Introduzione

This guide will show you how to remove the LCD screen off the Casio Camera.
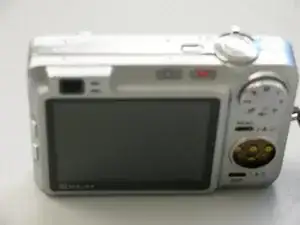
  1. upvP5Mn2CGXM2TTM
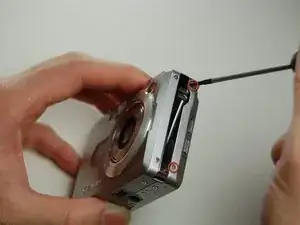
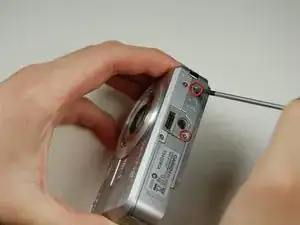
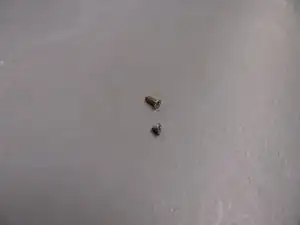
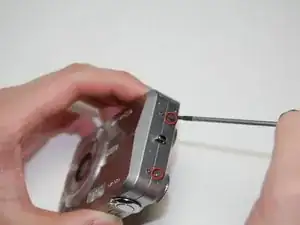
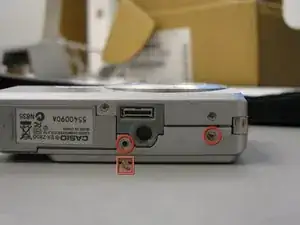
    • Remove the two screws on the side of the speakers with the Phillips 00 Screwdriver, on the portion of the camera that is a part of the back casing.

    • Label screws (where they came from and what step) and set aside in the sorting tray.

  2. YSbRoHydoNBSqeYb
    YSbRoHydoNBSqeYb
    sXeDWqY5NFv4XeKP
    • Remove the two back screws on the bottom of the camera on the same side as the LCD screen.

    • Note: The bottom screws are longer than the top ones, so label the screws accordingly for ease in reassembly. (See attached picture.)

  3. Km2D3X5GOcAEJRea
    • Remove the screws on the opposite of the speakers.

    • Label the screws accordingly and add to the sorting tray.

  4. XHHlUoRnerSFTxtp
    XHHlUoRnerSFTxtp
    RWxKpsvdBfbyQfoq
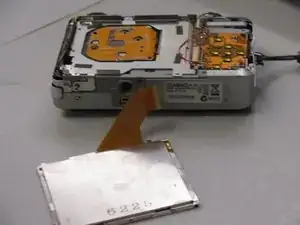
    • Once all screws have been removed, gently pry open the bottom casing.

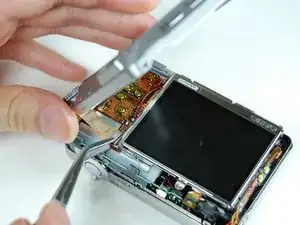
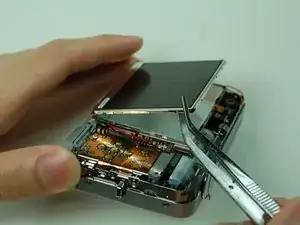
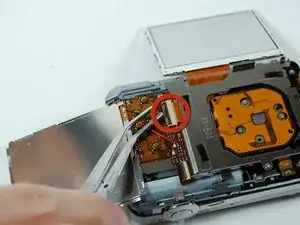
    • Use the tweezers to carefully remove the ribbon from the LCD screen- NOT from the back casing itself.

    • Set the bottom casing aside.

    • Navigation button may fall out so be cautious of this and set aside if needed.

  5. B2HqVhEKcjUhmTpN
    B2HqVhEKcjUhmTpN
    lUkZMgXHpNdLeRYN
    ZQiIJWa2BmRBIlmD
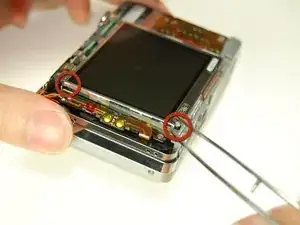
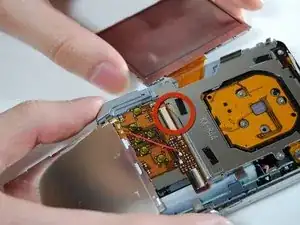
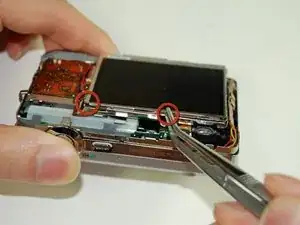
    • Use the tweezers to pry the LCD screen off from the openings. There are 5 spots that the tweezers can go in to pry the LCD screen off (see attached pictures).

    • There is a ribbon attached to the screen. Be sure not to pull this ribbon off the screen.

  6. uI2AxRYvc6Vu21PL
    uI2AxRYvc6Vu21PL
    HX6NNOb1VLYibbJt
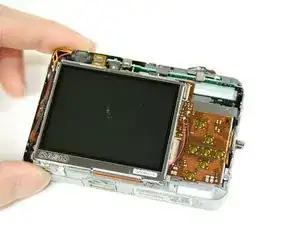
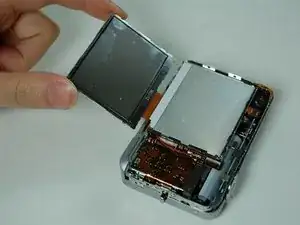
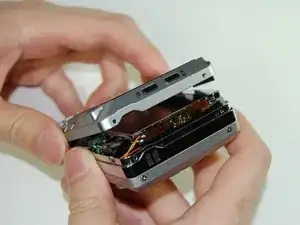
    • Use the tweezers to lift up the LCD screen.

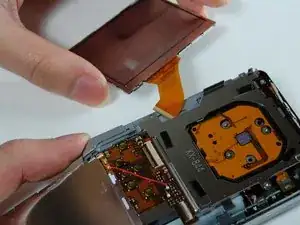
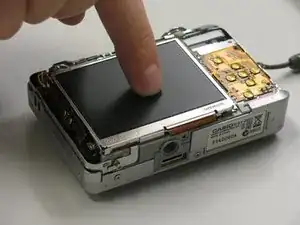
    • Grab the LCD screen with the index finger and thumb, leave the ribbon attached to the screen and leave it on the side.

    • Be sure to be very gentle with the LCD screen.

  7. jHA1JGjRARqaSfbj
    jHA1JGjRARqaSfbj
    PeZOgPccHG1vYjnH
    QITVnhjsyUrbsfoR
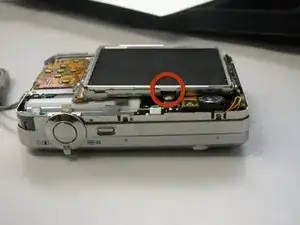
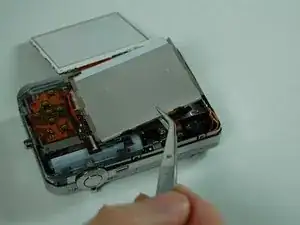
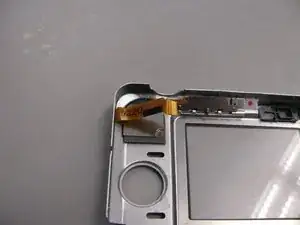
    • Under the LCD screen you will see an LCD casing. You will want to GENTLY pry this off using the tweezers.

    • The casing may possibly be attached to the LCD screen. If so, leave it attached to the screen.

  8. Yl6eeJBuGQRvvTf1
    Yl6eeJBuGQRvvTf1
    xBU6ZGDedwEadSD4
    hWiOMOvl2QaLPAju
    • Use the tweezers to flip open the connectors holding the ribbon.

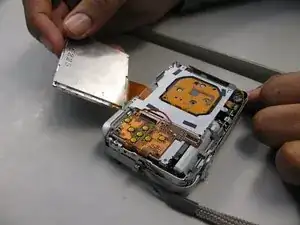
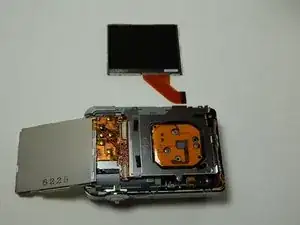
    • Pull out the LCD screen with the ribbon from the camera.

    • THIS STEP IS WHEN WHERE YOU SHOULD USE CAUTION AND BE VERY GENTLE!

  9. ePMfnSl5JqPoIePa
    ePMfnSl5JqPoIePa
    CKEhtiV1RbSNkYWv
    • Your LCD screen is now detached.

    • Locate the replacement screen that you will now attach.

  10. KYEEkOTmUHSaNP2X
    • Reconnect the LCD ribbon to the connectors and flip back down.

    • Ribbon should be inserted straight in and to the right side.

  11. JYWVSAwQmNMbmNfi
    • Reattach the LCD casing.

    • Flip it back into place.

  12. OTXMSYZuthXxSxnm
    OTXMSYZuthXxSxnm
    fBi14dJESIE22ftp
    • Make sure the LCD screen is firmly connected to the camera.

    • Slightly push the LCD screen down with one finger until you hear a click.

  13. NaTwQFg1sgFBVUlO
    NaTwQFg1sgFBVUlO
    VKdyThACG4J5ZLJQ
    • Reattach the back casing as well as the small ribbon with it to the camera body.

    • Be carefully reattaching the case. Using both hands might help.

  14. PyQah621bU2unOsK
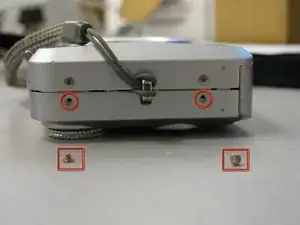
    • Locate the labeled screws from Step 2-on the bottom of the camera.

    • These are the longer screws. Screw them back in.

    • The picture shown does not show the right screw removed and ready to be replaced due to an issue with this specific camera.

  15. oCYJmIyi12UZya1b
    oCYJmIyi12UZya1b
    ZWWXIQpAGmXDNn3X
    ZMTn1hJXNkxOdGnO
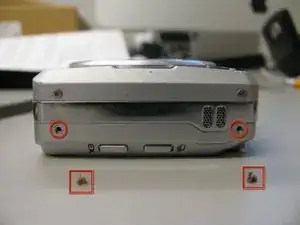
    • Locate the labeled screws from Step 1 and Step 3-on the side of the camera.

    • These are the shorter screws. Screw them back in.

    • Congratulations! Your camera has been reassembled.

Conclusione

By now you should have been able to get your Casio Exilim EX-Z850 camera's LCD screen functioning.

Christian

Membro da: 28/01/11

320 Reputazione

0 commenti