Introduzione

Segui questa guida per aggiungere dello spazio di archiviazione SSD nella tua PlayStation 5.

Prima di iniziare questa guida, assicurati che il tuo SSD M.2 sia compatibile con le specifiche di Sony. L'SSD mostrato nelle foto non è adatto per lo slot di espansione della memoria nella PlayStation 5.

Inoltre, assicurati che la tua PlayStation sia stata aggiornata con l'ultimo firmware di sistema.

Prima di iniziare spegni la console e rimuovi tutti i cavi.

Ricorda di seguire le procedure di sicurezza per scaricare le cariche elettrostatiche residue (ESD) mentre ripari la console.

  1. tccurcEsCV2Jem41
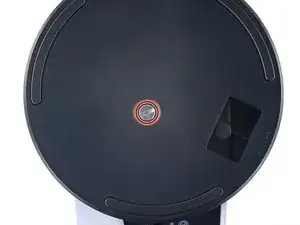
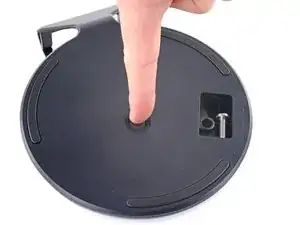
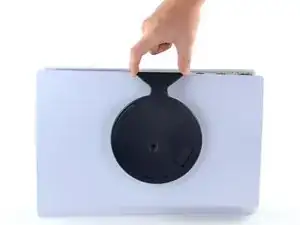
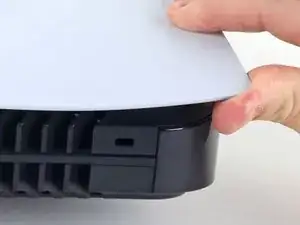
    • Se la tua PlayStation 5 è in posizione verticale, capovolgila così che il supporto risulti in alto.

    • Se la tua PlayStation 5 è posizionata orizzontalmente, vai al passo 6.

    • Lavora su una superficie piatta per evitare che la PlayStation cada.

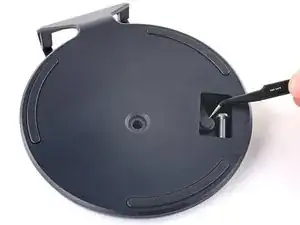
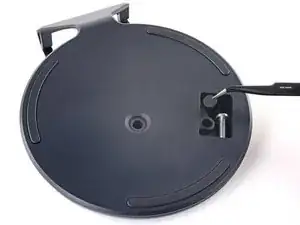
    • Usa una moneta o un cacciavite a taglio per rimuovere la vite da 26,5 mm che si trova sotto il supporto.

  2. GTbQeM3BQhiOdLSH
    GTbQeM3BQhiOdLSH
    pPvQrFR3QxJcona3
    • Tira verso l'alto per rimuovere il supporto verticale.

  3. 5ON3Z62eTgwwefAh
    5ON3Z62eTgwwefAh
    N2e3QE2E1XNbJaTK
    • Inserisci la vite nel suo vano sulla base del supporto verticale.

  4. c5wyLQEXQVvdxnMV
    c5wyLQEXQVvdxnMV
    TFfMjCrwb3lo5jM1
    vPxMbWYwZN4wgHAa
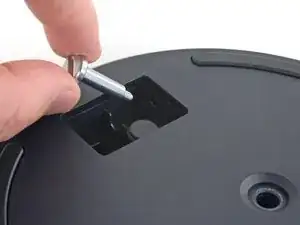
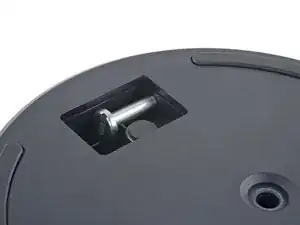
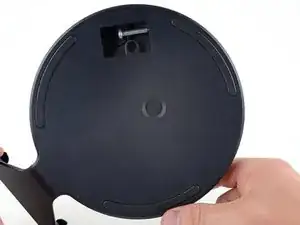
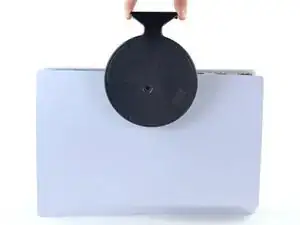
    • Usa un paio di pinzette o un'unghia per rimuovere il tappo dal vano.

    • Usa un dito per posizionare il tappo nel foro della vite.

  5. xXLuv4RjbvQuoOV2
    xXLuv4RjbvQuoOV2
    fgJrA5NsMKQaFaJq
    UTxfr1FuAInSlfD5
    • Ruota il supporto in senso anti orario per chiudere il vano.

  6. CNkg1VhN2eJYqVaj
    CNkg1VhN2eJYqVaj
    hgKZF2u42g1v2Zfx
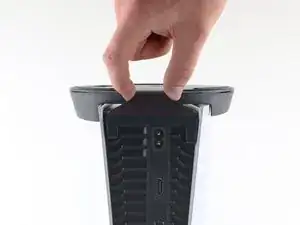
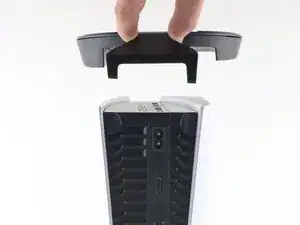
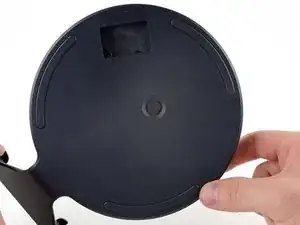
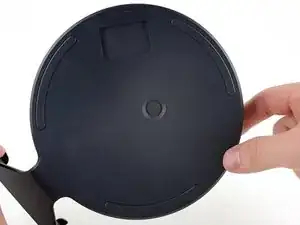
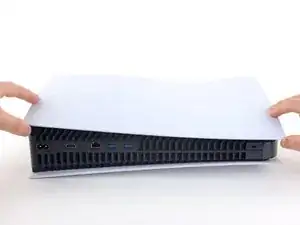
    • Se la tua PlayStation 5 è in orientamento orizzontale, appoggiala sul lato con la porta di ricarica rivolta verso l'alto.

    • Alza lo stand per rimuoverlo.

    Do you guys sell the stand

    Corey Lewis -

    Steps 1 through 6 are just about removing the stand, correct? Storing the screw and all that is just about being neat and tidy?

    tofu -

  7. nT45BCIZvPJWCMWS
    nT45BCIZvPJWCMWS
    bxKQIOScqBdSTVIs
    tFv2rTSvFWIkAag6
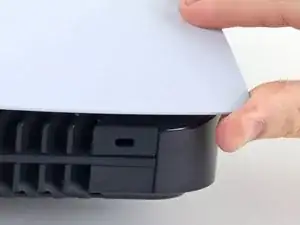
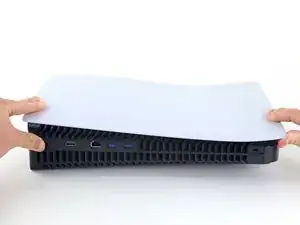
    • Capovolgi il dispositivo in modo che le porte USB e Ethernet siano sul lato sinistro dalla tua prospettiva.

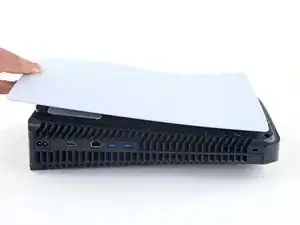
    • Solleva l'angolo della piastra frontale per sganciarla dal case.

    lift the corner on the top of the device on the back to unclip it

    Nicole Best -

  8. 4aQCX6nVw3eoJRVG
    4aQCX6nVw3eoJRVG
    CTDFeqPMSKC6xHy4
    • Mentre sollevi l'angolo, fai scorrere la piastra frontale verso il fondo del dispositivo.

    • Rimuovi la piastra frontale destra.

  9. ux5wSfqKOyVIjyuI
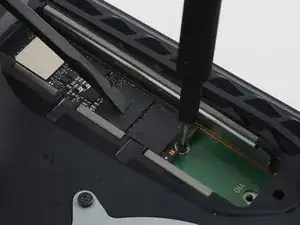
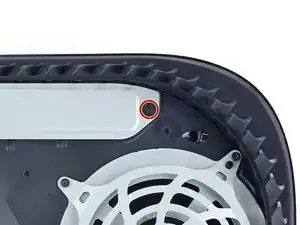
    • Usa un cacciavite a croce Phillips per rimuovere la vite da 17 mm che tiene in posizione la copertura dell'SSD.

  10. 3XmwkRDq3kD3eeEC
    3XmwkRDq3kD3eeEC
    lMW5FvUVNAsh1WBL
    PAcTEncGVKLQmXSX
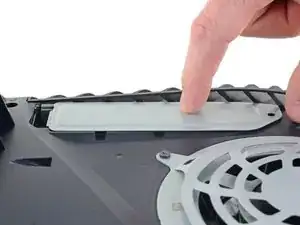
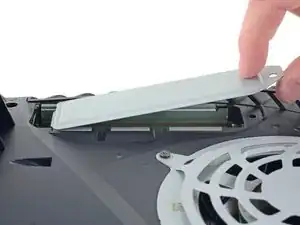
    • Usa un dito per far scorrere la copertura dell'SSD verso la parte alta della PlayStation 5 per sganciarla dal case.

    • Rimuovi la copertura dell'SSD.

  11. YMCdk5xirDjMFMvY
    • Usa un cacciavite a croce Phillips per rimuovere la vite da 11 mm dell'SSD.

    The screw in my PS5 was too tight and I can no longer get it off. Is there any replacement screws and spacers that anyone can recommend on Amazon UK? Many thanks in advance.

    Kevin McCubbin -

    what type of screw is this?

    want to replace it because i stripped during the m.2 ssd installation.

    Thx in advance

    Simon -

    I have the same problem and need a replacement for the screw and spacer.

    Niel Harder -

    I need to find a new screw and spacer because when I got it it was stripped already Brand new

    Zane -

  12. qnUSBEL1unIkAdbX
    qnUSBEL1unIkAdbX
    iWxHrL2GNVEYgHMZ
    eiDwRoh5GhUiL2mH
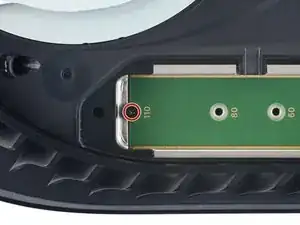
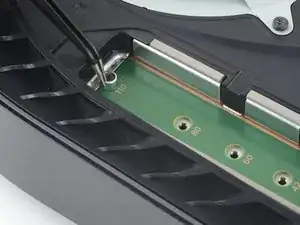
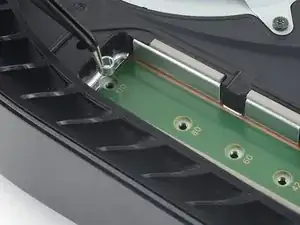
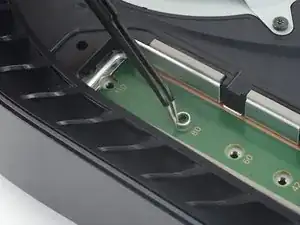
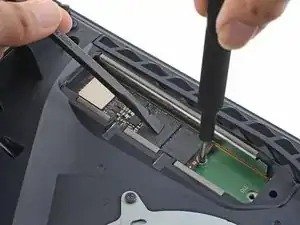
    • Usa un paio di pinzette per alzare e muovere il distanziatore sullo slot appropriato per l'SSD M.2 che hai scelto.

    • Non provare a installare un SSD senza prima aver messo il distanziatore nel posto giusto.

    What are the physical dimensions of the spacer and the screw (saw the screw is 11mm, wondering the thread size and length of the threaded portion)? Looking to buy replacements online from someone other than from Sony.

    I sent my PS5 back for RMA service for visual artifacts, and it was returned to me without the screw and spacer (I had checked before sending it that the hardware was there). Seems silly to have to send the console back for replace these components, but every time I’ve called technical support - I’ve been on over hour-long wait times (haven’t gotten through to an agent yet).

    Michael Meyer -

  13. NG2pu6N2VQT1Jf3F
    NG2pu6N2VQT1Jf3F
    AltZNPcsBhLihMoa
    • Se il tuo SSD beneficerà di un dissipatore di calore, segui questa guida per installarlo.

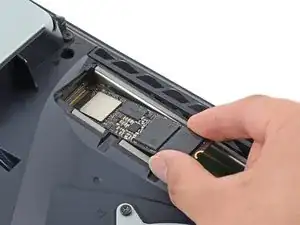
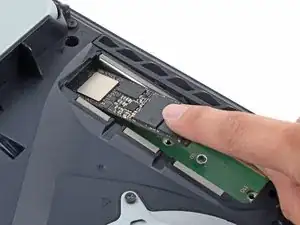
    • Inserisci l'SSD a un angolo acuto e nel suo alloggiamento M.2.

    • Sia l'SSD che l'alloggiamento M.2 hanno un sistema di blocco, il che significa che l'SSD si adatta solo in un modo nella presa.

    • È normale per l'SSD rimanere un po' inclinato una volta inserito nell'alloggiamento M.2.

    It should be noted here that the Samsung 970 Evo Plus is NOT a PCIE 4.0 SSD (It is NOT fast enough for the PS5)

    Rowan -

    Yes! Thank you, Rowan. I added a blurb addressing that in the introduction.

    Robert Boyd -

  14. LnYl6ZV2wB2Zn44H
    LnYl6ZV2wB2Zn44H
    UF5SEIfvIWIWEKF4
    AwC6NsapCpOfWBcV
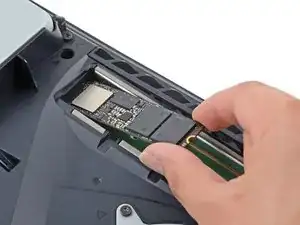
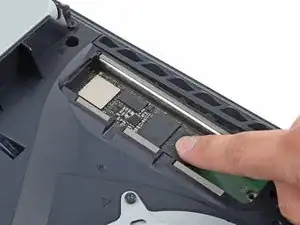
    • Usa un dito per premere l'SSD verso il basso fino a che l'estremità non si appoggia al distanziatore.

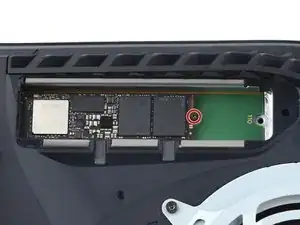
    • Con l'SSD appoggiato al distanziatore, inserisci la vite dell'SSD rimossa in precedenza nel distanziatore e avvitala, così da fermare l'estremità dell'SSD

  15. AQErmXdAUtOcL1eJ
    • Usa un cacciavite a croce Phillips per stringere la vite da 11 mm all'estremità dell'SSD.

    • Non stringere troppo questa vite o potresti danneggiare l'SSD.

    Forgot one last step:

    - Re-attach the SSD slot cover, as per Sony's instructions: https://www.playstation.com/en-us/suppor...

    Andrei Bunceanu -

Conclusione

Per rimontare il tuo dispositivo, segui queste istruzioni in ordine inverso.

Porta i tuoi rifiuti elettronici a un riciclatore certificato R2 o e-Stewards.

La riparazione non è andata secondo i piani? Prova delle soluzioni ai problemi di base o chiedi alla nostra community PlayStation 5 per trovare aiuto.

Robert Boyd

Membro da: 01/02/21

26243 Reputazione

4 commenti

Hello!

The 11m screw that keeps the SSD in place is totally stripped -- any tips for how to remove it? I've tried the rubber band and duct tape over the screw methods, with no luck.

Michael Deneen -

Se puede cortar para extraerlo con un 🪛 plano

silentdark96 -

Very well detailed, thank you!

wakey18 -

Follow the English language repair guide.

The Dutch translation needs an update.

aoosten -