Introduzione

Questa guida richiede un po' più di lavoro rispetto ad altre riparazioni di tosaerba. Rimuovi prima il filtro dell'aria, poi vai dietro di esso per rimuovere e pulire il serbatoio del carburatore. Dovrai usare una chiave a bussola con testa esagonale da 5/16" e da 1/2" e uno spudger. Prima di iniziare, ti consiglio di acquistare un O-ring se il tosaerba è vecchio, in quanto l'O-ring nel serbatoio del carburatore può essere consumato. La pulizia del carburatore può imbrattare dappertutto, quindi non provare a farlo all'interno.

  1. DFmMVyKKYBXAbZJZ
    • Assicurati che il motore sia spento e che il cavo di avviamento sia rimosso e lontano dalla candela prima di iniziare.

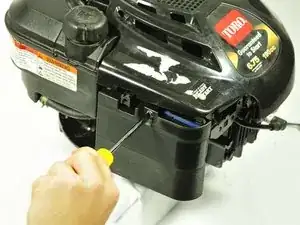
    • Utilizza un cacciavite a testa piatta n. 4 per rimuovere la vite da 40 mm che tiene in posizione la scatola del filtro dell'aria.

  2. dpCdYNFeYqHDqChx
    • Usa le mani per estrarre la scatola del filtro dell'aria dalla cerniera sul fondo.

  3. qJj2G6PBPSHeNDIC
    qJj2G6PBPSHeNDIC
    kYB4AokcNjVu3eZx
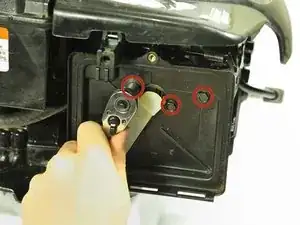
    • Utilizza una chiave a bussola con testa da 5/16" per rimuovere i tre bulloni da 20 mm dietro al filtro dell'aria.

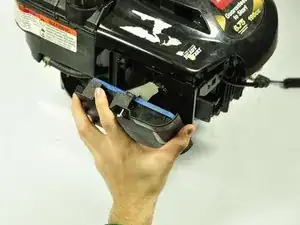
    • Utilizza la mano per rimuovere il supporto in plastica del filtro dell'aria, esponendo così il carburatore.

  4. VsEFJ2nmUaJvibBy
    • Nota: c'è una rondella di plastica che potrebbe staccarsi quando togli il supporto di plastica. Nessun problema, mettila da parte e conservala per il rimontaggio.

  5. tEoxiwESDgPItWQZ
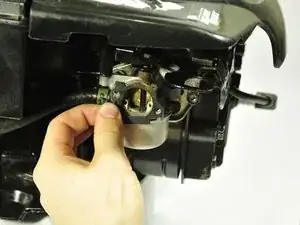
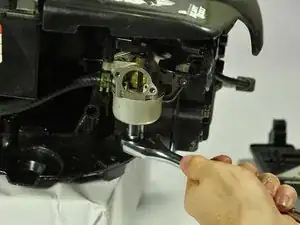
    • Utilizza una chiave a bussola con punta esagonale da ½" per rimuovere il bullone da 11 mm sul fondo del serbatoio.

    Make sure you empty the fuel, remove the fuel tank, or clamp the fuel line before you do this step, or you'll get fuel everywhere!

    Calion -

    Yes, definitely clamp off the fuel line with locking pliers. I can’t believe this guide would neglect to mention that.

    Also, I would not call this a “tank” — it is not the fuel tank. Everybody who works on small engines calls it a fuel bowl.

    Trevor Kemp -

    Mine was a 13mm on the fuel bowl..empty fuel tank first

    dslyr -

  6. OkvqVuY5FIUeWqRo
    OkvqVuY5FIUeWqRo
    BydmBYuqgTKHtLL2
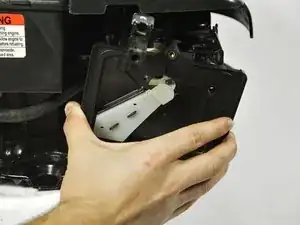
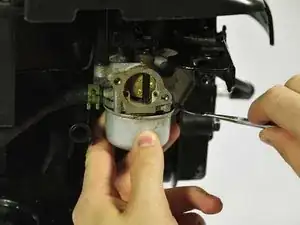
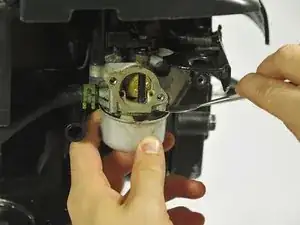
    • Una volta che il bullone è stato rimosso dal fondo del serbatoio del carburatore, fai leva delicatamente sul serbatoio con uno spudger di metallo fino a quando non si stacca. Se non hai uno spudger, un cacciavite a testa piatta andrà bene.

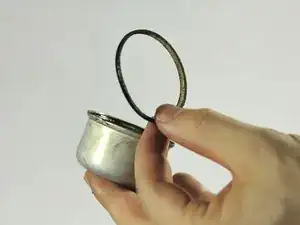
    • Rimuovi completamente il serbatoio in modo da poterlo pulire o sostituire.

    The thing that is most important to clean here is the screw in the bottom. It has holes which, if clogged, will prevent your engine from running for more than a second or two. Make sure you clean them out with carburetor cleaner. It's easy to miss, as it falls out into the socket when it's unscrewed.

    Calion -

    Calion

    Your old post on cleaning the float bowl retaining nut was a real problem solver for me. Had done everything but clean n the flow thru holes in the retaining nut. Reassembled and mower engine started right up. Thanks a lot. Sam

    Samuell Gonzales -

    Yes, definitely need to clean out the ports in the bolt with a needle, can’t believe that’s not included in a guide about maintaining a carburetor.

    Similar comment to previous step, it’s a fuel bowl, not a fuel tank.

    Trevor Kemp -

    What is the purpose of the bolt with the hole .

    dslyr -

    it lets gas slowly drip out when too much pressure builds up.

    pg alex -

    Just buy a new carburetor on Ebay for less than $10 and skip all this grief.

    David -

  7. IuZBQNSP1lue5CSj
    • Ispeziona l'O-ring all'interno del serbatoio del carburatore. Se è secco e usurato, potrebbe essere necessario sostituire l'O-ring prima di rimontare il dispositivo.

    Is there a filter in the bowl? I see something and it is covered with junk. Wish there were a schematic.

    Eddie Brown -

Conclusione

Per rimontare i componenti, segui queste istruzioni in ordine inverso.

Tim Wirtz

Membro da: 30/01/15

1040 Reputazione

16 commenti

I just performed a carb tank cleaning based on your DIY and it took less than 30 minutes! The best part of the cleaning was an immediate start of my mower on the first pull. Thanks

Jerry -

Nice guide. My mower was only running on choke, any other throttle setting and it would die. A quick online search indicated dirty carburetor and subsequently I found your guide. Gave everything a good clean and voila! Good as new.

Tania Miller -

Slide clamp on fuel line back and pull fuel line off carb. plug line with old pen/pencil

Remove two nuts holding carb onto engine. Remove nut holding engine choke arm on top of carb. Then remove two springs and one carb adjust metal arm. Note places of attachment

spray cleaner in all brass jets, use fine wire to clean out all orifices, clean bowl attachment nut. Spray cleaner in to choke area and tip upside down and spray under the bowl needle.

drain old gas out of tank and alternatively add a in line fuel filter as well a new air filter.

clean or repl spark plug

jim steinberg -

Excellent suggestions, as well.

Charlie Farrell -

yes, this is a better guide for cleaning. the other should be called "how to inspect your carb O-ring"

kevin -

My B&S 675 is on a Craftsman WeedTrimmer. It has no Manual choke. Only a primer bulb. I can't get primer bulb to pick up gas. I have put on a new carb and a new bulb. What else could be causing the prob? If I spray B12 in carb it will crank and run. Help please?

Steve -

took off cover, that plastic washer was cracked. what is the part number for that? i need it replaced as this is where a fuel leak was happening.

Scott Dilzer -

Excellent directions, but I have one minor critique. There is a lot of gas that leaks out when doing this. Maybe, suggest pinching the gas line? Otherwise, this was great!

Charlie Farrell -

Have tried everything else before finding this site. Following these instructions will be my last attempt before beating my daughter’s string trimmer to absolute and irredeemable destruction with a sledge hammer. I have a feeling that following these instructions will work and save my daughter a lot of money.

Nona -

I carried out these steps in addition; maybe they should go without saying but worth it all the same.

Before step 1, clean the external area well (I use carb cleaner spray) to remove the crud that builds up in the nooks and crannies and won’t contaminate the carb/air/choke areas.

Before step 3: Clamp the fuel line between the tank and the carb, in case there’s some gas left in the line and the tank. I have done this several times with a partly filled tank and without removing either end of the fuel line; anything to make the job easier.

Before step 5: Stuff some rags or paper towel wad under the tank to catch any residual gas that drips out.

Hugh Jampton -

how to slow rpm on engine

mariecp009 -

I would add that the hex head at the bottom of the bowl is also the main jet…using small wire and carb cleaner to make sure ports are clean. I have three port holes….one that rums all the way thru the sides and one at the bottom of the bolt. I came here to try to verify that the one at the top if it connects to the ones on the side….either it doesn’t, or mine is clogged.

James Mendenhall -

I have the same model lawnmower. The problem I am having is that the when I full the gas tank all the gas leaks out through the little hole on the priming bulb. My lawnmower usually sits for months at a time without use. Do I have to replace the pin and seat kit?

Wayne Tillett -

Replace the primer bulb.

David -

Parts are cheap off of Amazon if you need gasket or bowl O-ring. I got bowl, gaskets, O-ring, needle and more as part of rebuild kit for $9.99 and free shipping. Sears wanted much more.

REF; Harbot 493762 Carburetor Float Bowl Seal Ring O Gasket Overhaul Kit for 796611 49364... https://www.amazon.com/dp/B076KJPRC9/ref...

Eddie Brown -

On the older models the tank is secured with 1/2” nut.

FM Marine -