
Introduzione
-
-
Fissa insieme con del nastro adesivo la parte superiore della stampante e dello scanner
-
*Nota: io ho iniziato con i vassoi della carta già rimossi
-
-
-
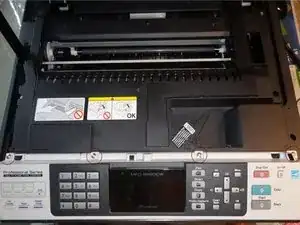
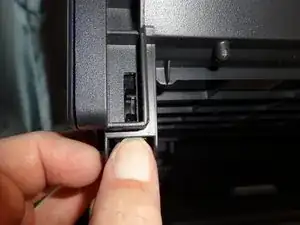
Rimuovi le quattro viti che tengono il pannello del display anteriore.
-
Solleva il pannello del display.
-
Rimuovi delicatamente il connettore blu e il cavo a nastro.
-
-
-
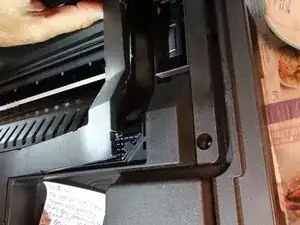
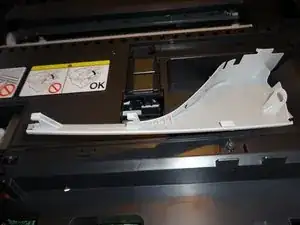
Rimuovi il braccio di supporto.
-
Premi la linguetta per rilasciare le clip; quindi, quando è venuto via, tira delicatamente verso di te per rilasciare la parte posteriore.
-
-
-
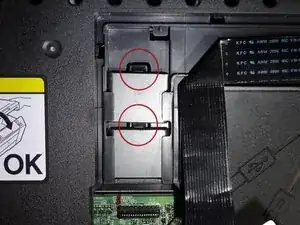
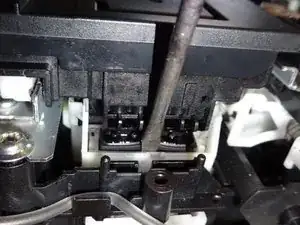
Rimuovi il coperchio sul lato destro e scopri il cavo a nastro. Usa delicatamente delle pinzette nelle linguette per liberarlo.
-
Scollega il cavo a nastro e fallo scorrere fuori.
-
*Nota per il riassemblaggio: i supporti di posizionamento del cavo a nastro possono essere rimossi per facilitare il reinserimento del cavo a nastro spingendo delicatamente le linguette verso il basso con lo spudger.
-
-
-
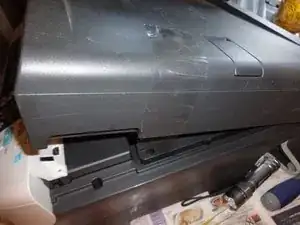
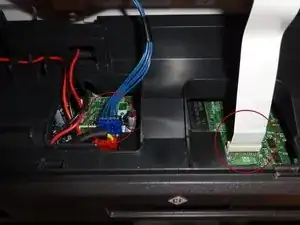
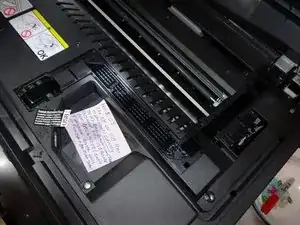
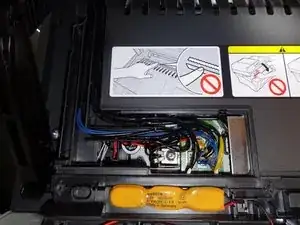
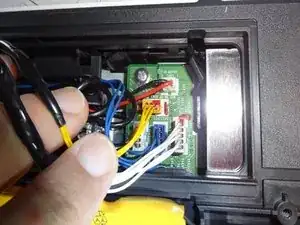
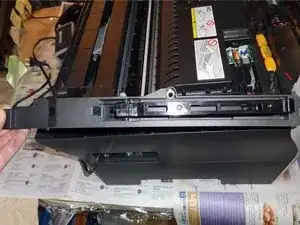
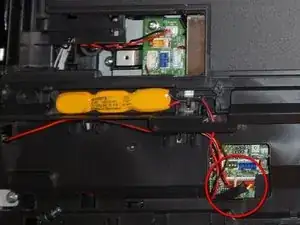
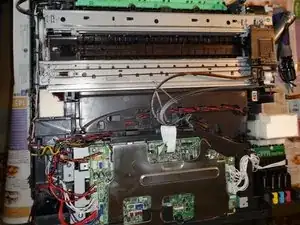
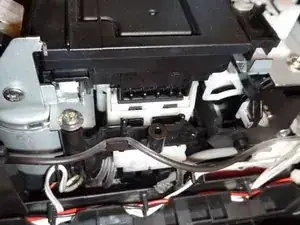
Rimuovi il pannello sul lato sinistro, esponendo i connettori di cablaggio per la parte superiore della stampante.
-
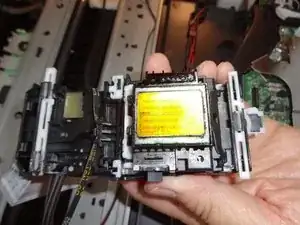
Dopo aver scollegato i connettori, rimuovi tutta la parte superiore della stampante e mettila al sicuro.
-
-
-
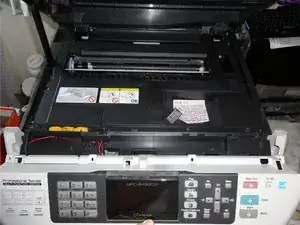
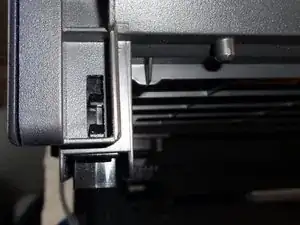
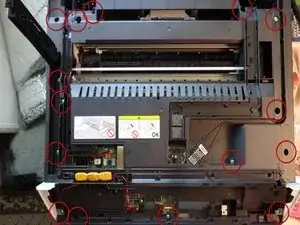
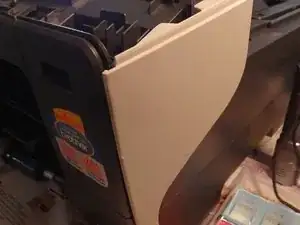
Rimuovi gli angoli anteriori tirando delicatamente verso l'alto.
-
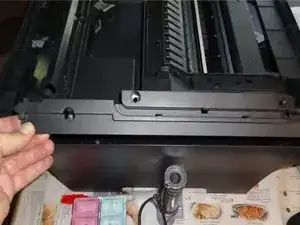
Apri il coperchio posteriore per l'inceppamento della carta.
-
-
-
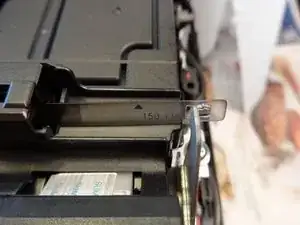
Fai scorrere il filo di guida trasparente della testina di stampa via dalla linguetta sul lato destro.
-
*Nota: indossa i guanti se non l'hai già fatto. Ci si può sporcare.
-
-
-
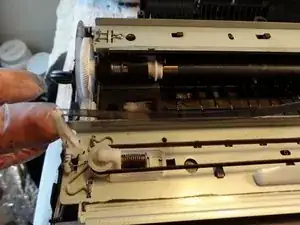
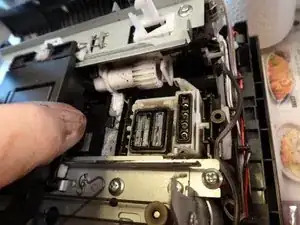
Usando uno spudger, premi sull'alloggiamento di plastica del carrello su cui poggia la testina di stampa.
-
Fai scorrere la testina di stampa verso sinistra liberandola per muoversi.
-
-
-
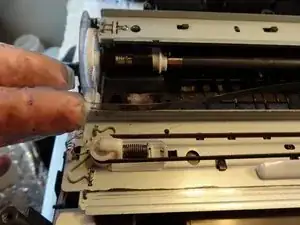
Fai scorrere la testina di stampa a sinistra fino a quando non si trova alla fine della guida. Si può sentire che si stacca (sollevala verso l'alto quando si allinea con la tacca intagliata).
-
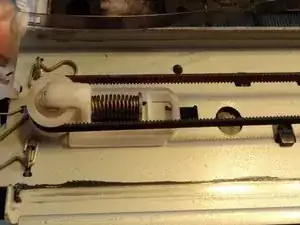
Spingi l'unità della testina di stampa verso il retro del dispositivo e solleva l'unità dalla guida posteriore.
-
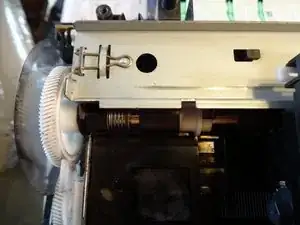
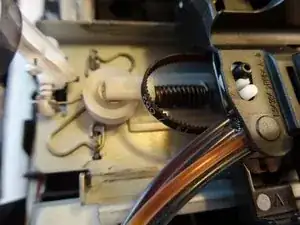
Usando lo spudger, premi la sezione della molla della puleggia bianca.
-
Rilascia il trasportatore dalla puleggia mentre la molla è ancora compressa.
-
Rimuovi il trasportatore dall'ingranaggio sull'altro lato del dispositivo.
-
-
-
Come pulire con la carta assorbente
-
Strappa un singolo foglio di carta assorbente a metà. Piega il foglio a metà diverse volte fino a quando non è largo circa 1,3 cm.
-
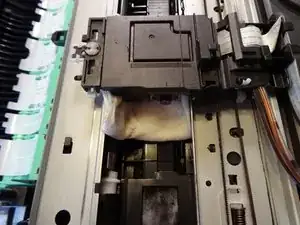
Metti alcune gocce di acqua distillata in cima alla carta assorbente e mettila nel trogolo sotto la testina di stampa. Sposta la testina di stampa sopra il tovagliolo e lasciala riposare per almeno 15 minuti. Questo ammorbidirà l'inchiostro sulla testina di stampa.
-
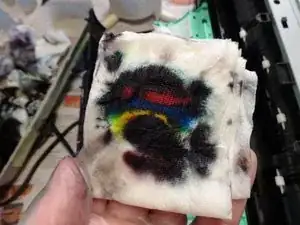
Sposta il gruppo della testina di stampa nella sua posizione di riposo. Probabilmente noterai che il tovagliolo di carta ora ha una grande chiazza nera di inchiostro su di esso (c'è così tanto inchiostro in eccesso sulla testina di stampa che tutti i colori si stanno mescolando per fare il nero).
-
Se non si riescono a vedere chiaramente i singoli colori, inumidisci un altro punto del tovagliolo di carta e sposta la testina di stampa sul punto appena inumidito del tovagliolo di carta. Continua a ripetere questa operazione finché non si vedono tutti i singoli colori.
-
*Nota: quando riassembli, assicurati di riportare la testina di stampa nella sua posizione di riposo (il lato estremo destro sopra il carrello).
-
Per riassemblare il dispositivo, segui queste istruzioni in ordine inverso.

24 commenti
Thanks for the guide. But I don't think you need to tear apart the printer to do that, just start a print cycle and when the printhead moves, plug the printer off. then you can freely move the printhead and put the paper towel under it.
Thank you! Thank you! I was getting no magenta ink at all - I tried this, took me 2 minutes and viola! It works perfectly now! Thank you!!!!!
Yes! Best comment ever! Saved me so much work. Let it sit 15 mins, instant success did 1 Cleaning and perfect printing.
Hello Filipe,
I have a problem with my printer and I came across this page. I have a Brother MFC-240C printer.
How do I reach the printerhead to clean it? Do I need to take off the top cover to reach it?
Thank you for your help.
Thanks Filipe for the extra advice :) I had already tried the paper towel method on my printer it did not work for me my print head was damaged and I had to replace it. I could not find any strip downs of my Printer at the time of posting this tutorial so I thought it was more useful for others in the future going this route
Great post, @crystal_b, and best comment ever, @Filipe. With this, I won't have to buy a new printer! It prints like new again.
This all day long!
My 8 year old MFC was totally 100% dead for black printing.
I stuck a wad of damp paper in the trough under the printhead, and slid the printhead over the wad and left it for a bit. I then slid the printhead over the wad a few times, with a couple of replacement wads on the way, and left it to dry for a few hours.
Black didn't work straight away, but after 3 head cleans it was appearing. After 12 head cleans it was back to full health.
Not cheap, ink-wise, but better than chucking the whole thing out and starting again.
(One tip: do not try using a damp tampon cut to size as your wad. I initially did, and ended up with a print head section covered in gunky gel. Duh.)
Thank you Filipe Silva! You have saved two hours of futility in my life. This worked well to allow for printing again.
your idea is admirable I also do one of this particle with my printer head I made a vacume box on which printer head can be fix over with rubber bands to make airtight as when the air is sucked out from the box the the ink itself open the nozzles and after cleaning it with paper towel replace in its original position then the collected ink in the box should be clean for next use .... The box is 15x5x3.5 cm with side tube to suck air.
Thanks To Filipe Silva Comment below, if you only need to clean the print head you do not need to pull the hole printer apart. I needed to replace my printhead and there were no manuals on how to strip the printer down at the time.
Filipe Silva - 02/01/2017
Thanks for the guide. But I don't think you need to tear apart the printer to do that, just start a print cycle and when the printhead moves, plug the printer off. then you can freely move the print head and put the paper towel under it.
crystalbic -