Introduzione
Il vostro peluche preferito ha subito uno strappo? Seguite questa guida per far tornare il vostro amichetto peloso come nuovo
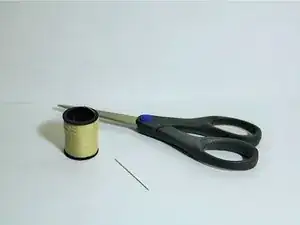
Strumenti
-
-
Raduna tutto il necessario.
-
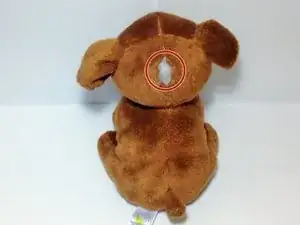
Individua lo strappo sul tuo peluche.
-
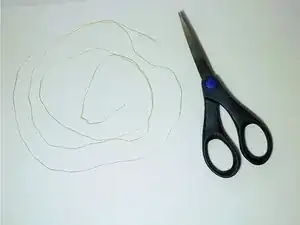
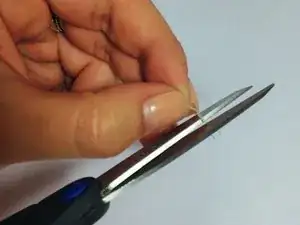
Misura la quantità di filo necessaria per ricucire interamente lo strappo.
-
-
-
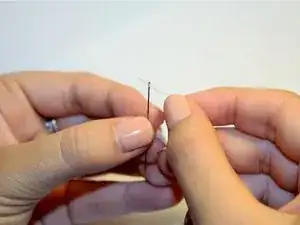
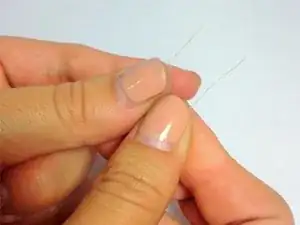
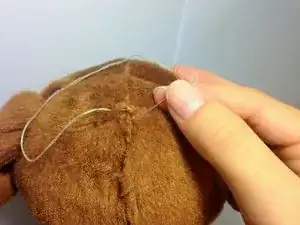
Spingi il filo attraverso la cruna dell’ago. Assicurati che il filo si possa tirare completamente attraverso la cruna.
-
-
-
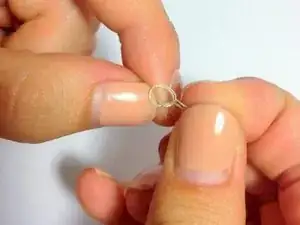
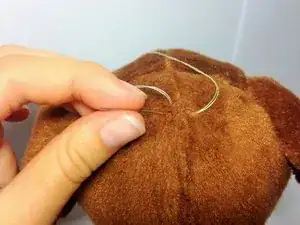
Prendi e avvicina le due estremità del filo.
-
Annoda le due estremità tra di loro con un doppio nodo.
-
-
-
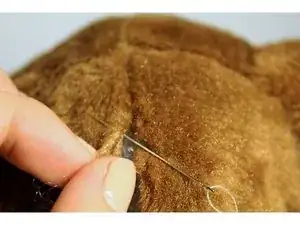
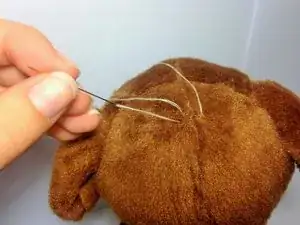
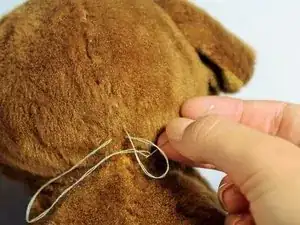
Posiziona l’ago da cucito sulla parte superiore dello strappo.
-
Inserisci l’ago, partendo dalla parte interna del tessuto.
-
-
-
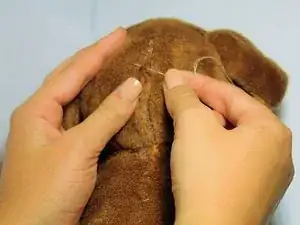
Inizia a ricucire lo strappo. Sposta l’ago dal punto di partenza verso l’altro lato dello strappo.
-
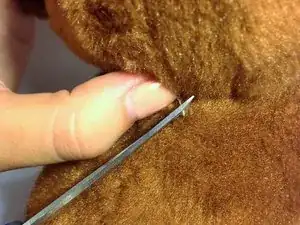
Spingi l’ago dalla parte esterna del tessuto.
-
Riporta l’ago verso il lato da cui si è iniziato a cucire e spingilo nuovamente nella parte interna del tessuto.
-
-
-
Per eseguire l’ultima cucitura, fai passare l’ago attraverso l’anello che si sarà creato, prima di tirare il filo.
-
Ripeti questo passaggio un altra volta per assicurare ulteriormente il nodo.
-
Tira l’ago con decisione.
-
10 commenti
I have a vintage Mickey Mouse (1970s) he has red velvet shorts with yellow felt buttons. It looks like they were just attached by adhesive when made. One of the buttons have been lost due to time and left a bare patch of velvet. I am unable to find hints or suggestions on how to repair our Mickey. It was my husband's as a child and our youngest was in love with it until the button disappeared. He wont play with it now because he think he hurt it. Any help would be greatly appreciated.
You could sew on Another button, I'm sure you could find a very similar button on Amazon and quickly thread it back together, good as new. If you need any more help, just let me know :)
How about you try to make a duplicate button and sew it on to your Mickey. You can probably make one by cutting two pieces of yellow felt fabric and sewing them together, you can then sem the button on Mickey where the bare patch is. If it looks awkward, then you can make another button and replace it with the other (original) button if it looks different from the new one you made. You can always make a new button, but maybe not an original one.
By doing this repair, you might take some of the vintageness out of Mickey, but your son would be happy and play with him again. Which is more important? Don’t forget the reason why Mickey was made in the first place. You'll be restoring Mickey’s purpose of being played by children again!
Simple and easy to follow instructions! Thank you so much!
I’m still only learning to sew, and a dog we were looking after decided to chew on my little sister’s FAVOURITE unicorn stuffy, and left a HUGE tear in it. Searched for ages to find instructions on how to sew it back up, but they were all extremely complicated, overdone, or way too confusing to follow. This one, however, was amazing! I was able to fix it for her like new! Thank you!