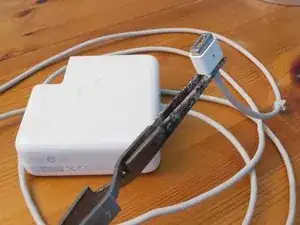
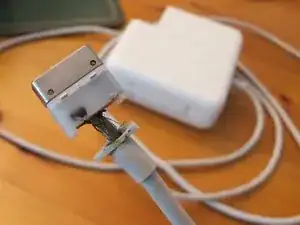
Introduzione
Questa guida ti mostrerà, passo dopo passo, la procedura di riparazione e come determinare se può avere successo.
-
-
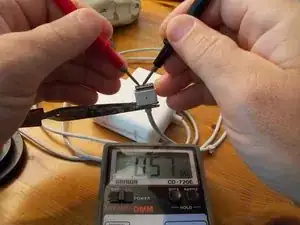
Usa un multimetro o un tester per controllare se i contatti del connettore fanno corto circuito.
-
Ci sono cinque contatti nel connettore. Quello centrale è usato per segnalazione, mentre gli altri portano corrente al Mac. Poiché il connettore MagSafe è progettato per essere inserito in entrambe le orientazioni, i contatti esterni (1 e 5) sono collegati e dovresti riscontrarlo anche col multimetro.
-
Lo stesso dovrebbe valere anche per i contatti intermedi (2 e 4).
-
Se invece il multimetro mostra qualsiasi altra coppia di contatti collegati, è presente un corto circuito. Nel nostro caso sono i contatti 1 e 2.
-
-
-
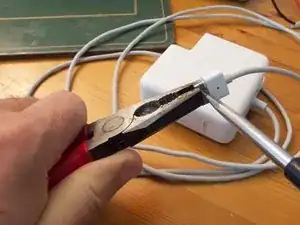
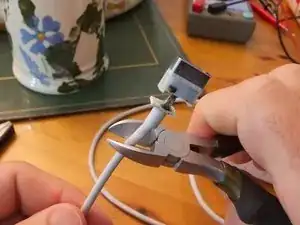
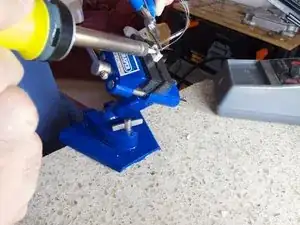
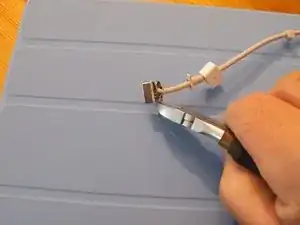
Per rimuovere la copertura in plastica tieni ferma la parte metallica con un paio di pinze (o una morsa) e usa un cacciavite piatto per fare leva delicatamente sulla copertura e sfilarla.
-
-
-
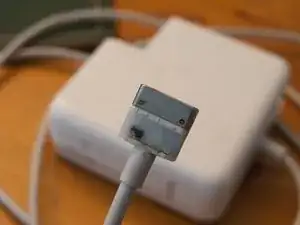
Lo scolorimento presente suggerisce che forse abbiamo già trovato il problema.
-
Tira indietro delicatamente la copertura in gomma dal connettore per avere accesso ai collegamenti.
-
-
-
Avendo identificato la probabile causa dei problemi dobbiamo rimuovere la presa dal cavo per verificare se il caricatore funziona ancora.
-
-
-
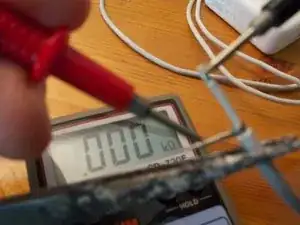
Esponi le estremità del cavo e usa un multimetro per verificare che non facciano più corto circuito.
-
Se il tester mostra un corto circuito, il cavo può essere danneggiato da altre parti. Controlla ancora in cerco di segni di danni: Magari devi solo accorciare il cavo di qualche centimetro.
-
Se non trovi la fonte del corto circuito nel cavo, dovrai aprire il caricatore e continuare la ricerca qui (vedi le altre guide per maggiori dettagli su come fare).
-
-
-
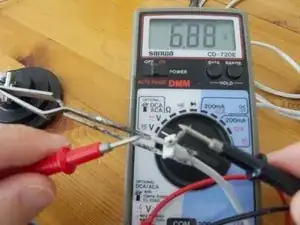
Dopo aver confermato che erano i cavi non fanno più corto circuito, collega alla corrente il caricatore alla presa della corrente e controlla che i cavi portino la giusta tensione.
-
Usa un multimetro per verificare che arrivi la tensione corretta. Dovresti leggere circa 6,8 V in DC.
-
Se la tensione è corretta, complimenti, puoi continuare la riparazione della presa, altrimenti dovrai andare più a fondo (vedi le altre guide per il caricatore).
-
-
-
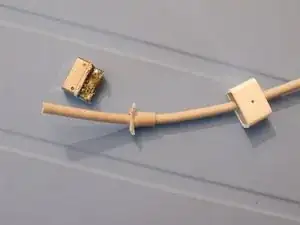
Per prima cosa taglia via la plastica stampata che è probabilmente usata come diffusore per il LED di stato.
-
-
-
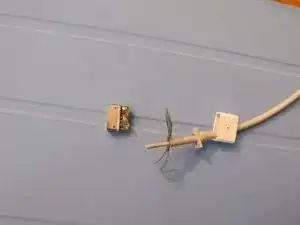
Una volta rimossa la plastica dovresti vedere una piccola scheda logica verde con saldate le estremità dei cavi che hai tagliato prima.
-
Usa un saldatore per rimuovere i vecchi cavi.
-
NOTA: Stai attento a dove vanno i cavi per ricollegarli correttamente durante il rimontaggio. Dovrebbe comunque essere abbastanza evidente che il cavo di schermatura è diviso in due e saldato su entrambi i lati della scheda con il cavo centrale (coperto con isolante bianco) saldato direttamente all'angolo in basso a sinistra della scheda.
-
-
-
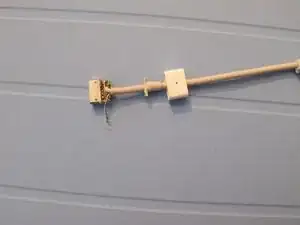
Prima di saldare i cavi ricordati di infilare la copertura in plastica e il gommino sul cavo.
-
Suggerimento: Infila delle pinzette appuntite nel gommino e una morsa in metallo per allargarlo leggermente per infilarli nel cavo.
-
-
-
Taglia e rimuovi l'isolamento esterno e divi la schermatura così esposta in due fasci.
-
Taglia e rimuovi l'isolamento bianco dal cavo centrale, lasciando 2-3 mm coperti.
-
-
-
Risalda i cavi partendo da quello centrale (bianco) alla PCB.
-
Quindi salda un fascio della schermatura sull'altro lato della scheda.
-
Gira la presa e salda l'altro fascio della schermatura.
-
Suggerimento: l'obiettivo è dividere in parti uguali la schermatura tra fronte e retro della scheda e non tirare il cavo centrale.
-
-
-
Usa il multimetro per controllare il lavoro:
-
I contatti 1 e 5 non devono essere in corto circuito con il 2 e 3
-
Dovresti leggere una tensione di 6,8 V in DC tra loro
-
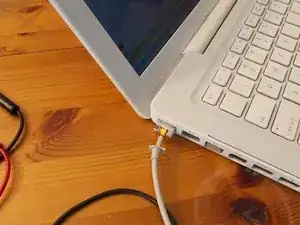
Se tutto sembra a posto, è il momento di provarlo con il tuo Mac. Anche se il LED non si accende (potrebbe essere stato danneggiato dal corto circuito) accendi il Mac e controlla se si sta caricando.
-
-
-
Per finire:
-
Fai scorrere il gommino fino in fondo al cavo e usa un paio di pinze per chiudere la morsa in metallo.
-
Se vuoi, puoi anche usare dell'Araldite o della colla a caldo per isolare la PCB.
-
Fai scorrere la copertura in plastica sopra la presa: dovrebbe essere abbastanza stretta da reincastrarsi correttamente, altrimenti usa qualche goccia di super colla.
-


Se tutto va a buon fine, dovresti guadagnare molti altri anni di vita per il tuo fidato caricatore.
11 commenti
I have the newer cylindrical adapter, can that be repaired as well in a similar way?
smahar -
Did anyones MBP get insanely hot after doing this to the charger?
i just want to thank you for the guide. I had the same problem and got it fixed.