Introduzione

Se il tuo Controller DualShock della PS4 sta avendo problemi di drift, essendo un problema comune

—muovendosi autonomamente senza essere toccato, o rimanendo bloccato una volta toccato—

Utilizza questa guida per risolvere il problema senza saldatore, dato che diverse persone non hanno molta esperienza nell'utilizzarlo.

Il controller verrà smontato completamente in modo da poterci lavorare sopra e che il joystick sinistro possa essere pulito. Questa semplice riparazione con delle conoscenze minime è facile da eseguire.

P.S. Non è necessario indossare i guanti mentre lavorerai sul controller.

  1. MQ3qGUJEBabZOfPe
    MQ3qGUJEBabZOfPe
    CR5MxSbpgWThHNdC
    G6tHW2FyPbuXJ1Or
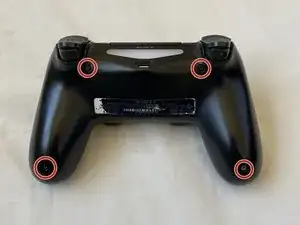
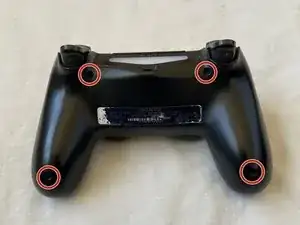
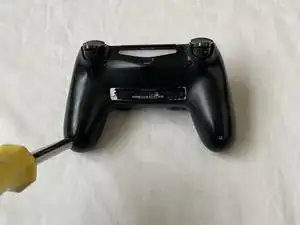
    • Rimuovi le quattro viti da 6.0 mm sul retro della scocca del controller PS4 utilizzando un Cacciavite Phillips(+) #00.

  2. NVlWA32pXNqVJLfF
    NVlWA32pXNqVJLfF
    PSGOL5RmqDMMA6DZ
    5vBTvfTAyto2wOZr
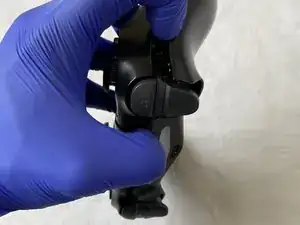
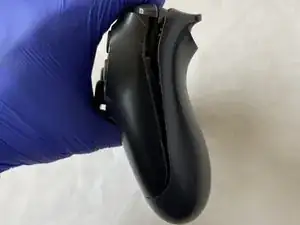
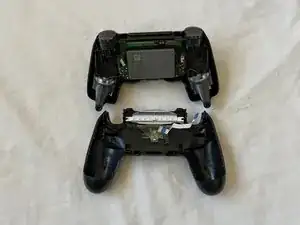
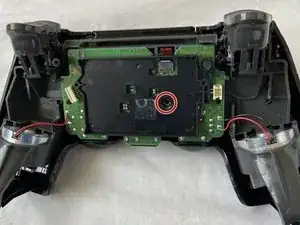
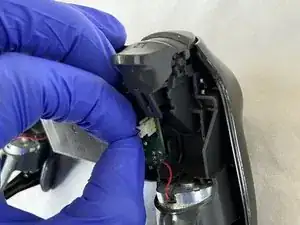
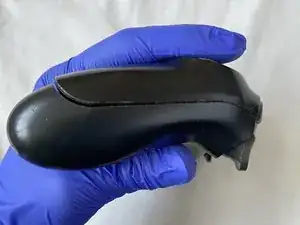
    • Separa la scocca posteriore dal resto del telaio, tirando verso l'esterno la scocca frontale e la scocca posteriore allo stesso tempo.

  3. rhftCg1cbH6lLsLo
    rhftCg1cbH6lLsLo
    ZKraUp6iTMOn15st
    GBgDAHBsPgaJP5tF
    • Sii molto delicato quando rimuoverai completamente la scocca posteriore dato che il cavo flessibile blu potrebbe danneggiarsi.

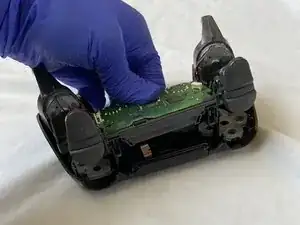
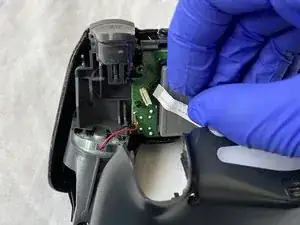
    • Tirare delicatamente il cavo flessibile blu per separare la scocca frontale dalla scocca posteriore.

    • La scheda elettronica e la scocca frontale saranno smontati ulteriormente.

  4. QcjerMCYKeTVboKg
    QcjerMCYKeTVboKg
    VqkkqUXFcQfXAA3v
    TatbHfc2mc2SvDGQ
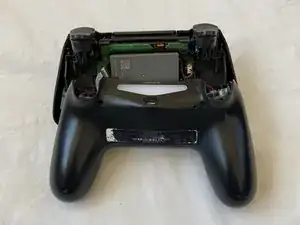
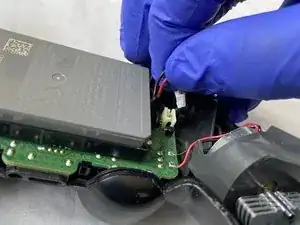
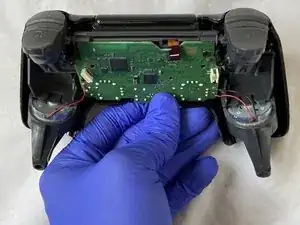
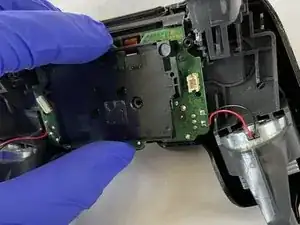
    • Sgancia il connettore della batteria dalla scheda madre premendo sui due lati e tirando sul connettore verso l'alto.

    • Fai attenzione a non strappare i cavi nero o rosso dal loro connettore mentre si rimuove lo stesso.

  5. eNMTRgUm3SuMUMdq
    eNMTRgUm3SuMUMdq
    kbrhbnjES2EOI3dG
    RAeyJdCAvrvGRBCQ
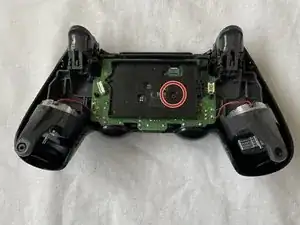
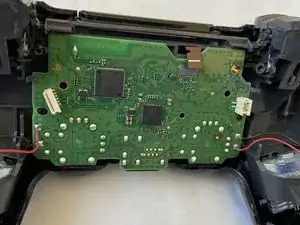
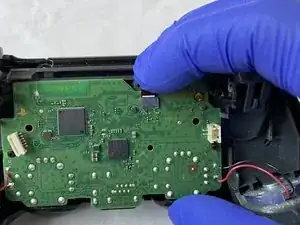
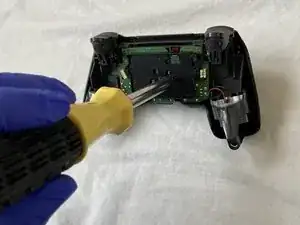
    • Utilizza un cacciavite Phillips(+) #00 per rimuovere la singola vite da 6.0 mm che tiene la scheda.

    • Una volta che la vite è stata rimossa, lo slot per la batteria si allenterà, ciò ti permetterà di rimuoverlo tirandolo verso l'alto.

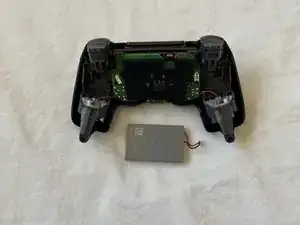
    • Rimuovi il cavo della batteria.

  6. le2kZs5GrDTHYDE2
    le2kZs5GrDTHYDE2
    KjWrhErfpoiQZxid
    ndZB43RRFiVSaMJs
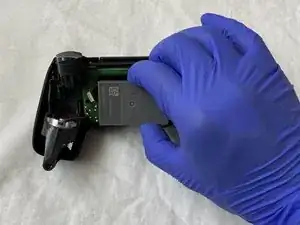
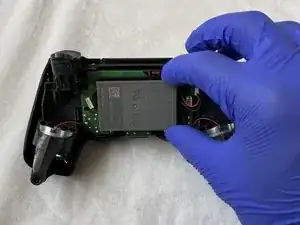
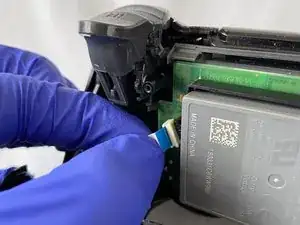
    • Scollega il cavo dalla scheda tirandolo verso l'alto.

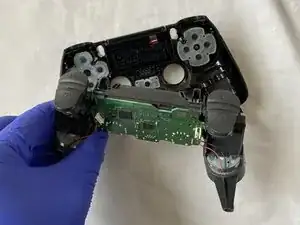
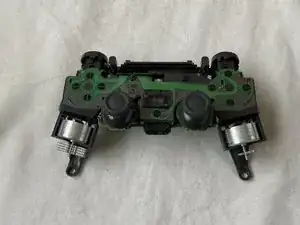
    • Porta via la scheda dalla scocca frontale cosi da rimuoverla completamente dalle altri componenti.

    Bis hier hin, bin ich gefolgt. Ich habe von diese Punkt an die Kontaktflächen der Druckschalter gereinigt, ( Isopropanol). Mit Wattestäbchen vorsichtig abgewischt. im abgenommenen Deckel die Silikonschablone mit den Gegenkontakten abgezogen und gereinigt (Isopropanol) und die Kunststoffknöpfe aus der Deckelhalbschale gedrückt. Danach alle Knöpfe und die Laufhülsen gereinigt ( Malzbier/Zucker entfernt) und wieder zusammengesetzt. Beim nächsten mal reinigen würde ich jetzt noch einen Stoß Teflonspray in die Hülsen geben. Nun alles rückwärts wieder zusammensetzen. Danke für die gute Beschreibung. (MaC)

    Martin Carstensen -

  7. HKWTZymHchGFTYRe
    HKWTZymHchGFTYRe
    ghTKWUNtCFyHbdri
    • Rimuovi il joystick sinistro tirandolo verso l'alto finché non si stacca.

  8. TUMZPbNJIZRiycZQ
    TUMZPbNJIZRiycZQ
    XuwraGg1BnlNCivk
    • Su ogni "camera" verde, c'è uno spazio che separa il corpo argentato dalle "camere" verdi.

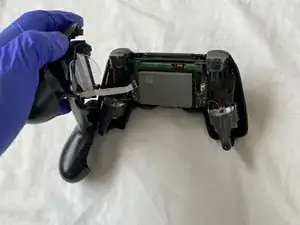
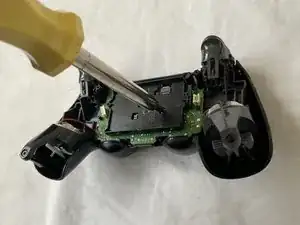
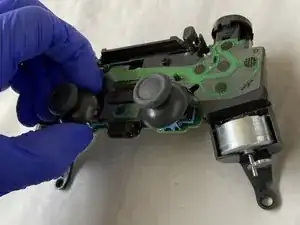
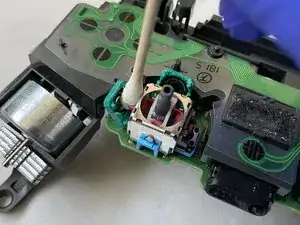
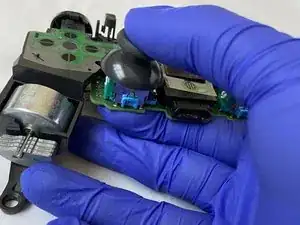
    • Utilizza un cacciavite a spacco per aprire le "camere" verdi inserendo la punta del cacciavite in mezzo allo spazio e spingendo verso l'interno.

    • Aprile molto delicatamente così che le "camere" verdi non si rompino/stacchino dalla scheda.

  9. OXRaNfQ3WRZr2PDS
    OXRaNfQ3WRZr2PDS
    KOlqqGZOJZJdHFfG
    1UpBoLbcTeVCGCLM
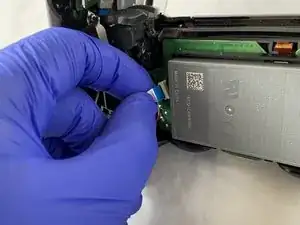
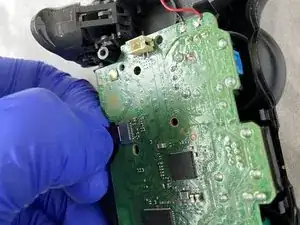
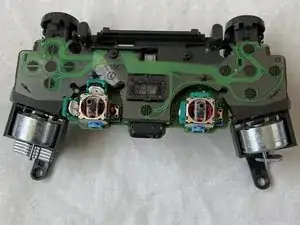
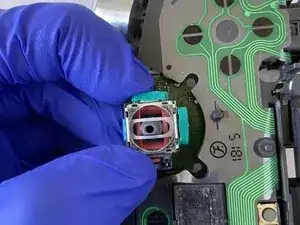
    • Una volta che le "camere" sono aperte, utilizza delle pinzette per afferrare e rimuovere il dischetto bianco da ognuno delle due "camere".

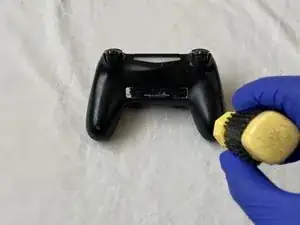
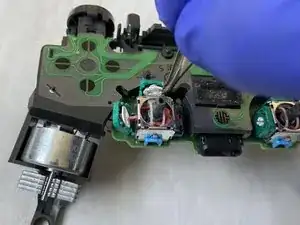
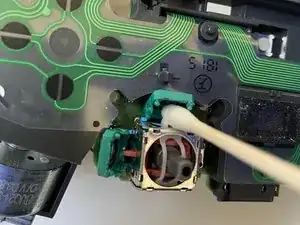
    • Prendi un Cotton Fioc e immergilo in alcool isopropilico al 90%.

    • Utilizza il Cotton Fioc imbevuto per pulire le "camere" accuratamente.

    • Lascia le "camere" verdi ad asciugare per circa 5-10 minuti prima ricominciare il rimontaggio.

    The white disk is an intricate part. Each contains 2 semi-circular <0.5 mm thick wires which are exposed and elevated, and serve to relay proportional motion to the motherboard, Do not tug, pull, press or break any of them as that may cause that plane of motion to be permanently disabled / enabled.

    Ming L -

    I just took apart my controller to clean out the analog part because I have a bad drift in my left analog and it's making me crazy. So I have all the screws in one spot and the white disks together in another I'm organized when I do this type of stuff, but when I looked again I only had 3 disks. There are 4 chambers and I'm positive that I took 4 disks out, but now I'm trying to convince myself there were only 3 to begin with which I know is wrong. Can anyone confirm if there are 3 or 4.

    Tommy Levins -

    There are 4. One for vertical and one horizontal for each analog.

    This is why I do them one at a time. No point leaving the chambers open so that dust ir other things can collect in them while you work on the others, plus in just reduces the risk of misplacing or damaging one of the disks.

    Clean one, place disk back in, snap shut, onto the next one. And only bother doing both sticks if both have a problem, don't fix what isn't broken. You want to open these chambers as little as possible as each time you do, the solder gets weaker and weaker from bending. Do this too much and you'll end up having to replace the entire analog stick.

    darkseany223 -

    For that matter, don't even clean both chambers on one analog if it's only Drifting in one single direction.

    For example If it's drifting straight down with no diagonal tilt to it, there's no need to bother with both.

    Just remember that the chamber on the SIDE controls vertical and the chamber on the TOP controls horizontal. So in this case, clean the one on the side as it is the source of the downward drift.

    darkseany223 -

    With my Dualshock 4 controller, the drift problem was not resolved after cleaning the disks and chambers. On a second try, I switched the disks on the joystick (disk from left chamber went into top chamber and vice versa) and that resolved the drift problems for me. Or I cleaned better the second time, could also be.

    Johan -

    Always keep your busted remotes. Never know when a spare part can come in handy. Ribbon cable stop working or fried battery? Thumbstick rubber peeling off? Tried to fix a drifting mote but accidently bent the metal on one of the discs? Snag em from your old dead water damaged remote.

    Frankenstiening motes has saved me hundreds.

    darkseany223 -

  10. 6SM5lx6FQtKKsLip
    6SM5lx6FQtKKsLip
    rFWjwvRpACwWp3Ul
    JNHG6Mu3wwhqLxDo
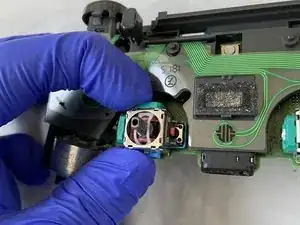
    • Metti i due dischetti bianchi in posizione nelle "camere" verdi utilizzando le pinzette.

    • Chiudi entrambe le "camere" premendo forte verso la scatoletta grigia finché non si incastrano in posizione.

  11. HeUk2uAjUmZl1wUM
    • prendi il joystick sinistro e rimettilo in posizione finché non senti un click che ti conferma che il joystick è tenuto fermamente al suo posto.

  12. uxDWRGcUUemNdOZy
    uxDWRGcUUemNdOZy
    AigZfCAhFIElhwIJ
    tBJAK3EPXF3DFAAE
    • Fai passare il connettore del cavo attraverso il foro della scheda dalla scocca frontale per assemblare le parti insieme.

    • Io personalmente utilizzo le pinzette per far passare il connettore del cavo dalla scocca frontale alla scheda.

    • Posiziona il connettore nel suo zoccolo e premi verso il basso per connetterlo nuovamente.

  13. GNUkDEVhkNMImMwU
    GNUkDEVhkNMImMwU
    SPoJArJFEfeVTevO
    16FTVy32ml3CTeO1
    • Prendi lo slot della batteria e posiziona le linguette nei buchi per allinearlo correttamente.

    • Inserisci la vite da 6.0 mm sullo slot batteria utilizzando un cacciavite Phillips(+) #00 così che lo slot batteria possa tenere ferma la scheda.

  14. HZ3umUKUYYMySqtm
    HZ3umUKUYYMySqtm
    rpIBOimKkv46CSBY
    • Posiziona la batteria sullo slot.

    • Collega i cavi nero e rosso della batteria nel loro zoccolo premendo verso il basso.

  15. VqegQTxAN1waLdTK
    VqegQTxAN1waLdTK
    oldOZvi1ZQBtMZRD
    • Posiziona il flessibile attaccato alla scocca posteriore e premi verso il basso in modo tale che entrambi i compartimenti possano collegarsi.

  16. JACxTJTm3pXeRmpP
    JACxTJTm3pXeRmpP
    P4Q5WlRYAWnRAqeb
    dT46s5JupL2WXyi4
    • Incastra la scocca frontale e la posteriore insieme.

    • Inserisci le quattro viti da 6.0 mm Phillips sugli alloggiamenti della scocca posteriore utilizzando un cacciavite (+) Phillips #00.

    • Il tuo controller dovrebbe essere completamente pronto!

Anubhab Rahman

Membro da: 17/01/21

1945 Reputazione

9 commenti

does this work with the right joystick too?

long tran -

Yes! Both sticks seems to be identical. Did my right one and it fixed the drift.

raltamimi0001 -

i fix my brothers ds4 with your tutorial. Thank you very much.

Bryan Avila -

Thank you so much for this amazingly well made guide. I just fixed my PS4 controller and it surprised me how well it works, absolutely no drift whatsoever. I should note that i’ve done the same steps on the right stick as it’s the one broken for me.

raltamimi0001 -

I just followed the guide and the drift problem is gone! A really throughout guide with all the details and warnings. Thank you for this.

Diego Costa -

This works. Thanks to the poster, bought some really cheap controllers off facebook and repaired them following this. Thank you!

Manu facturer -

dident try but man the comments look pleasing though i wont do it cuz im not ryna break it and i dont havbe 90% isopropyl alcohol but yeh look good enough

Hamza Dardar -

Would regular rubbing alcohol work instead of isopropyl?

heezkd -

Both ethanol and isopropyl are very suitable, although isopropyl will evaporate less quickly and leave less residue. Ethanol is often used to clean glass, while isopropyl is more often used in the production of electronics.

Toon Konings -