Introduzione

This repair guide will help guide you through the process to replace or upgrade your T-Force Delta RGB RAM in your PC. Depending on the computer case tower you have, you may need a Phillips head screw driver to remove the side panel. You will also of course need new RAM. This repair may be needed if you have troubleshooted your computer and have found your RAM is a problem. You may also be wanting to upgrade your RAM for better, newer, and faster RAM. Upgrading and replacing your current existing RAM is the same process.

  1. uRcGBgi4EClUMmT1
    • Press the power button on the case of your PC to turn it off.

  2. fx2hSliDXO4Po3X4
    • Turn off the computer from the power supply in the back, and unplug the cable from the PSU.

    • This step is important as not doing so means the computer is still receiving power and can damage your computer parts or even shock you.

    Dont just turn off the PSU from the switch. Always unplug it completely to be 101% safe

    Jayden Shadlow -

  3. ZQUCRC5fLUFedUmZ
    • Lay the case on its side.

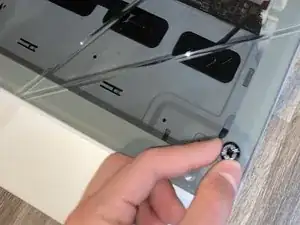
    • For this case model (Cooler Master TD 500 Mesh) it has two thumb screws on the top corners which can be removed with your fingers.

    • Remove the side panel.

  4. BW315i2VCpMxU4DV
    • Your RAM sticks are the two long cards with T-FORCE written on the top of them.

    Prior to touching any components within your computer you should make an effort to ground yourself to reduce the chance of a electro static discharge. This is generally as easy as touching the case of your computer however you can buy dedicated wristbands to be completely safe

    Jayden Shadlow -

  5. 2AmLDGOD5TgqUjSG
    2AmLDGOD5TgqUjSG
    pRtJUXEjiNAh3aT3
    twV2DUUrwGkZrXAn
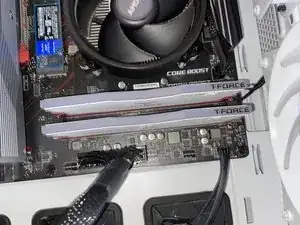
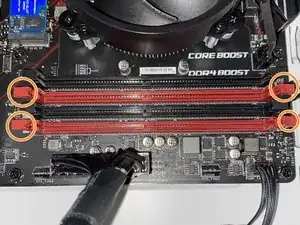
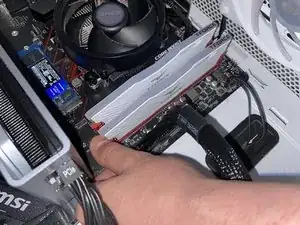
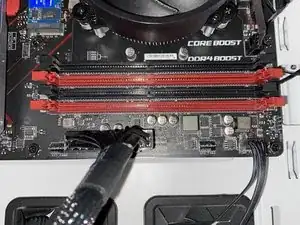
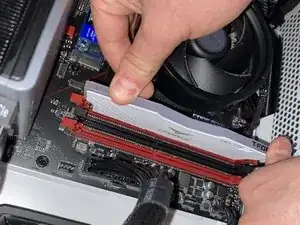
    • Each motherboard is different. This motherboard (MSI B450 Gaming Plus Max) has two pull tabs on each side. Push down on them to release each card.

    • If you are not using this motherboard, your motherboard may only have one pull tab instead of one on each side. Please refer to the manual for your motherboard.

  6. XqvRQ5QyNAojVbMj
    • Once the pull tabs are released, remove the RAM from the RAM slots and set to the side.

  7. D4fvXFvDTgB6TZm5
    D4fvXFvDTgB6TZm5
    gN6LmVU6fjXYGUdW
    DhvBnI2wOf1hcOjn
    • Repeat Steps 5 & 6 to remove the second RAM card from the RAM slot.

    • If you only have one RAM card, skip to the next step.

  8. N6uV15krFxZ2QcxN
    N6uV15krFxZ2QcxN
    W6xIKZpE1FCw2O4c
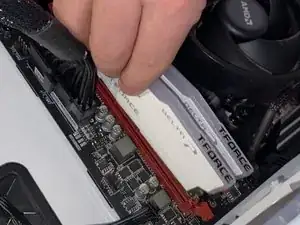
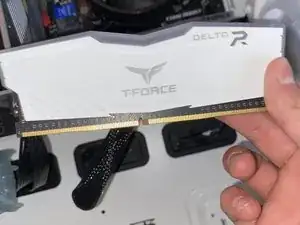
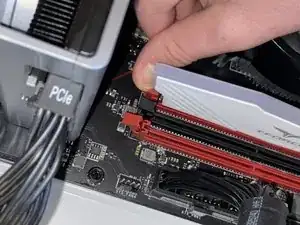
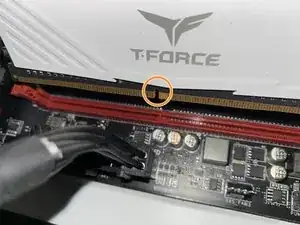
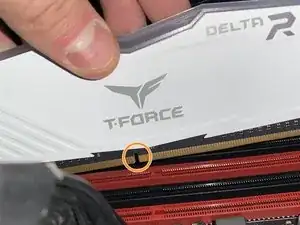
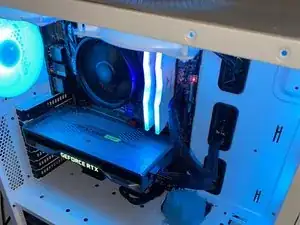
    • To install new RAM, line up the notch of the RAM slot with the notch of the RAM slot on the motherboard.

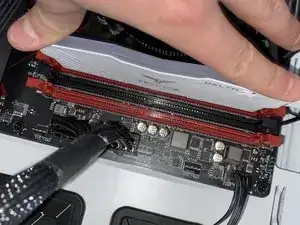
    • For this motherboard, insert the RAM in the 2nd slot from left to right and the furthest one to the right.

  9. jTmIEAHCNynuXHVB
    jTmIEAHCNynuXHVB
    6IA3onsEKEDSLJGD
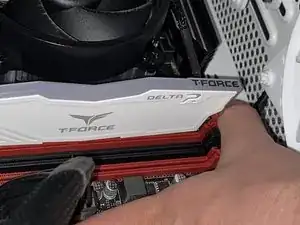
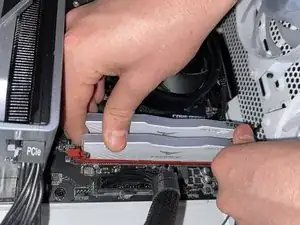
    • Push down with even pressure on both sides until you hear two clicks since on this motherboard there are two tabs, one on each side.

  10. aaxBLlHgVxMKSuGE
    • Repeat Steps 8 and 9 to install the second RAM stick.

  11. ZP1tpHdKJxOUM4CN
    ZP1tpHdKJxOUM4CN
    xZO4AbFZXBrEyXZv
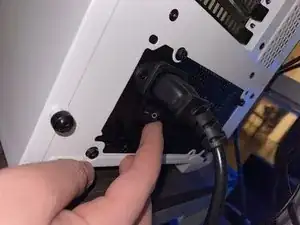
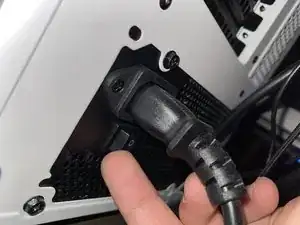
    • Power your PC by turning on the power switch on the back.

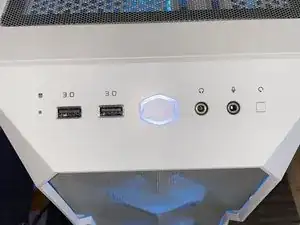
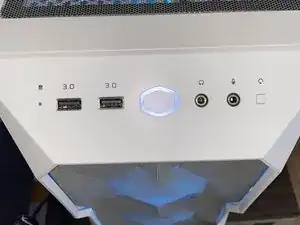
    • Press the power button on the top of the case.

  12. 4b6wCx5OnC3Mk4Hg
    4b6wCx5OnC3Mk4Hg
    xvlyhQUGT2lnLBSI
    • Stand your computer back up.

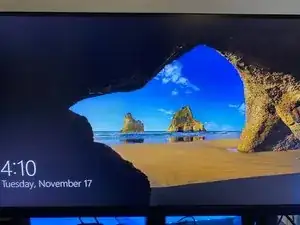
    • See if the computer powers up and into windows and shows up on your display. If it does, put the side panel back on.

    • If you do not see anything on your monitor’s display, you did not install the RAM correctly and must check to see if it's fully secured. Remove the RAM again and install again.

  13. dN2iVoM2oyY6WSsv
    dN2iVoM2oyY6WSsv
    yPJkS21FvPPhFHdG
    • Check to see if your RAM is running at its rated speed.

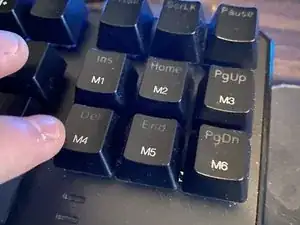
    • Restart your PC and spam click your delete key on your keyboard until you get into the MSI BIOS.

    Some Motherboards require a different key to enter Bios, Refer to your motherboard manufacturer

    The most common keys are f2, f12 and delete

    Jayden Shadlow -

  14. VXFmRpEp4Vw5cfWs
    VXFmRpEp4Vw5cfWs
    J5OdDG25hqGWXoYH
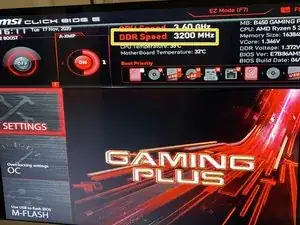
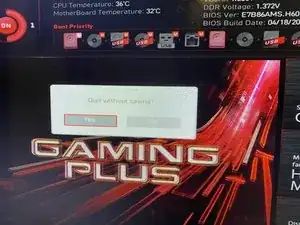
    • You will know you got into your BIOS if see a screen like this. On the top section, for this RAM, it should say the DDR speed is 3200 Mhz. If you do see this, skip to the final step.

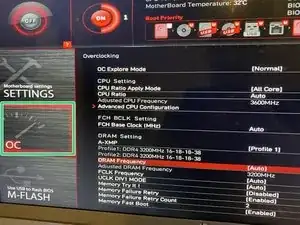
    • If you do not, with your arrow keys go to the OC section, scroll to DRAM frequency and instead of auto, select the rated speed of your RAM. (Don't forget to save this setting.)

  15. vm4XAfCGHQTYfcIT
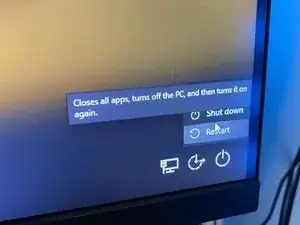
    • Press your Esc key until the message in the picture pops out. Navigate to exit and your PC should restart and you are good to go. You have successfully remove and replaced or upgraded your RAM!

    • Navigate to "Exit," and your PC will restart. You are good to go!

Conclusione

This is how you replace/repair your RAM, and how to check it is running at the rated speed.

Eden rodriguez

Membro da: 21/10/20

292 Reputazione

0 commenti