Introduzione
The flow meter measures how much fresh water is pumped into the coffee machine. Various faults can occur, if the sensor itself is defective, the part must be replaced. It is often just clogged/calcified, especially at the inlet port. A thorough cleaning will then be sufficient.
Strumenti
-
-
Remove all attachments such as water tank, pulp drawer, brew group.
-
Turn the machine with the back facing you.
-
Remove five Torx T20 security screws.
-
-
-
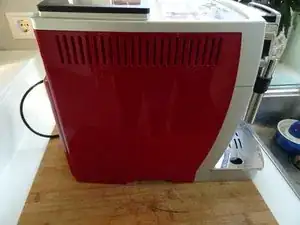
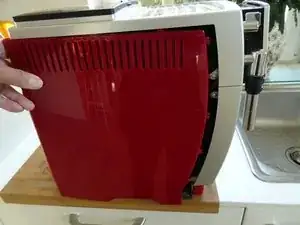
Push the side panel back about 1.5 cm.
-
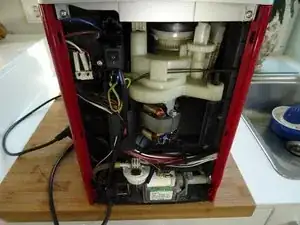
Lift off the panel.
-
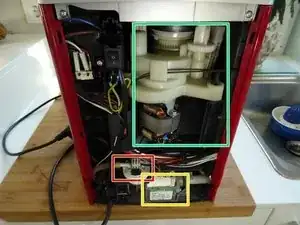
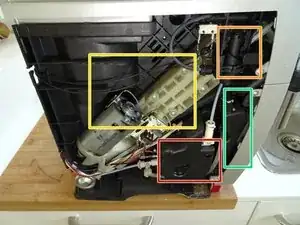
The following compononents are exposed:
-
Heater
-
Expansion chamber
-
Gear drive
-
Steam valve
-
-
-
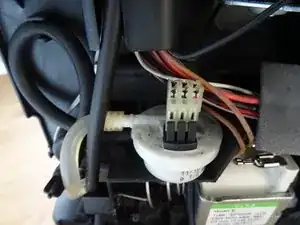
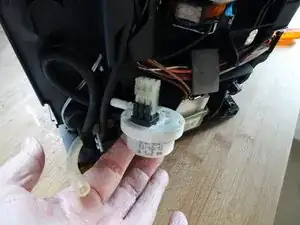
The flow meter is located on the back of the machine.
-
First detach the upper silicone hose.
-
Pull the flowmeter straight out backwards.
-
If you don't want to replace it, the cables can remain connected.
-
-
-
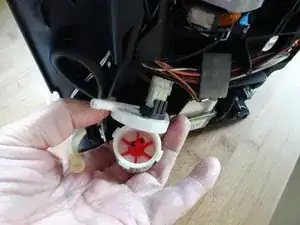
Turn the flow meter cap a little counterclockwise.
-
Lift off the lid. Pay attention to the sealing ring in the lid. The turbine wheel becomes visible.
-
Pull off the hose at the bottom.
-
Blow into the inlet port and check that the turbine wheel spins quickly.
-
If it is blocked, clear the very thin inlet channel with a needle or similar tool.
-

Follow these steps in reversed order to reassemble your device
5 commenti
Herzlichen Dank für die übersichtliche Anleitung! Der Tipp mit dem verstopften Flowmeter aus einem Forum und dazu diese Anleitung haben mir heute sehr geholfen. Meine DeLonghi Dinamica läuft wieder. :D Selbst ist die Frau.
Beste Grüße
Christine
info -
Fantastisch!!! Toller Job Christine! @VauWeh erstellt die besten Ratgeber für alles, was mit Kaffeemaschinen zu tun hat!
Fantastic!!! Great Job Christine! @VauWeh creates the best guides for anything Coffeemaker related!
Ich freue mich!
VauWeh -
Hi,
kurz vor Weihnachten streikte unsere " PrimaDonna Class ". Ein Gau für jeden Kaffeetrinker. Schnell über Online - Shops zwei Ersatzteile besorgt. Doch sie streikte immer noch. Dann die Wasserzuleitungsschläuche gereinigt. Nein, es gab immer noch keinen frischen Morgenkaffee aus dem heimischen Automaten. Dann ging ich exakt nach Deiner Anleitung vor. Yes! Sie funktioniert wieder.
Vielen Dank für die hilfreichen Tipps und ein schönes Weihnachtsfest.
Jürgen aus Eching b. München
Sehr schön, hoch die Tassen!
VauWeh -
Screwdriver must have a hole? What does that mean? Is it a standard Tx20 bit?
Kevin -
No, it is a TR20 Security Bit, which really has a hole (if you look to the star shape) . See TR10 Torx Security Screwdriver
VauWeh -
Bits from iFixit are equipped with it.
VauWeh -