Introduzione

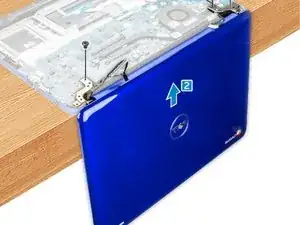
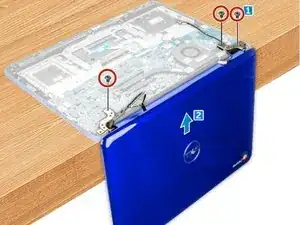
In this guide, we will show you how to remove and replace the Display Assembly.

  1. RCPTqDiZQC2oEQg5
    • CAUTION: The touch LCD Assembly is pre-assembled with the LCD bezel, touch sensor daughter board, touch sensor cable, display cable, and the camera module and hence cannot be further torn down and must be replaced as an assembly.

    • Follow the procedure in Before working inside your computer.

    • Disconnect the eDP cable.

  2. qYjmgKVe1qGpCfDe
    • Disconnect the antenna cables from the WLAN card.

  3. vvVxRrixMsd2dwtd
    • Unroute the WLAN cable from the its routing guide on the fan.

  4. PIFH2kKPdTDnHFdn
    • Remove the M1.6xL2 screw securing the power port to the display hinge.

  5. vFPKcKlUHirWB2hp
    • Remove the power port from the system board.

  6. qCtytl2QkcnYAFhi
    • Remove the M1.6xL2 screw securing the metal bracket covering the display cable connector.

  7. tI4YxqpRHlPYdHvF
    • Remove the metal bracket off the computer.

  8. NDXjEbOqPmR6qR1K
    • Disconnect the display cable from its connector on the system board.

    • Flip over the computer.

  9. PfMOFFATdCyOP64T
    • Remove the M2xL4 screws [1] and lift the display assembly off the computer.

  10. Ob534XJr51u5T1Pf
    • Place the NEW display assembly to align with the screw holders on the computer.

  11. aiWVKbRMLOkhdyCV
    • Tighten the M1.6xL2 screws to secure the display assembly to the computer.

  12. vMCxoUhsNaVAWKXN
    • Turn over the computer.

    • Connect the display cable to the connector.

  13. 4rUILNFaS1xALloq
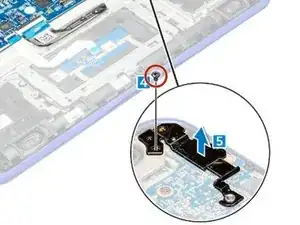
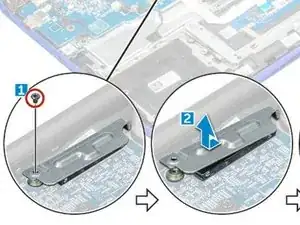
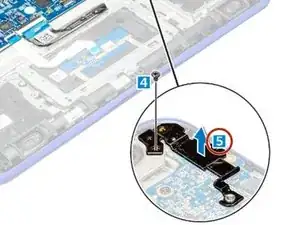
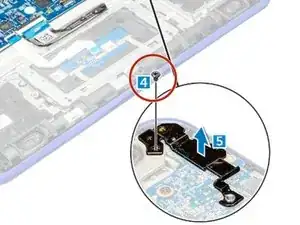
    • Place the metal bracket over the display connector and tighten the screw to secure the display cable to the computer.

  14. eOtGeQG5kdmfc31t
    eOtGeQG5kdmfc31t
    2vTmwHwhTR2DbM63
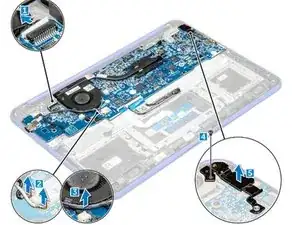
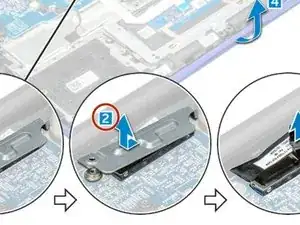
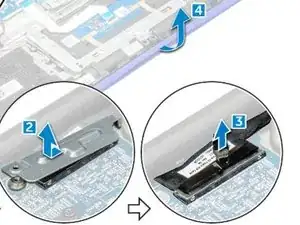
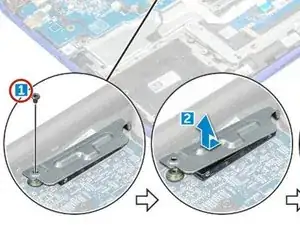
    • Replace the power port on the system board and tighten the screw to secure it to the display hinge.

  15. pA2yUoXYda33WdmG
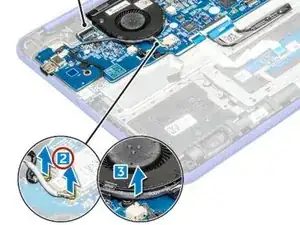
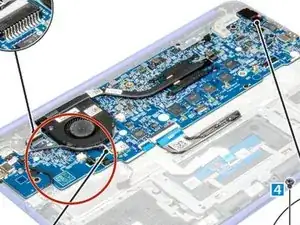
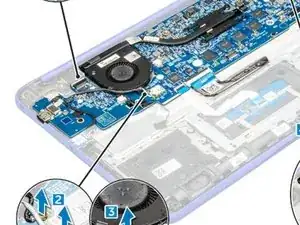
    • Route the WLAN card cable to its routing guide on the fan and then reconnect the antenna cables to the WLAN card.

  16. 5HbGGuRuLEQjYNYC
    • Connect the eDP cable to its connector on the system board.

Conclusione

To reassemble your device, follow these instructions in reverse order.

Terrence15

Membro da: 18/12/17

79031 Reputazione

0 commenti