Introduzione

  1. ro3eXhpN5FYtwxxs
    ro3eXhpN5FYtwxxs
    OdePwJXtKfpq5SWp
    • Turn off power to the laptop.

    • Unplug the charging cable from the laptop.

    • Failure to unplug the charging cable could result in damaging the computer or seriously injuring yourself.

    • Wear the anti-static wrist strap or work in an uncarpeted area to prevent static shocks. Shocks may damage the components.

  2. 1ZTStNFDxCMFbFgS
    1ZTStNFDxCMFbFgS
    GfTrKURKULrX4UKI
    • First carefully turn the laptop over so you can access the battery.

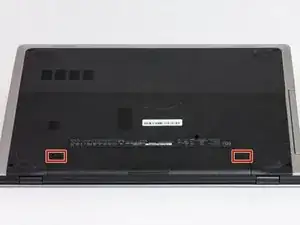
    • Switch each of the battery latches to the "unlocked" position.

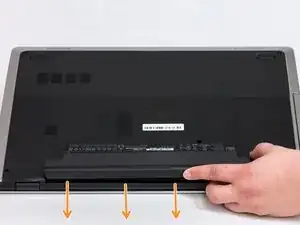
    • Pull battery upwards by the tab to remove from the laptop.

  3. nMPSqMO2TI2Be1OY
    nMPSqMO2TI2Be1OY
    uoeGOr2i2EYO5dxh
    sUB11kCtSskMSEJO
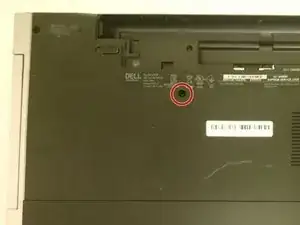
    • Remove the 5.5mm screw that secures the optical-drive assembly to the computer base

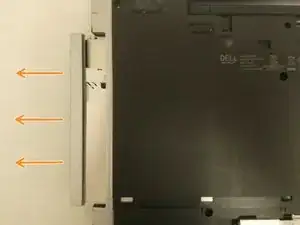
    • Using your fingertips, slide the optical-drive assembly out of the optical drive bay.

  4. gRGlfmVHp6xDtr41
    gRGlfmVHp6xDtr41
    XFhI2AQikCRqcDfC
    EY6PMIZEaFJhTNnC
    • This step is only needed if replacing the optical drive.

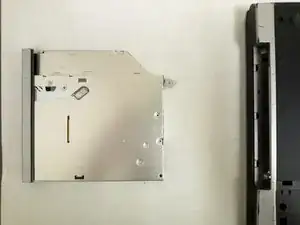
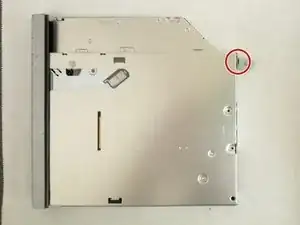
    • Remove the 2.5mm screw that secures the optical-drive bracket to the optical drive assembly.

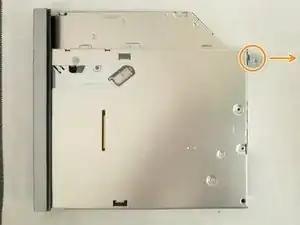
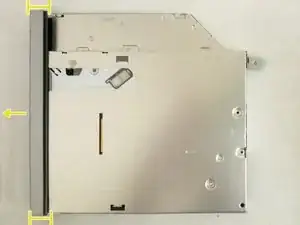
    • Remove the optical-drive bracket from the optical-drive assembly.

    • Carefully pull the optical-drive bezel and remove it from the optical drive.

Conclusione

To reassemble your device, follow these instructions in reverse order.

Christopher Tran

Membro da: 14/02/18

1161 Reputazione

0 commenti