Introduzione

We are going to guide you through the steps to remove the current speaker and replace it with a new speaker.

  1. eKB1Pr3Xoi1kBLyD
    • With the base stand facing upwards, unscrew the 6mm Phillips #2 screw.

    • Pull the base stand straight up from the device.

  2. Ksrjub4PqrM2QNiJ
    Ksrjub4PqrM2QNiJ
    52ZEPDdcKgJVmZSV
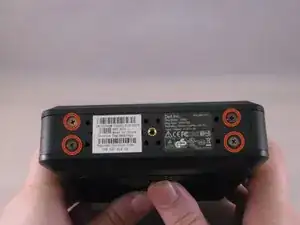
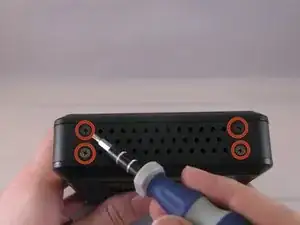
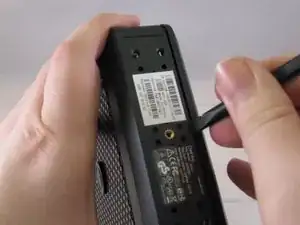
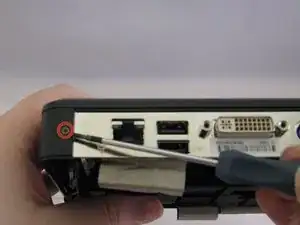
    • Unscrew and remove the eight 4mm Phillips #0 screws (four on top, four on bottom) from the top and bottom of the device.

  3. vkj3jdWuKuYi2TLI
    vkj3jdWuKuYi2TLI
    nCSSIqVcCgMCZIMT
    aBSF16YNTQrKUI42
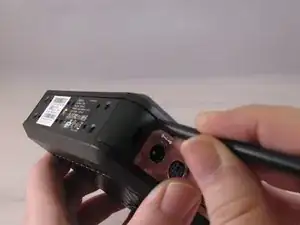
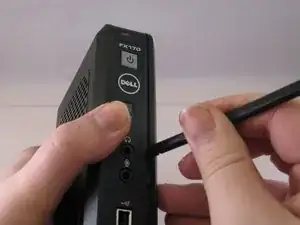
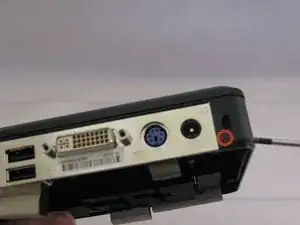
    • Run the flat side of the spudger along the entire line of the case starting from the back where the power plug and a small screw are located.

    • Use care to not apply excessive force that could damage retaining clips while running the spudger along the case.

  4. XHCtTYmDgHUWhr4X
    XHCtTYmDgHUWhr4X
    rIyPRqLIrCjcDH4S
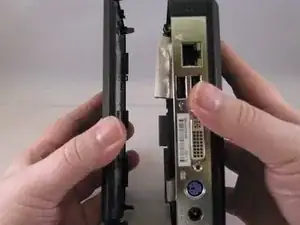
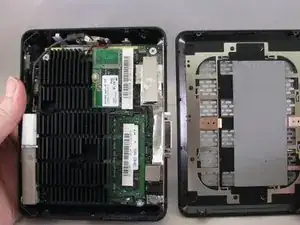
    • Once the clips have been released, gently disengage the cover from the rest of case by pulling in opposite directions.

  5. X6BXbmL4bbPw5tlj
    X6BXbmL4bbPw5tlj
    ywE5JpWF4icKlWdj
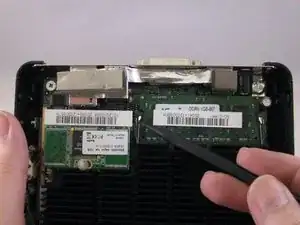
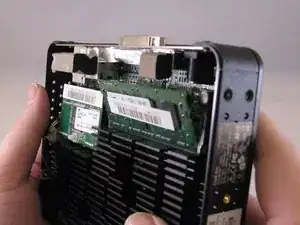
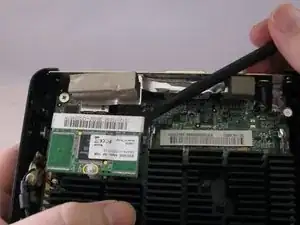
    • Using fingers, push the clips on either side of the RAM. The RAM will pop up at a 45 degree angle when both clips are disengaged.

  6. N2beTNrGB4a53OMk
    • Lift and pull out the RAM.

    Is it possible to increase memory, maybe about 8 RAM? Have you try to install Debian Linux?

    Vic -

  7. YQisXBEL1OAHjOEN
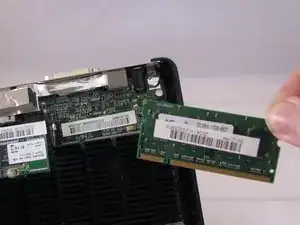
    • Using the spudger, gently push on the underside of the memory board to loosen it. Gently grasp each side and pull up to release the memory board.

  8. QsuLiQQElCYbvsuL
    QsuLiQQElCYbvsuL
    fn1kEuxHVCKp5xOW
    • Remove the two 4mm Phillips #00 screws that are along the back of the case.

  9. sn5AfGrFAXLD4XKr
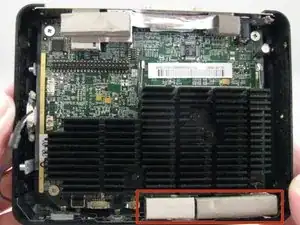
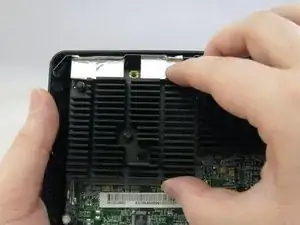
    • Remove the two foam bumpers that lie on top of the two front USB ports with fingers. Do not throw them away.

  10. pXueOwcvrchTSLCH
    pXueOwcvrchTSLCH
    pXFRuSPdcoRA4VGW
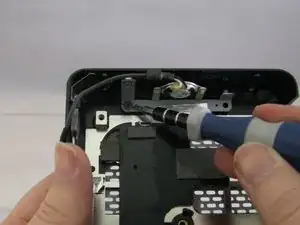
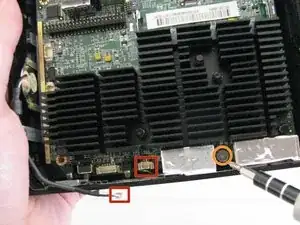
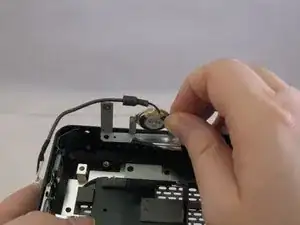
    • Disconnect the speaker cable from the motherboard by gently pulling it straight up to disengage it from the port.

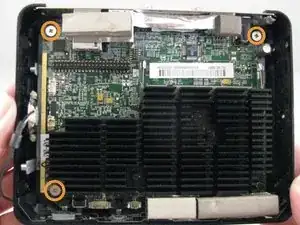
    • Remove the four 4mm Philips #0 screws that secure the motherboard to the case.

    • The screw in the corner where the RAM is located is covered by a small piece of Mylar tape, peel this tape back to reveal the screw. The tweezers can be helpful for this.

  11. ujaiVXCLZaPPuQUS
    ujaiVXCLZaPPuQUS
    awBQE5CjCAWloxbh
    ktZZxx6c4IhBhmcB
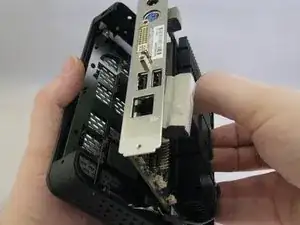
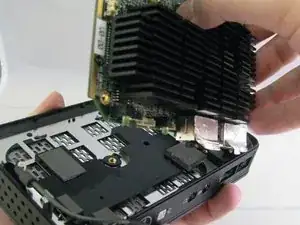
    • Gently grasp the motherboard by the heat sink (the black finned piece). Lift the motherboard at an angle such that the ports along the back side come up first.

    • Continue lifting the motherboard, then slowly tilt the piece off to the right to break the Mylar tape over the front USB ports.

    • Be careful when handling the motherboard to prevent electro-static discharge (ESD) damage. If the motherboard is being removed as part of a prerequisite, place the motherboard into a bag designed to prevent a build up of a static charge (usually referred to as a static bag).

  12. FYcttVsk2LZ2QssN
    • Remove the 5mm Philips #0 screw securing the speaker mounting bracket to the case.

  13. 1h2NEJXMlFxNEgTQ
    • Grasp the speaker mounting bracket and lift it up from the case.

Conclusione

To reassemble your device, follow these instructions in reverse order.

Jess J Cunning

Membro da: 14/01/15

247 Reputazione

0 commenti