Introduzione
This guide is designed to help you successfully replace the Wi-Fi card in your Dell Precision M4800. Whether you're experiencing internet connectivity issues or looking to upgrade your wireless capabilities on your laptop, this replacement will address those concerns and have your laptop running smoothly again.
When looking for a replacement Wi-Fi card for your Dell M4800, it's essential to consider the following factors:
- Form Factor: Ensure that the replacement Wi-Fi card is a Mini-PCI Express (mPCIe) card, as this is the standard form factor used in many laptops, including the Dell M4800.
- Wireless Standards: Check for compatibility with the wireless standards you need. For example, modern Wi-Fi cards support standards like 802.11ac or 802.11ax, providing faster and more reliable wireless connections.
- Bluetooth Compatibility: If your original Wi-Fi card also included Bluetooth functionality, make sure the replacement card has Bluetooth support if needed.
Before beginning, make sure to shut down your laptop entirely and disconnect it from any power source. If your laptop has a swollen battery, exercise caution and handle it with care.
Strumenti
Ricambi
-
-
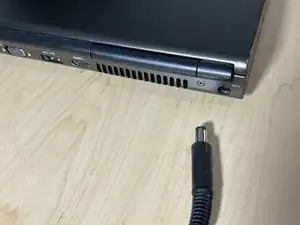
Unplug the charger from the laptop and shut it down.
-
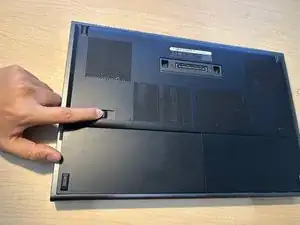
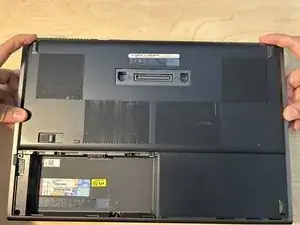
Flip the computer, so the bottom is facing upwards.
-
Slide the release latch to release the battery.
-
Lift and remove the battery from the laptop.
-
-
-
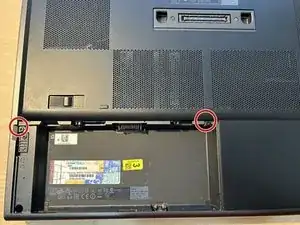
Using a Phillips #1 screwdriver, remove the two 5 mm screws fastening the backplate.
-
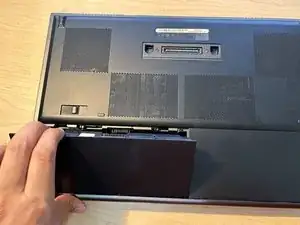
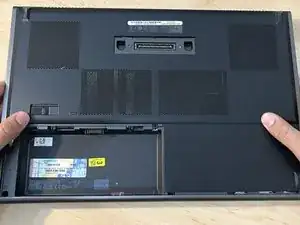
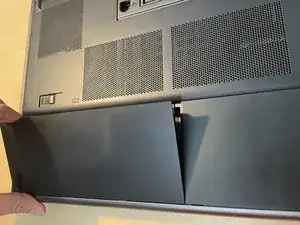
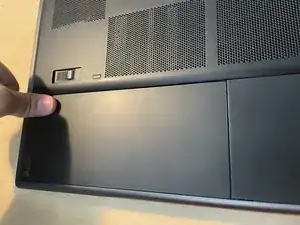
Slide the base cover towards the rear of the laptop.
-
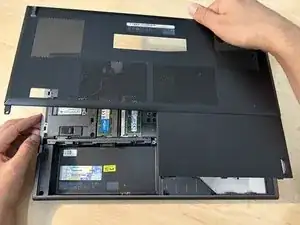
Lift the base cover and remove it from the laptop.
-
-
-
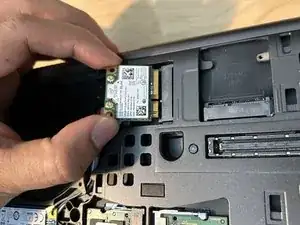
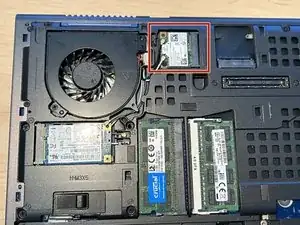
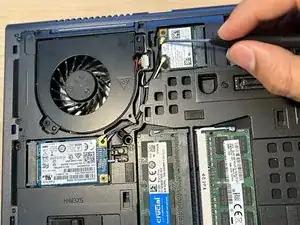
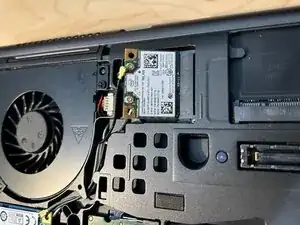
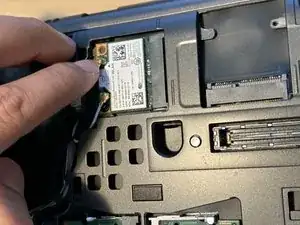
Disconnect the black and white antenna cables by carefully pulling them upwards away from the card, being cautious to not bend the connector.
-
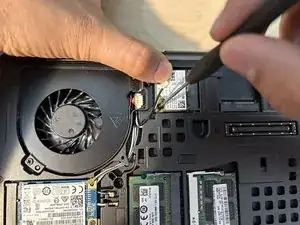
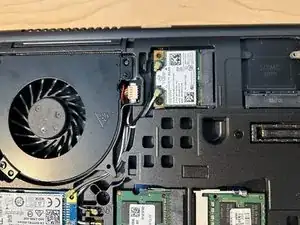
Remove the screw.
-
-
-
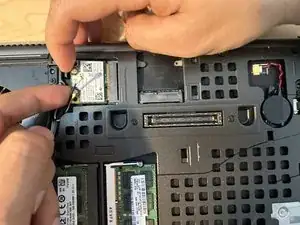
Connect both antenna cables back to the same places according to the color code on the Wi-Fi card.
-
-
-
Slide the base cover towards the front of the laptop.
-
Slide the battery back into its place.
-


To reassemble your device, follow these instructions in reverse order.

The series of photos and action shots (showing your hands) gives a clear overview of the initial steps of the repair. Well done! Check iFixit's conventions for markup (your arrow), and notice that the direction it is pointing in is in the opposite direction to the one that your finger seems to be pointing toward. This could be confusing to readers because your finger is more prominent than the red arrow (which is hard to see against the black background of your laptop) so readers are likely to get the impression that the catch should slide in the direction that the finger is pointing in. Could you re-shoot the photo so that the visual information is consistent?
Ros Woodhouse -