Introduzione
If your Delta Push Valve shower diverter is leaky, stuck into place, or needs to be replaced for any reason, this guide is for you. Your shower diverter plays an important role in diverting water back and forth between the tub faucet and the shower head.
A plumber visit can be costly, but the fix can be easy and save you time, stress, and money. This process should take 25 minutes max with a few simple tools no hazards on the job. The guide will walk you through how to disassemble your shower valve, replace the diverter, and put it all back together again in functioning order.
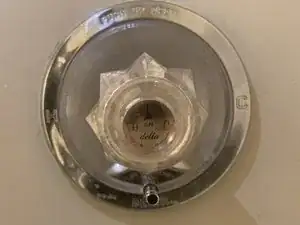
This guide works to repair or replace a Delta Push Valve style diverter, or a model RP5649. If you have a different type of diverter, this guide may not work for you.
Ricambi
-
-
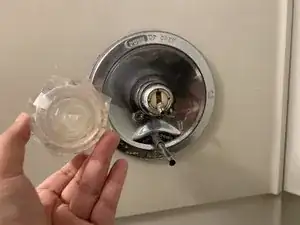
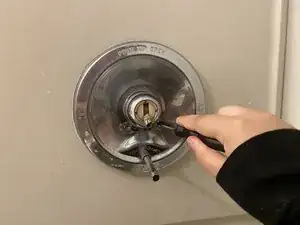
Remove the decorative cap off of the knob by pushing a flathead screwdriver underneath the cap.
-
-
-
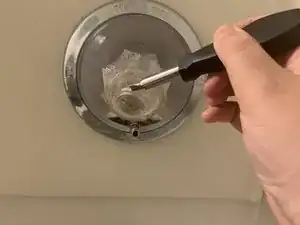
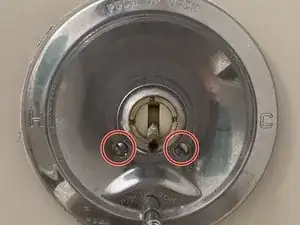
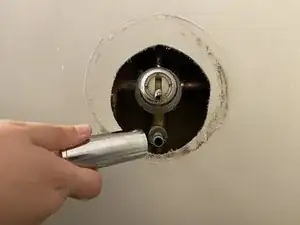
With a Phillips #2 screwdriver, remove the screw inside of the knob. Pull to remove the shower knob.
-
-
-
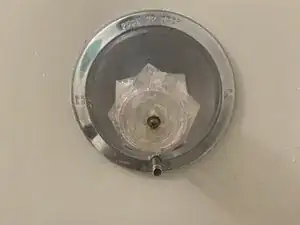
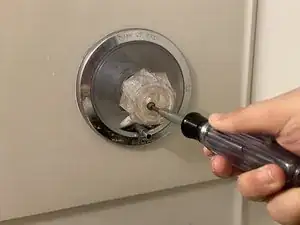
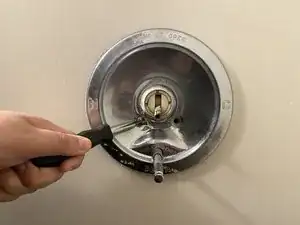
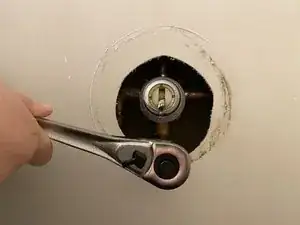
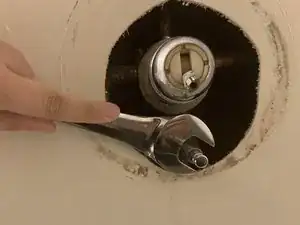
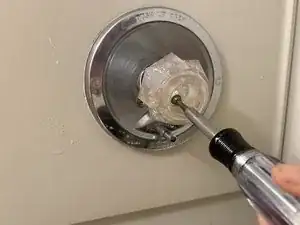
Use the 3/8 in. Drive 7/8 in. 6-Point SAE deep socket to remove the old diverter. Place the deep socket over the diverter and unscrew.
-
-
-
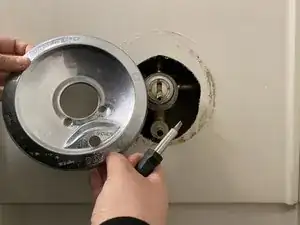
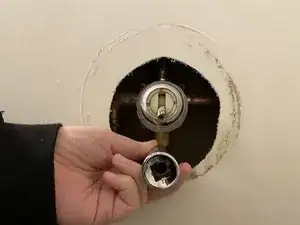
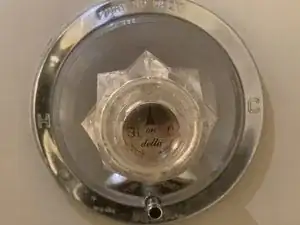
Reassemble the faceplate and knob. Remember to place the screws back in the places they were originally.
-
Test the water flow before leaving the project! If it is leaking, you may need to tighten the diverter or screws.
Once everything looks good, you’re done! Great job. You’ve saved yourself a visit from the plumber by fixing it yourself.

Un commento
Please turn on the water and engage the diverter. I want to see it work! I put in a new diverter and it did not completely divert ALL of the water. After installing the new diverter, about 10% - or so - of the water continued to come out of the faucet (and 90% was diverted up to the shower head). I'm not sure how to fix this problem. Perhaps, I will let a little water to flow out of the faucet, wasting water and electricity (to heat the water).
can you tell me what delta model this faucet is? i have one just like it i need to replace the handle broke piece behind the plate. trying to figure out model of delta this is? is this the 600 series? thanks
Steve Rodgers -