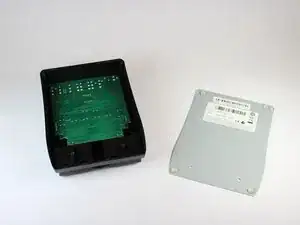
Introduzione

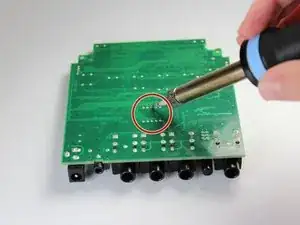
If the LED light is broken, or dead, this guide will teach you how to remove the broken component for replacement.
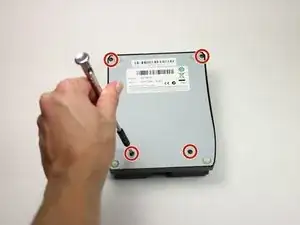
  1. OrjgPDq2feho53Ai
    OrjgPDq2feho53Ai
    pAfkGCYBHXoL14ZC
    • Unplug the device from its AC power adapter; unplug anything connected to the input/output jacks.

    • Remove the four 8mm Phillips #0 screws located on the back panel.

  2. SvSqM1H4AY3dyrPv
    SvSqM1H4AY3dyrPv
    sGQFAGaGesvr6pbf
    • Remove the back panel to expose the motherboard.

  3. pIdYF3SBFiiSQHFX
    • Remove the two 11mm #0 Phillips screws located at the bottom of the motherboard.

  4. VClvmoEdeDiCuoQG
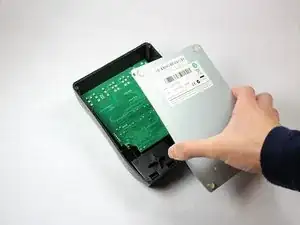
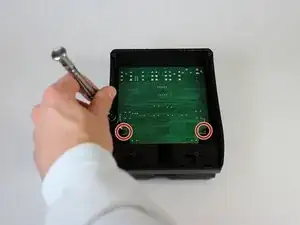
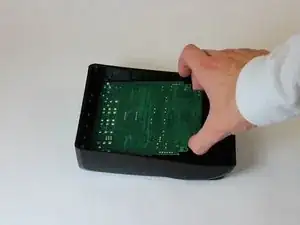
    • Lift the indented end of the motherboard opposite the input/output jacks. Then, pull away from the input/output jacks to slide the motherboard out of the casing.

  5. NFQQYgpLgXxMqHGm
    • Desolder the back of the motherboard where the LED light is located.

Conclusione

To reassemble your device, follow these instructions in reverse order.

Elijah Smith

Membro da: 10/09/18

738 Reputazione

0 commenti