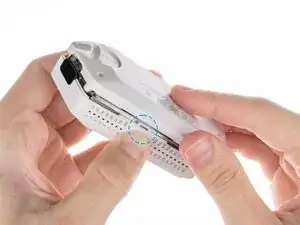
Introduzione

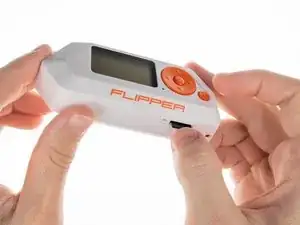
Flipper Zero è un multi-strumento portatile per Tester e geek in un corpo simile a un giocattolo. Ama hackerare cose digitali, come protocolli radio, sistemi di controllo degli accessi, hardware e altro ancora. È completamente open source e personalizzabile, quindi puoi estenderlo come preferisci.

  1. PQJuABmOeCvrSpQX
    • Non usare alcol o alcol contenenti detergenti, fazzoletti, panni o disinfettanti sul vetro della protezione dello schermo! Può danneggiare in modo permanente il vetro della protezione dello schermo.

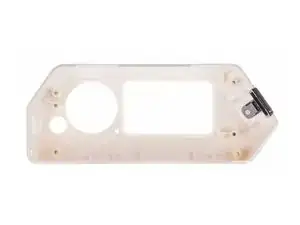
    • Il guscio superiore, il coperchio IR e il vetro della protezione dello schermo sono una parte solida e non possono essere smontati.

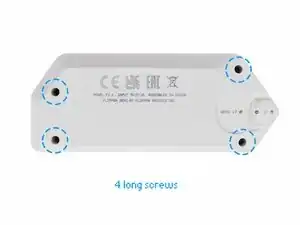
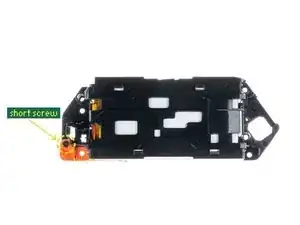
    • Il Flipper Zero utilizza solo due tipi di viti:

    • Dimensioni della vite lunga 1,8 x 8 mm

    • Dimensioni della vite corta 1,8 x 4,5 mm

  2. Xkx3MjRElM1NP1Ip
    • Espellere la scheda microSD (se presente) premendola con l'unghia.

  3. rVf3Pb6kNjgG3DyQ
  4. ekhPVJGevZylMfAg
    ekhPVJGevZylMfAg
    FbDvsPu1EmmDo5IG
    xpgkVebRsxN4kwsS
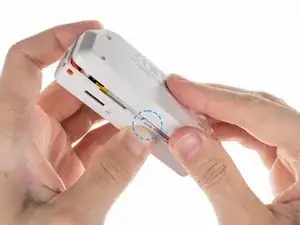
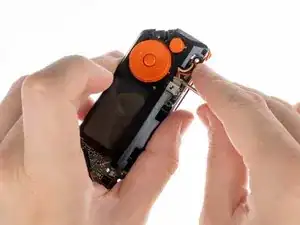
    • Premere il centro del coperchio superiore su entrambi i lati, uno per uno, per rilasciare i fermi che tengono in posizione il coperchio posteriore.

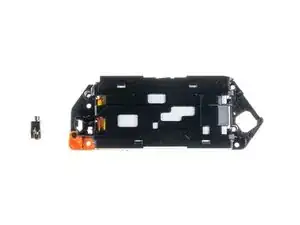
    • Una volta che i chiusure sono stati rilasciati, è possibile rimuovere il coperchio inferiore.

    You need to press a little stronger between the GPIO ports than next to the SD-card slot.

    EpicErik HD -

  5. pIxCjQ6Bu2OaiuxJ
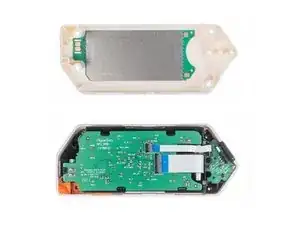
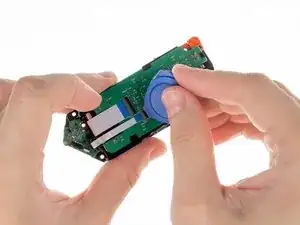
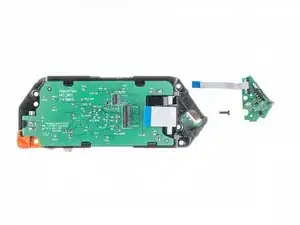
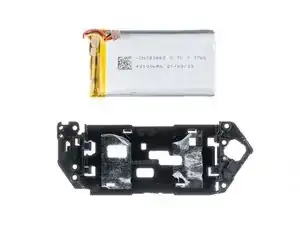
    • La scheda con l'antenna NFC è incollata al coperchio inferiore con nastro adesivo.

    • Per rimuovere la tavola, leva delicatamente uno dei bordi della tavola con un plettro di plastica per staccare il nastro adesivo.

  6. 21MoGCCmXZNfKEKm
    21MoGCCmXZNfKEKm
    eLQthvxfV1ErYTIS
    • Tira fuori delicatamente il resto dalla scocca

  7. QfjWFTPXF41DhSWU
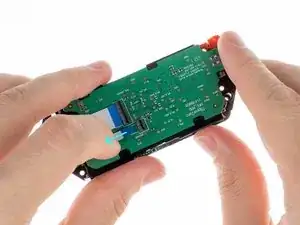
    • Utilizzare un cacciavite PH0 per svitare le due viti corte che tengono insieme il telaio e il coperchio superiore.

    When I did this I had a long screw and a short screw. The long screw was top left. Thanks for the excellent guide!

    Patrick Coyle -

  8. GHpVTYwHKSB1UHRZ
    • Estrarre il telaio dal case

    take the chassis out of the case... well alright... please explain how because it's very much stuck at the side of the USB port :/
    2023 version is different than the 2022?

    remco katz -

  9. ORDmGDgWJAkGDRlI
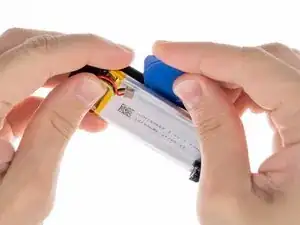
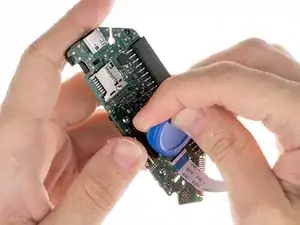
    • Scollegare la batteria tirando il connettore con un cacciavite piatto e tirandolo fuori.

    • Non utilizzare un cacciavite metallico altrimenti potrebbe esserci un cortocircuito con il connettore della batteria.

  10. cRXnQCQGs6XCZCUG
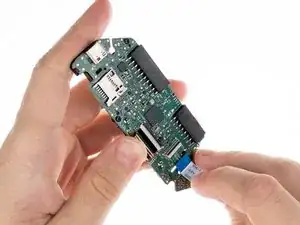
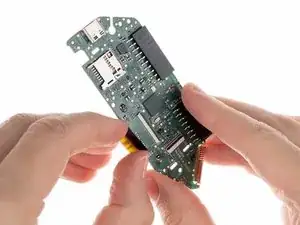
    • Scollegare il cavo grande dalla scheda. Usa un plettro di plastica per sollevare il fermo per rilasciare le serrature.

  11. ZpqvrILl4Kp6eEvQ
    • Una volta sbloccati i connettori, estrarre con attenzione i cavi.

  12. TVHkBFeHNgwSLtOE
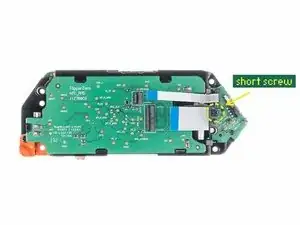
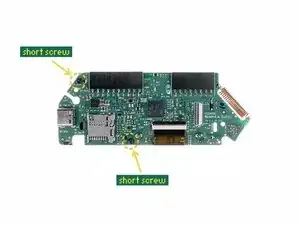
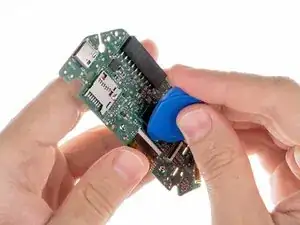
    • Svitare la vite corta che tiene la scheda iButton in posizione utilizzando un cacciavite PH0.

  13. g3NS62xDYnRICPXI
    • Una volta rimossa la vite, rimuovere con attenzione la scheda iButton.

  14. hGPuCrbgYMDLYRCB
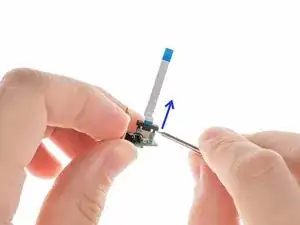
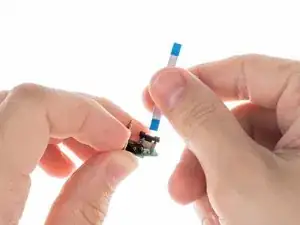
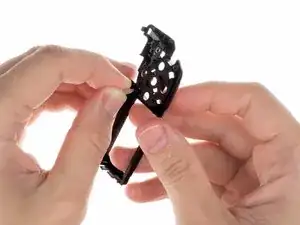
    • Per scollegare il cavo piatto dalla scheda iButton, utilizzare un cacciavite piatto per rilasciare con attenzione la serratura tirando verso l'alto il fermo, quindi tirando delicatamente il cavo del nastro.

  15. OAJAXQB3lHjXeWFo
    • Una volta sbloccato il connettore, estrarre delicatamente il cavo dal connettore.

  16. F6odPQBvB2TQEfZ5
    F6odPQBvB2TQEfZ5
    ySMEnLQKq3Yqgylr
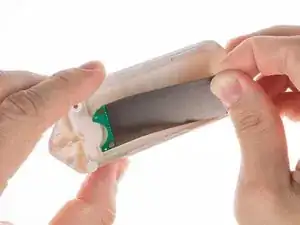
    • Per rilasciare il telaio della batteria, dondola gentilmente avanti e indietro mentre si separano le due parti.

  17. dOwRmQTFFpov2rIK
    • Per rimuovere la scheda RFID NFC, rilasciala dai blocchi nella sequenza mostrata.

  18. KEqBCnnFC4MbLMKt
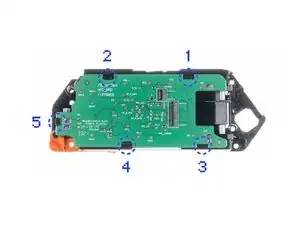
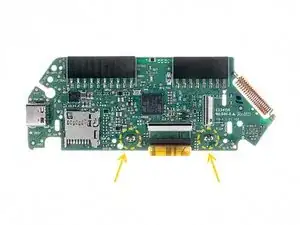
    • Rilasciare la scheda dai fermo premendo sul bordo del telaio vicino al fermo specifico nella sequenza specificata.

  19. CeVKc2Q3UWKdUvvk
    CeVKc2Q3UWKdUvvk
    tPbKrl3xngZR3GhY
    • Rimuovere il motore per la vibrazione.

    Do we have a part number for the motor?

    James Randolph -

  20. RuQuLNPDrG1fkTu1
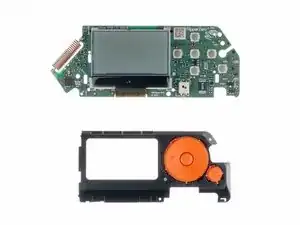
    • Per rimuovere il supporto, utilizzare un cacciavite PH0 per svitare la vite corta che lo sta fissando in posizione.

  21. HZ1yT6jDXHIUUHM2
    • Rimuovi il supporto dal telaio.

  22. scLYMMBAHiTmF3NV
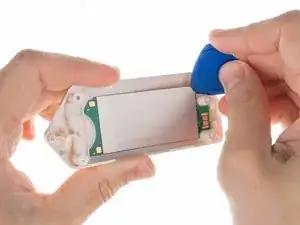
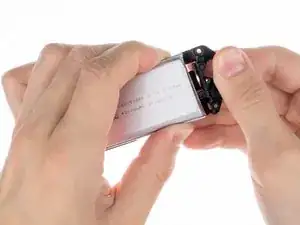
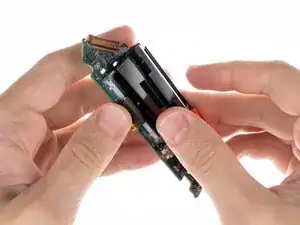
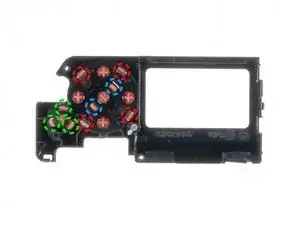
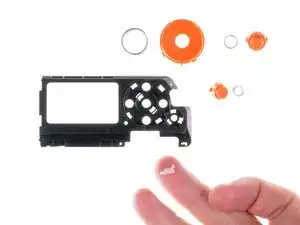
    • La batteria è attaccata allo chassis con nastro biadesivo. Per rimuoverlo, usa un plettro di plastica per staccare delicatamente la batteria dallo chassis.

    • Attenzione: non premere la batteria con strumenti affilati. Una batteria forata può perdere sostanze chimiche pericolose o prendere fuoco.

  23. Lpwh1ffJNTlwDsXe
    Lpwh1ffJNTlwDsXe
    3IYYl35RMNDVLl4Z
    • Rimuovere la batteria dal telaio.

    where is the replacement battery? what are the dimensions of the battery?

    Arni Nym -

    This kind of battery is standard, as this device is not a known brand, you will not find a Flipper Zero branded spare part batteries, indeed, it's a standard no-name Li-Po battery that is being used in this device.

    From the picture, we can guess this battery is a standard 3.7V Li-Po battery having a power capacity of 7.77W, so the capacity is indeed 2,1Ah -> so 2100 mAh of capacity.

    Note : we can observe there is a circuit protection (BMS) on this battery, I don't know how this device reports voltage, temp and other battery-related stats but these features may not work properly if BMS of the new battery is not compatible with the device firmware.

    After more research, I found the data sheet of this battery for you as the manufacturer of this device made public a lot of hardware related docs : https://cdn.flipperzero.one/FLIPPER_ZERO...

    I found dimensions are specified in it with other useful information. So I don't know which dimensions you are searching for, there are mentions on page 4 of this doc

    Brendan -

    There is also additional dimensions specified page 5 and also pictures starting page 22.

    This document has been made by the chinese laboratory in charge of thesting the safety of the battery used in the flipper zero device.

    Brendan -

  24. JjxCkxSm3PF2bJwD
  25. TPWsBjLSTSAVkupG
    • Estrarre il flat cable.

  26. ubAIKFULQyuFUTaj
    • Svitare le due viti corte che tengono il telaio del pulsante usando un cacciavite PH0.

  27. 3JG1etLlCLFZRRYi
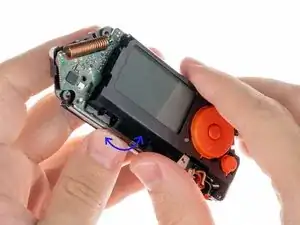
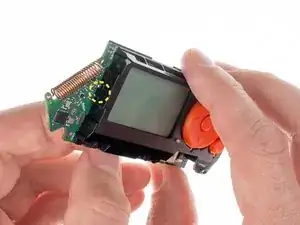
    • Per scollegare il telaio del pulsante e la scheda, premere il fermo sul lato mostrato di seguito.

  28. NMTgFPJjmUUAcTQ4
    NMTgFPJjmUUAcTQ4
    RWiXkgRStjfKPZxd
    • Rimuovere il telaio del pulsante.

  29. mFyr2EoaDLGX2hNl
    • Scollegare il cavo dello schermo dalla scheda. Usa un plettro di plastica per sollevare il fermo per aprire il blocco.

  30. IXuPa6IoBoIs5D2P
    • Rimuovere il cavo dalla scheda.

  31. EeaJBfSbI3PZoqjp
    • Per rimuovere lo schermo è necessario dissaldare due contatti.

    • Fai attenzione durante questa fase a non sciogliere o dissaldare accidentalmente altri componenti vicini.

  32. fexNkgRkTMdnR1dS
    • Per rimuovere i pulsanti è necessario rilasciare i blocchi.

    • OK

    • D-pad

    • Indietro

    • Il pulsante centrale (OK) viene rimosso dopo il pulsante di navigazione (D-pad)

  33. FGWEpntlD2uhEKZ3
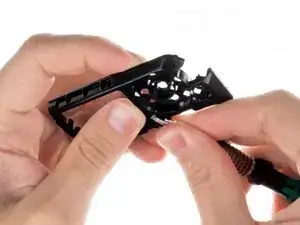
    • Rilasciare i blocchi con un cacciavite piatto. Devi stare attento con le molle sotto i pulsanti.

  34. 3VW5itLpHwy6louN
  35. qEphZjBe2p3UX4aU
    qEphZjBe2p3UX4aU
    AyQXrAMkMBhvxuUS
    • Estrarre la guida luminosa dall'interno del telaio.

  36. weZSuIQ2yQRlri43
    • Qui puoi vedere tutte le parti disposte insieme.

Flipper Devices

Membro da: 29/06/22

670 Reputazione

13 commenti

I'd say, that long screws requires PH1 screwdriver.

Evge Key -

Agree with Evge, when I read "PH0" I picked mine but they wouldn't quite fit. I had to use a PH1 (1.2 to be exact, according to toolset casing) to be able to unscrew the chasis and get to the battery (I had to only remove and plug back the battery cable to fix my problem)

João Ciocca -

Careful with those screws. They are not great quality and strip easily.

andy cooper -

Yeah, I have run into the same issue. The screw securing my IR/iButton board sheered in half! I cant remove the bottom part since its flush with the socket, but the board seems to be alright without it and is still in place since the chassis supports it. I still need to find a way to get it out :)

SkidFace -

Do you know what kind of these screws are?

Gugo -

Second that about the screws being low quality. Also, if your FZ battery decides it doesn't like you anymore (it shows some 50%ish max), open it (steps 1-4), disconnect it (steps 7-9), and reconnect the battery. And it seems to be something that's gonna be routine, because it happened back in October and again now in December.
When disassembling this time I checked the screws better, and it seems a 2.0 phillips is the best fit for the long screws.

João Ciocca -

Second the question for what kind of screws are being used? Size/thread?

Enygma -

Am I the only one that ended up with 5 long screws?

geronimo larralde -

My small iFixit toolkit doesn't have the right bits for step 3. PH0 strips the slot on the screw, and PH1 does not fit into the hole. If you have the same tools as me, don't force it, you'll do damage to the screws. Try other screwdrivers.

Tamás Hegedűs -

The IR cover does come out, just pull

Carters lil channel -

there are three golden pins that fall out when you open the clamshell. this doesnt show them or where they go. fml.

Bob L. Phishmann -

Those pins are supposed to be attached to the IR board, you have accidentally broken them off in the disassembly, they can only be soldered back on with a soldering iron/hot air station. You can also just leave them in their respective holes and the press of using the pins, will make them make contact with the board, they will just be loose. Or leave them out entirely, iButton isnt too common in most countries.

Francis -

what do i buy to replace gpio pins 1-8?

Michael S.bush -