Introduzione

  1. CK2LCNb5u6LAUmE5
    CK2LCNb5u6LAUmE5
    h5q1oaMTVTORqAYE
    • Rimuovi il coperchio della batteria facendolo scorrere via.

  2. qSVZJ13TVFxEni3T
    qSVZJ13TVFxEni3T
    sPlBCKecHXTssHmh
    • Svita la vite a croce Phillips #1 nel vano batteria dopo aver rimosso la batteria.

  3. JTsvq4yeqGhgS3gU
    • Non serve togliere i gommini poiché sono tenuti insieme da una sola vite.

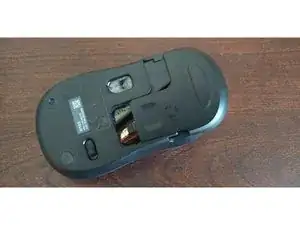
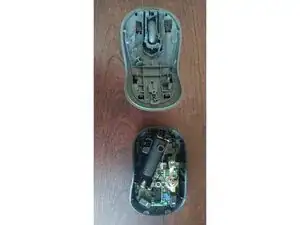
    • Muovi la parte grigia che si trova nella parte superiore per rimuoverla, tirandola verso di te (lontano dalla rotella del mouse).

    • Non tirare il coperchio grigio verso l'alto e nemmeno la parte vicina i tasti.

    • Motivazione da Jacob Hickey "perché nella parte superiore interna del mouse, dove c'è la rotella, ci sono dei dentini a cerniera che si spezzeranno se lo tiri. È come aprire un portagioie che ha una cerniera su un'estremità... se mi spiego..."

    • L'immagine mostra come dovrebbe apparire il tuo mouse alla fine.

    Just note, the reasoning on the author of this guide indicating “Do not pull the grey cover towards the top and do not pull the part near the keys” is because in the internal top part of the mouse where the buttons/scroll wheel is, there’s hinges-like “tooth” that’ll snap if you do pull on it. It’s like opening a jewelry box that has a hinge on one end of the box… if that makes sense…

    Jacob Hickey -

  4. PCdhKDJRmJ5xyLu6
    PCdhKDJRmJ5xyLu6
    dNLvoG5TCEnZZOnt
    VhwutNNBkQTSgrLv
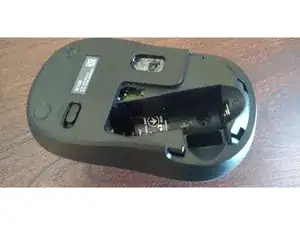
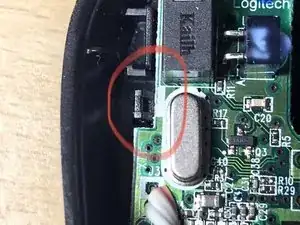
    • Spingi indietro le piccole clip nere per rilasciare il circuito stampato.

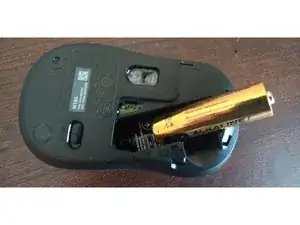
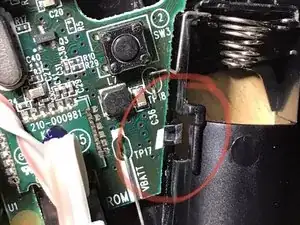
    • Fai scorrere verso l'alto i connettori metallici della batteria per liberarli dal case protettivo (considera che questi sono saldati al circuito stampato).

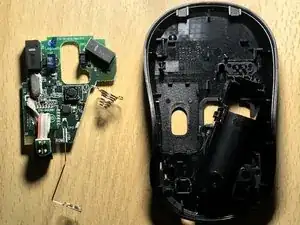
    • Rimuovi il circuito stampato con i connettori della batteria e il sensore di immagine ancora collegati.

  5. x44MSmXUoumKCAdW
    x44MSmXUoumKCAdW
    JL6GDAXe6fxNYr3C
    A5KlDjFGdMiKEwAf
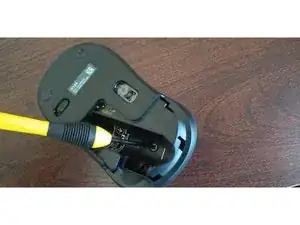
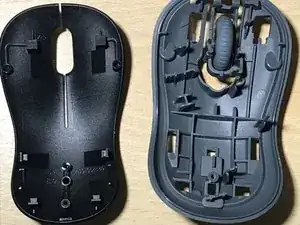
    • Lavorando da dietro a davanti (da sinistra a destra nella prima immagine) sgancia le prime due paia di clip nere in plastica.

    • Fai scorrere il case protettivo superiore nero sopra la rotella del mouse mentre fai pressione sulle due clip frontali per rilasciarle.

    • Separa completamente i due strati di case protettivo.

Conclusione

Per rimontare il tuo dispositivo, segui queste istruzioni in ordine inverso.

Karmanyaah Malhotra

Membro da: 23/09/18

855 Reputazione

9 commenti

Thank you Karmanyaah Malhotra for takin’ the time to do this for everybody like me :-)

Jacob Hickey -

TElll me now or else

Brayden Karanian -

I will be sad

Brayden Karanian -

Wow! As an engineer in molded plastics, this mouse is the most gorgeous impressive molded thing I've seen in a long time. Worth taking my mouse apart just for fun. Impressed with Logitech again. Thank you for the excellent instructions.

Bought my keyboard/mouse at Microcenter.

James Salter -

The screw in the battery holder was covered by a sticker on my mouse. So I used a small screwdriver to just poke through the sticker and I was able to get it apart. Excellent post. Saved me a lot of time & hassle. My left click button had lost its spring because over the years the cover was wearing away the button. Just put a small piece of electrical tape over the part of the cover that pushes the click button and now it works great again. Thanks!

Michael Nagy -

Also, I second James Salter's opinion on this molded plastic. Still springy after all these years. Kudos to Logitech!

Michael Nagy -

I seem to have a cheaper version. I'd guess it's an illegal clone but do people really bother with low end mice?! I don't have that red jumper cable - the laser is on the main board. I don't have any circuit board clips, not as many clips on the top & the bottom of the top is flat - none of the structural reinforcing cross beams present. The wheel is a completely different device.

My problem is the wheel - it appears to have been directly attached to the sensor with a <1mm rod which has broken. I can not even take the part of the wheel in the sensor out; AS shown in my ASCII art below (S: sensor. W: wheel) it is practically part of the sensor:

SSS WW

WS WW

WWWWWWWWWW

WS WW

SSS WW

Hopeless? I was thinking of melting a hole with a needle & jamming in a slightly larger metal rod but I can't even tell how much of the sensor face is wheel, and how much is a plastic plate covering the wheel. If I try this - any tips on materials/hole boring technique/glue?

Carter McLaughlin -