
Introduzione
Questa guida è solo un prerequisito per disconnettere la batteria su un iPhone 7 Plus. Questi passi dovrebbero essere eseguiti ogni volta che si ripara un iPhone per evitare di attivare l'alimentazione durante l'operazione.
-
-
Spegni il tuo iPhone prima di iniziare lo smontaggio.
-
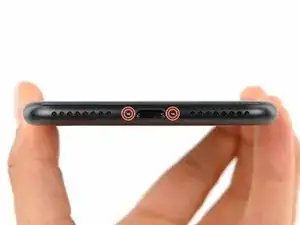
Rimuovi le due viti pentalobe da 3,4 mm sul lato inferiore dell'iPhone.
-
-
-
Riscalda l'iOpener per 30 secondi.
-
Se durante la riparazione l'iOpener si raffredda, scaldalo di nuovo nel microonde per altri 30 secondi.
-
-
-
Rimuovi l'iOpener dal forno a microonde, afferrandolo per una delle due estremità piatte per evitare il contatto con la parte centrale calda.
-
-
-
Riempi una pentola o una padella con abbastanza acqua per immergerci un iOpener.
-
Scalda l'acqua finché non bolle. Spegni il fuoco.
-
Posiziona l'iOpener nell'acqua calda per 2-3 minuti. Assicurati che l'iOpener sia completamente immerso nell'acqua.
-
Usa delle pinze per estrarre l'iOpener scaldato dall'acqua calda.
-
Asciuga accuratamente l'iOpener con un asciugamano.
-
Il tuo iOpener è pronto all'uso! Se devi scaldare di nuovo l'iOpener, scalda l'acqua fino all'ebollizione, spegni il fuoco e immergi l'iOpener in acqua per 2-3 minuti.
-
-
-
Scaldare il bordo inferiore dell'iPhone aiuterà ad ammorbidire l'adesivo che fissa il display rendendolo più facile da aprire.
-
-
-
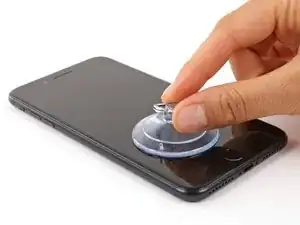
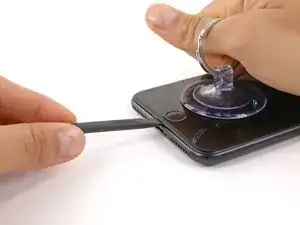
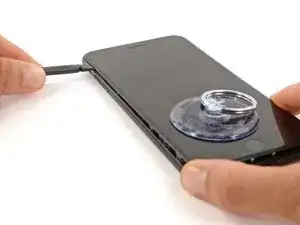
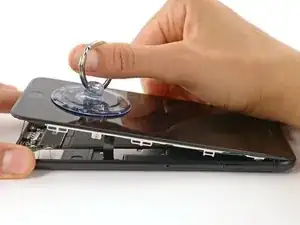
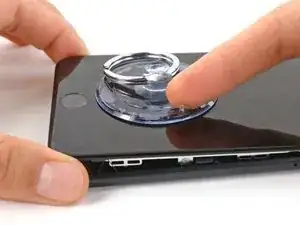
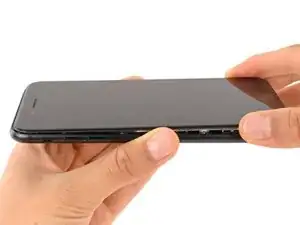
Applica una ventosa nella metà inferiore del pannello frontale, appena sopra il pulsante home.
-
-
-
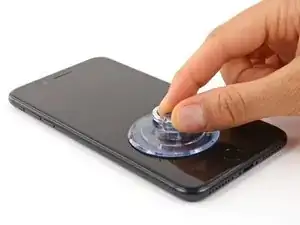
Tira la ventosa con una pressione forte e costante per creare una piccola fessura tra il pannello anteriore e il case posteriore.
-
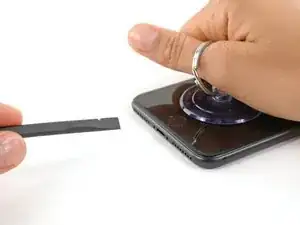
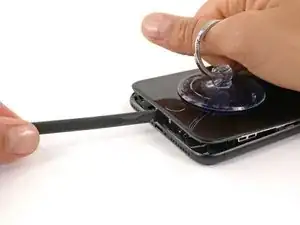
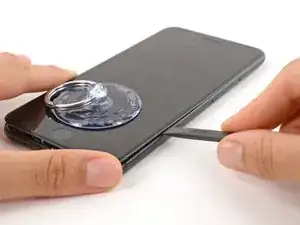
Inserisci l'estremità piatta di uno spudger nella fessura.
-
Mentre continui a tirare la ventosa, fai ruotare lo spudger per allargare l'apertura tra lo schermo e il case posteriore.
-
-
-
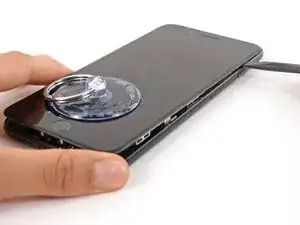
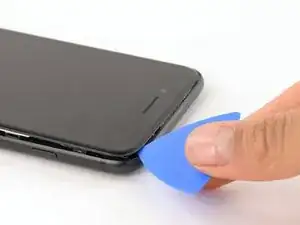
Inserisci l'estremità piatta di uno spudger tra il pannello anteriore e il case posteriore nella parte inferiore sinistra dell'iPhone.
-
Fai scorrere lo spudger lungo il lato sinistro del telefono iniziando dal basso e muovendoti verso i pulsanti del controllo volume e dello switch suoneria/silenzioso, per rompere l'adesivo che tiene in posizione il display.
-
-
-
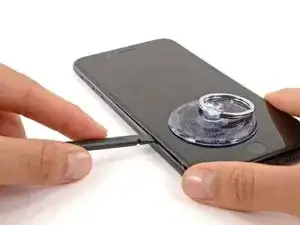
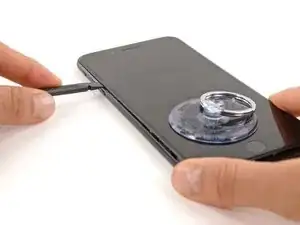
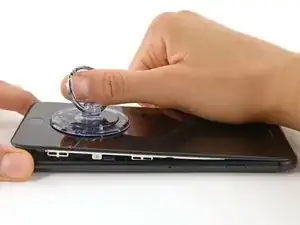
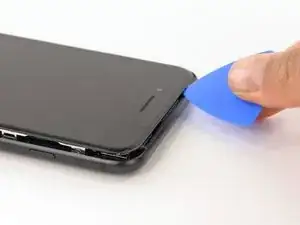
Rimuovi lo spudger dal lato sinistro del telefono e inserisci la sua estremità piatta nell'angolo inferiore destro.
-
Fai scorrere lo spudger sul lato destro del telefono fino all'angolo superiore per rompere l'adesivo che tiene in posizione il display.
-
-
-
Fai scorrere una levetta di apertura sotto il display lungo il lato superiore del telefono per indebolire l'adesivo rimanente.
-
-
-
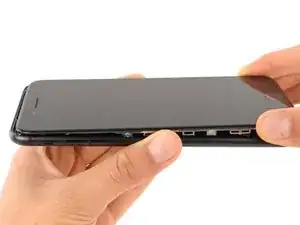
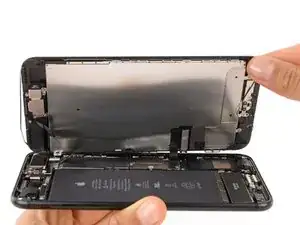
Tira il gruppo display allontanandolo lievemente dal bordo superiore del telefono per sfilare le clip che lo fissano al case posteriore.
-
Apri l'iPhone inclinando il display e sollevandolo dal lato sinistro, come si farebbe con la quarta di copertina di un libro.
-
-
-
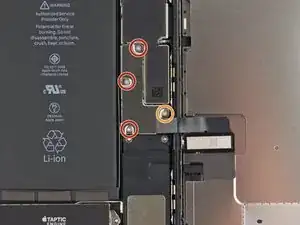
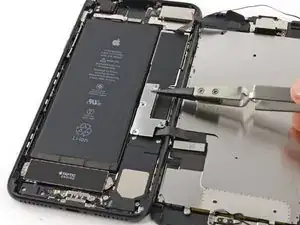
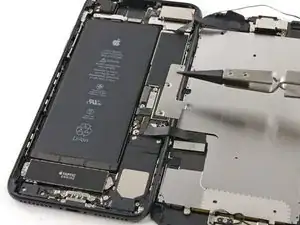
Rimuovi le seguenti quattro viti tri-wing Y000 che fissano la staffa inferiore del cavo del display alla scheda logica:
-
Tre viti da 1,2 mm
-
Una vite da 2,6 mm
-
-
-
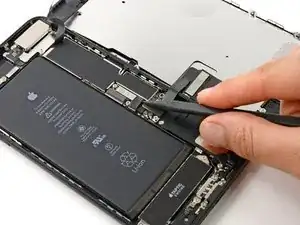
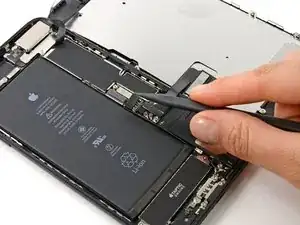
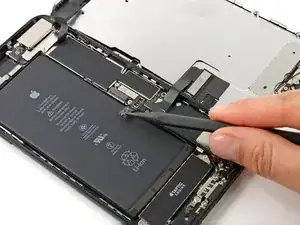
Usa l'estremità a punta di uno spudger per sollevare il connettore della batteria dal suo zoccolino sulla scheda logica.
-


Per rimontare il tuo dispositivo, segui queste istruzioni in ordine inverso.

Un commento
after I replaced my battery and tried to turn on my phone it would just stay on the apple logo and nothing would happen. I know I did everything right but… help
The recommendation of discharging the battery is completely unnecessary. Even a 25% charged battery can explode. Completely ridiculous suggestion.
pargoff -
The risk of thermal runaway on these batteries decreases with the battery's SOC (state of charge). Below 50% charge the risk is fairly low, and at 25% charge the risk of a thermal event is near zero. If I recall correctly, the same suggestion appears in Apple's official (non-public) service manuals for the iPhone.
Jeff Suovanen -
@jeffsu Yes, that is correct. Apple does require all certified staff to discharge the battery below 25%. This is an industry standard for all LiION batteries. If you don’t want to do this, just make sure to not puncture the battery and disconnect it first thing.
iHelpU.Tech -
Hang on a second here, doesn’t the Ifixit part I ordered come with the seals? The display assembly? It doesn’t. Now I have to wait another week?!
Vanessa Pinter -
How do you turn off if the screen isn’t responding to touch?
adam -
The replacement battery came with the seal—but how do you put it on???
lkollar -
Instructions for replacing the seal are here: Sostituzione guarnizione adesiva display iPhone
bester -
I just found the instructions on how to install the seals AFTER I was completed and had to figure it out. Maybe, just maybe you should link this somewhere on the guild instead of buried in a comment. Just a thought.
Charles Meitin -
Step 1 is: Read through all the steps and comments or the method prior to starting on this Step 1. There's a lot of much needed information and experience that you can learn from which will reduce the chance of struggling, wasting time or even breaking your device.
My favourites are:
Use a hot water bottle.
Label all screws you remove with their size and location on a piece of paper with double sided sticky tape.
Test the lightning assembly at step 13
There is a Standoff driver bit in the box, don't use a screwdriver.
etc...
Neil Eriksen -
A tip for looking out for all those little screws. I used an ice block tray, for all the little screws etc. I numbered each with the step number, as in the instructions, but not all steps have bits to look out for. Where two different size screws are used I had a tray for each size and marked step a and step b. For this I coloured each tray sticker with the colour of the screw as shown in the instructions. All this worked a treat with no confusion or using the wrong part.
Herb
Herb Adler -
The screw size for those with a screw set is P2.
Gareth Flandro -