Introduzione

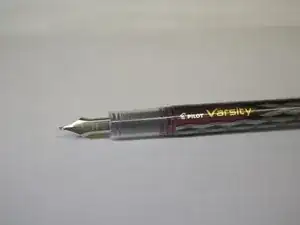
This repair guide will detail how to repair a broken fountain pen nib. The nib of a fountain pen is where the ink flows from, and having a broken nib results in a non-functioning fountain pen. The repair mostly requires household tools, as well as a polish at the end.

  1. XToL11m5ryheHxNX
    XToL11m5ryheHxNX
    ucuTlMiHZKlFGJJP
    1OXNT651nXJ6pLtS
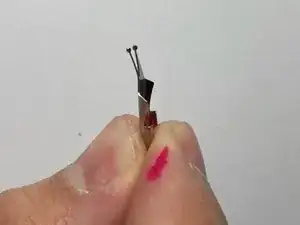
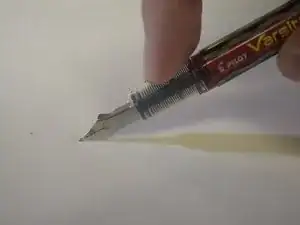
    • Assess fountain pen nib damage. The nib is the small metal piece at the tip of the pen from which ink flows.

    • Practice caution when removing the nib, as it is sharp and may cut you.

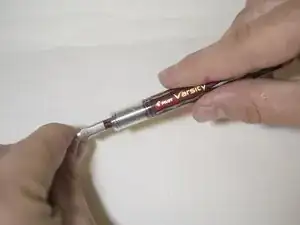
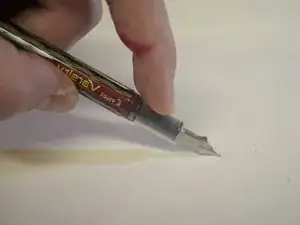
    • Remove the nib by gripping its top with two fingers and pulling away from the body of the pen. Gently grip the top of the nib with your index finger and thumb. Pull the top away from the pen's body to remove the nib.

    • Removing the nib helps to better assess the fraying of the tines, which are the two thin pieces at the point of the nib.

  2. FDryuSmFUmBgNrQS
    FDryuSmFUmBgNrQS
    3qumNSmwYJwOn4KV
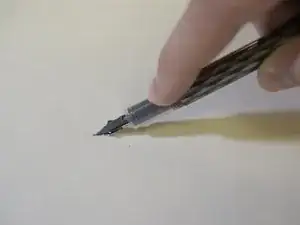
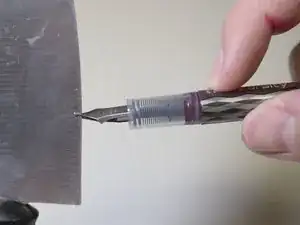
    • Press the nib of the pen down onto the flat surface.

    • Gently apply pressure to straighten out the nib.

    • Slowly roll the fountain pen nib horizontally, from left to right.

    • Rolling is the motion of pressing the nib down on a flat surface and moving it back and forth to straighten out any bends.

    • Rolling the nib of the fountain pen fixes flayed/separated tines.

  3. xGOISKP2xE5bfYQN
    • Rotate the nib by 90 degrees.

    • Apply pressure in a style similar to Step 2. Continue to roll the nib, from the tip to base and back.

    • Rolling the nib after rotating it helps to repair bent tines.

  4. JfovNTRFYhyRckUI
    • Flip the pen over and repeat the process of Step 3.

    Thank you! I found a box of my dad's fountain pens from the 1950's, the ones he used to write love letters to my mom. I know, it sounds like a sappy Life Time movie. But now, they write without the scratching. Maybe I'll try writing a romance novel!

    Ginger SM -

  5. roYSVefhcAW6PxaM
    roYSVefhcAW6PxaM
    qybYpRSxfLjRaTEY
    • Be sure to practice caution when using sharp tools such as the knife!

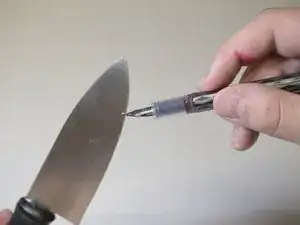
    • Slide the knife, or thin metal surface, between the two tines on the nib.

    • Slowly move the pen nib up and down the length of the knife in a flossing motion.

    • This action can help correct misalignment.

  6. DLmcHKD5OMMDKbHJ
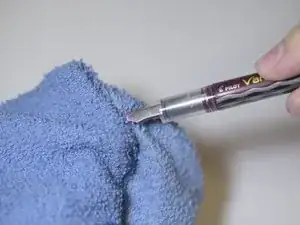
    • Apply some simichrome polish onto a towel or rag.

    • Wax the entirety of the nib using the rag; try to avoid the body of the pen.

    • Removing the pen nib again may make this process easier for some fountain pens.

    • Polishing the pen nib helps to increase ink flow.

  7. bfVvgIWwaKxNYxyi
    • Allow the polish to dry before using the pen.

    • Optional: Using a dry chrome polishing rag, buff the pen nib to set the polish.

    • Your newly aligned pen is now ready to use!

    thank you, works fine.

    Flavio Bracali -

Conclusione

To reassemble your device, follow these instructions in reverse order.

Clayton Braga

Membro da: 20/02/20

238 Reputazione

0 commenti