Introduzione

Many people have accidentally stuck their metal key into the charge port of the Rad Power Bikes semi-integrated battery, causing the fuse to blow. This guide will walk you through the steps to replace your fuse. You may also find this video helpful: https://www.youtube.com/watch?v=Q287-kQN...

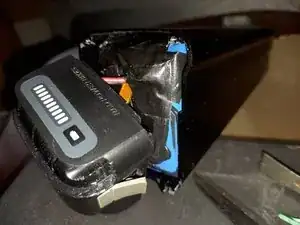
NOTE: If your battery is wrapped in blue plastic, you should be able to replace your fuse. If it's wrapped in black plastic, you may have a newer version of the battery with the fuse soldered on.

  1. pXT5fdTUbBkDmk51
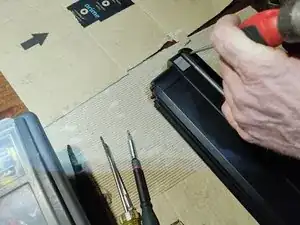
    • Use a flathead screwdriver to pry into the end cap and then tap at an angle with a mallet to knock off end cap. This will reveal the screws underneath. Start with the end cap closest to the charge port. (You may not need to take off the other end, depending on how step 3 goes.)

  2. rabiOXuNlaCbYTCu
    rabiOXuNlaCbYTCu
    L6QiNMKxvNWP1sF5
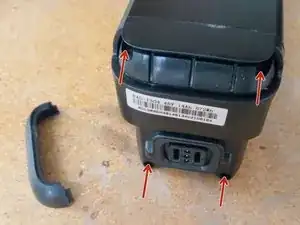
    • There are four torx 10 screws on each side. Two are easy to access, but the other two are buried deep in the recessed opening, so you’ll need a torx 10 screwdriver that can go deep.

  3. edpT4eYNxynAkWPO
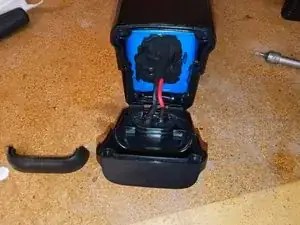
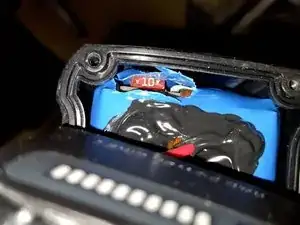
    • The fuse is at top left corner on charge port end of battery. Pull the blue casing out a bit to access it. If there is a lot of black rubber sealing your battery into place, you may need to open the other side so you can push it out from one end. Your goal is to get top portion of battery sticking out the top, making the fuse accessible.

    On mine, there's 4 globs of white glue holding the battery to the housing, two globs on each end. I don't know how to cut it or dissolve it. So I can't move the pack up and out of the housing. What an incredibly terrible place to put a fuse!

    Sanford Redlich -

  4. euFE42NYUNuBZuxb
    euFE42NYUNuBZuxb
    2wleMODJXUaLkrNp
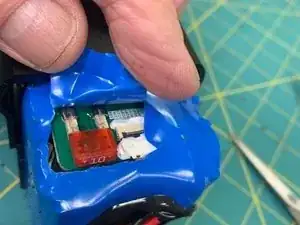
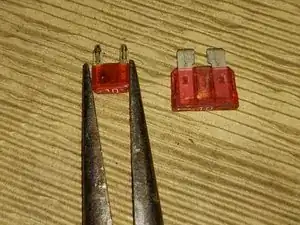
    • Use a utility knife to make a small slit so you can remove the broken fuse. Proceed slowly and carefully. To the right of the fuse there is a flat ribbon that conveys the battery status to the exterior lights. You don't want to accidentally cut through that.

  5. PXA1WoYEhpDGGvgM
    • You will see a red fuse with the number 10. You can pull it out using needle nose pliers.

  6. PxRYuaLkXEfARENq
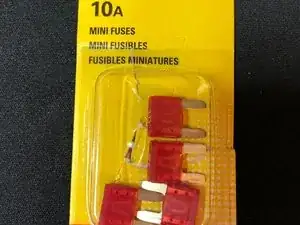
    • Insert the working fuse in the same spot where you removed the broken one. Then, plug in your charger to confirm that both lights are red indicating it is fixed and now charging. If it works now, congrats!

  7. VJGrjGbW1SLDJyZA
    • Use electrical tape to tape where you cut the slit. You could also try liquid electrical tape. Avoid using silicone with acetic acid since it can corrode the electronics in the battery pack.

    Different style of battery no visible fuse

    Russell Kling -

Conclusione

To reassemble your device, follow these instructions in reverse order.

Eve

Membro da: 02/08/22

289 Reputazione

14 commenti

Very good information! I had to slide out the battery also to get to the fuse. They probably changed the design so it was harder to change the fuse ourselves.

harvey -

We replaced the fuse, but the battery doesn't charge up. What next?

Kathy Marshall -

I have a Rad Rover 6 Plus. Battery wouldn't charge or even show a single bar on display and was not in "transport mode". I followed this guide but had to open BOTH sizes to cut the battery adhesive to be able to slide the batter about 1 or 2 inches as the 10 amp fuse was mounted deeper down on the RIGHT side. Note also that I found a 30amp fuse on the other side (opposite the charge port). It was still okay, but the 10amp fuse was toast. I replaced it and the battery is charging just fine!!!! Why don't they make this any easy fuse replacement. These are $600 batteries that shouldn't be replaced simply due to a 10 cent fuse!

Todd Nuttall -

Does that 10amp mini red fuse need to be rated for voltage? Are there specific 10amp mini red fuses for 48v batteries or will any 10amp mini fuse do?

Bob Beaker -

I have the Rad Rover 6 Plus and the battery is dead for some reason in less than a year with under 50 miles rode on it.

I have the type of battery that should be repairable but they put so much silicone around the sides and especially the bottom it is literally welded in there with the silicone. It seems to me like they don't want anyone to be able to fix the battery.

Jeff Miller -

Keep trying. I repaired 2 rad rover 6 plus batteries last night. Take a small screwdriver and carefully work the edges. It will eventually come out. My batteries would charge and would light up on the display but provided zero power. I had to replace the 30 Amp fuse at the bottom of the battery.

Lyle Courtney -

This is great. Took about 35 minutes. Had to open both ends to push the core out enough to access the fuse.

Wade Litsey -

Why is there a sudden death warning for the Rad 6 integrated battery to not do it yourself?

Amylouisewahl -

Many thanks for the video. I also arced the charge receptacle by inadvertently sticking the key in. Saved me $600 by replacing the 10amp fuse. So glad the %#*@ thing didn't kill me as Rad inferred by opening the battery compartment and cutting the plastic wrap to get to the fuse. I also had to open both ends of the case and push some extra length out, to get to the fuse. The design is unbelievably poor.

JOHN W BASHAM -

So how do you replace the fuse if it's soldered in?

tim.r2000@yahoo.com -

I replaced the 10amp fuse and now the battery indicator does not light up at all. Before I replaced it it had three lights on the indicator.

Jennifer Ann Henderson -

However, when the battery is installed on the bike you can see the battery indicator on the bike and it is charging.

Jennifer Ann Henderson -

I've cut the ribbon cable. Any idea how to buy a replacement?

Flumm ox -

Fantastic, I was being stupid and accidentally put my key in the charge slot and blew my fuse. Easy fix. I would suggest using some good 3M / scotch brand e-tape and doing a good job sealing it back up as good as possible before reinstalling to prevent corrosion / water ingress. Nice work!

Trey -