Introduzione

  1. RglrkRhuoCGGuCjc
    RglrkRhuoCGGuCjc
    ohI5QHOP6pGHoQSP
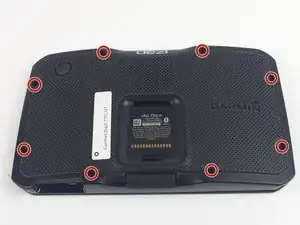
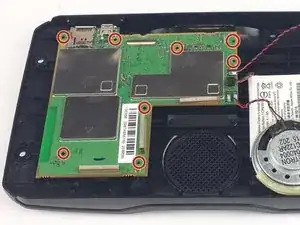
    • Turn the device screen down and using the screwdriver remove all eight screws from the back plate.

  2. 5MGKAG2ogTGE4PhZ
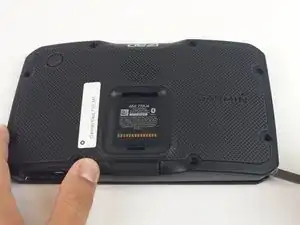
    • Place a nylon spudger in the seam between the front and back panel and carefully lift around the edge of the device.

  3. 4DRpGtWOZeB3IoGP
    • Use the spudger to pry apart the screen from all around the device.

    • Gently lift the screen so not to disconnect the ribbon attaching the screen to the motherboard.

  4. ZlMiYqQc1irkqHvi
    ZlMiYqQc1irkqHvi
    ZoVHwtjBBAgmTx3J
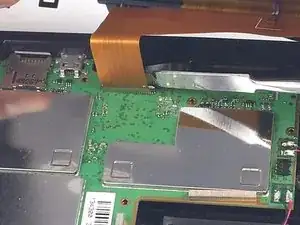
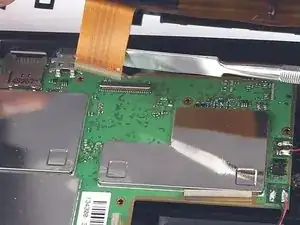
    • After you've removed the back cover, you will see a copper colored ribbon connected to a grey hinge.

    • Carefully remove the hinge from the cord using a spudger and the ribbon will come out.

    • The regular black nylon spudger should be used whenever possible, especially around sensitive internal components.

    • Make sure to wear an anti-static wrist strap when handling the motherboard.

  5. SmTSFkrRQ6TehtWF
    SmTSFkrRQ6TehtWF
    DZUQEcFnJ42G5TYS
    • Using a T5 Torx screwdriver remove the eight screws attaching the motherboard to the case

  6. XC3QjuSKpKcapHJL
    XC3QjuSKpKcapHJL
    cDAD3QFMOEIqGq1i
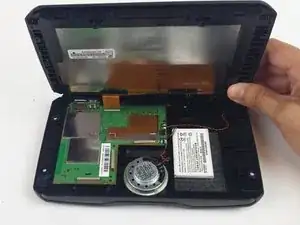
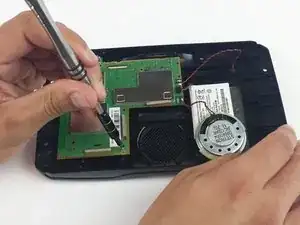
    • Carefully remove the cord connecting the battery to the motherboard, by gently lifting it straight up from the board.

    • Do not pull the cord out towards the battery. The solder joints holding the port onto the mother board may break.

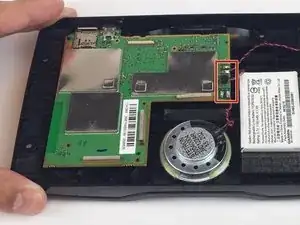
    • If you want to remove the antenna and speaker you will need to desolder them from the mother board. This is not necessary to remove the mother board.

Conclusione

To reassemble your device, follow these instructions in reverse order.

Francisco Rosado

Membro da: 05/10/16

370 Reputazione

Un commento

Onde posso comprar a Motherbord?

Carlix -