Introduzione
There will be prerequisites that you need to be complete before displacing the cooling fan.
-
-
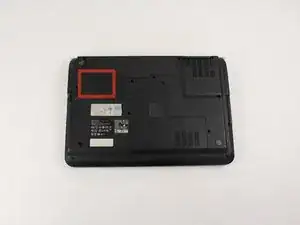
Turn the laptop on its backside with the stickers and barcode facing you.
-
Locate the latches on the top left corner.
-
-
-
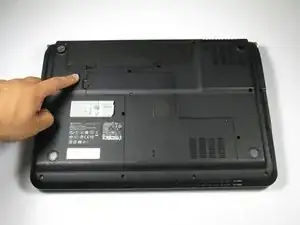
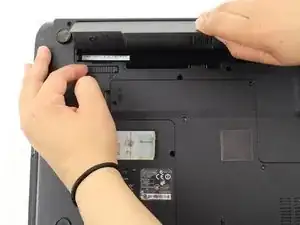
In order to unlock the battery, slide the vertical latch downward where it indicates the unlocking icon.
-
-
-
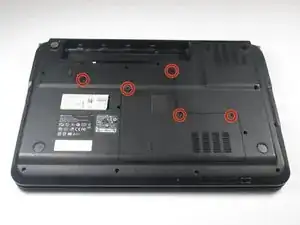
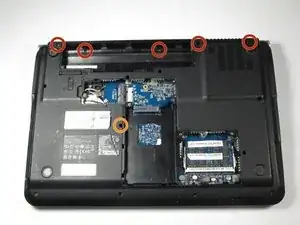
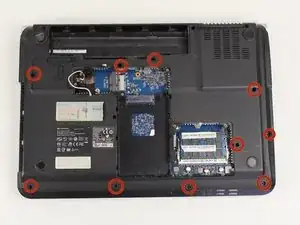
Remove the five identical 3/16" Phillips #0 screws that secure the hard drive and memory cover.
-
-
-
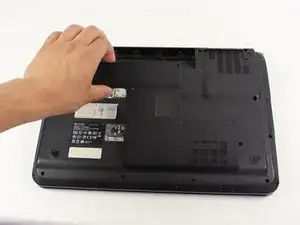
Lift up the base cover from the the top with your hands to a 90 degree angle.
-
Remove the base cover.
-
-
-
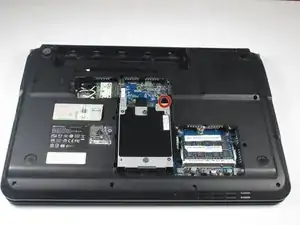
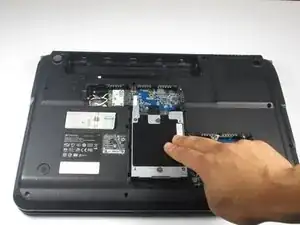
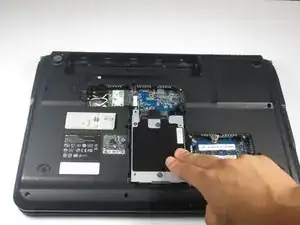
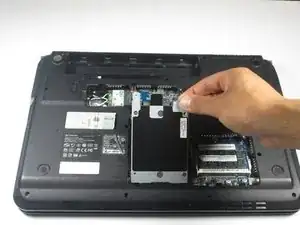
Remove the hard drive component from its compartment. To do so, slide the component downward away from the battery pack.
-
Lift the hard drive to a 90 degree angle and out of its slot.
-
-
-
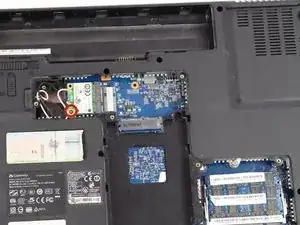
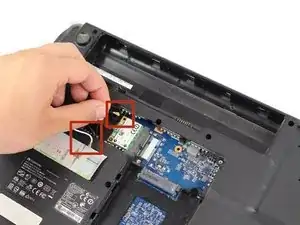
Locate the black and white cables attached to the WiFi card.
-
Gently wiggle the black cable until it detaches from the WiFi card.
-
Repeat the previous step for the white cable.
-
-
-
Gently, remove the Wifi card from its slot, and place it in a dry and safe place.
-
Turn the laptop with the keyboard compartment facing up.
-
-
-
Remove the five identical 9/32" Phillips #0 screws located under the battery and both upper corners.
-
Remove the 9/32" Phillips #0 screw fastening the optical disc drive.
-
-
-
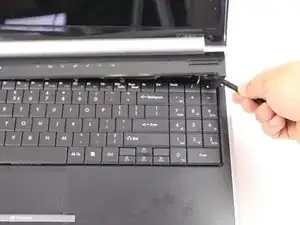
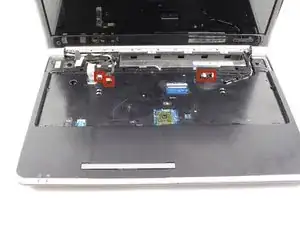
Flip the device so the keyboard and display screen are faced upright.
-
Lift up the media button board cover using the heavy duty spudger. Apply a minimum amount of upward force to the media button board cover at the right bottom corner. Starting from the right, continuously lift the cover to the left edge until completely separated.
-
-
-
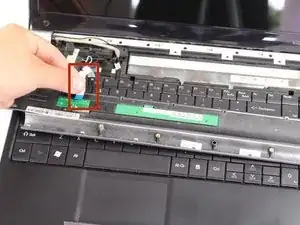
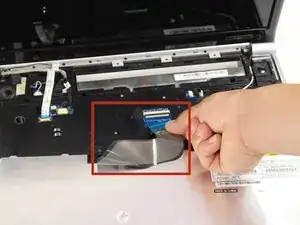
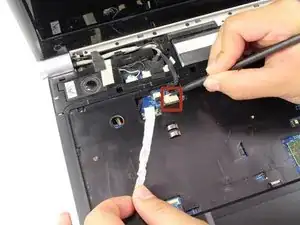
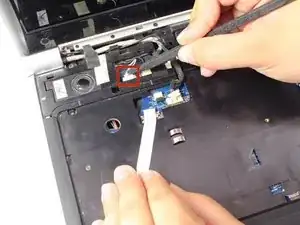
Disconnect the dark colored locking tab by pulling at a 90 degree angle, and then slightly pull away the ribbon from the locking tab.
-
-
-
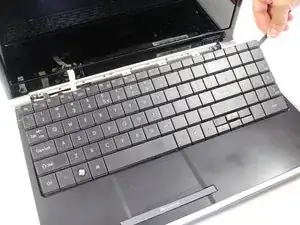
Lift up the keyboard with the spudger. Rotate the keyboard until its face down on top of its base.
-
-
-
Disconnect the brown-colored locking tab by pulling at a 90 degree angle and slightly pulling away from the locking tab.
-
Remove the keyboard.
-
-
-
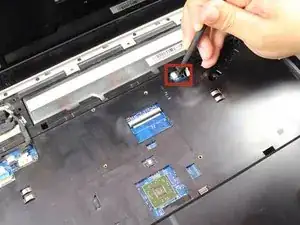
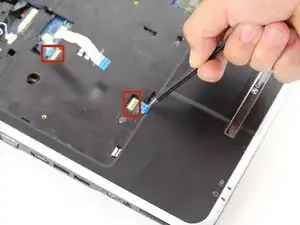
Use the pointy end of the spudger to gently pry each side of the LCD connector until they are detached from their respective ports.
-
-
-
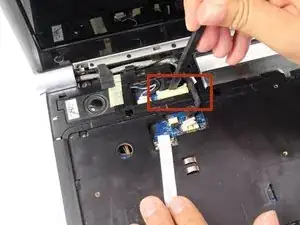
Using the flat edge of the spudger, disconnect the big white LCD cable connector by slightly pulling on it until it's detached from its respective port.
-
-
-
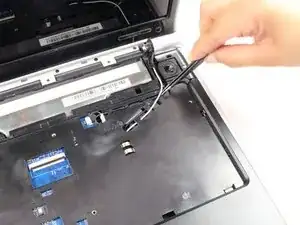
Using the tweezers, pull out the black and white cables located at the right side of the laptop.
-
-
-
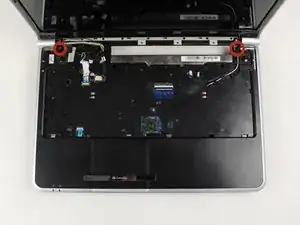
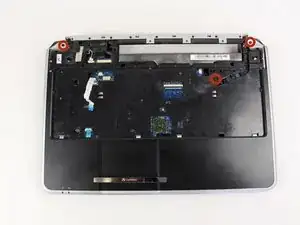
Remove the two 9/32" Phillips #0 screws on the top left and right corners.
-
Lift the entire display screen straight up using both hands.
-
-
-
Flip the laptop over.
-
Remove the three 9/32"screws that secures the top cover with a Phillips #0 screwdriver.
-
-
-
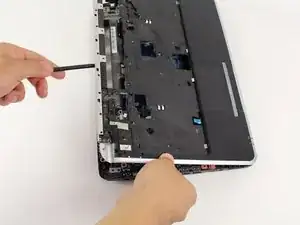
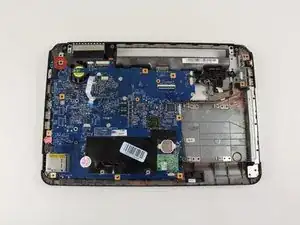
Separate the top cover from the base using the heavy duty spudger. Insert the spudger in between the keyboard base and the base of the laptop with a minimum amount of force to separate them. Follow this procedure around the perimeter until the parts are separated.
-
-
-
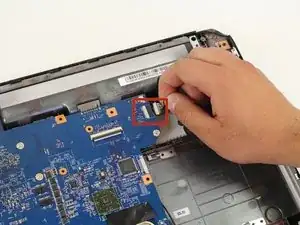
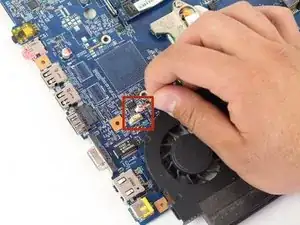
Cautiously disconnect the USB board cable that is situated on the top right corner of the motherboard.
-
-
-
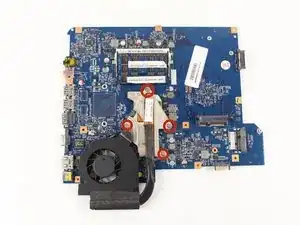
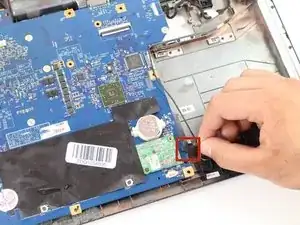
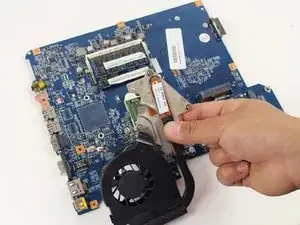
Loosen the four 13/32" screws that connects the cooling fan to the motherboard using the Phillips #0 Screwdriver.
-
-
-
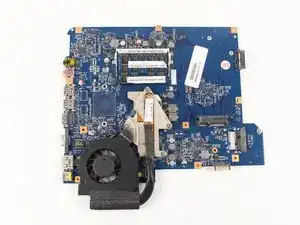
Carefully lift up and remove the cooling fan using your hands, and place it in a dry and safe zone.
-


To reassemble your device, follow these instructions in reverse order.