Introduzione

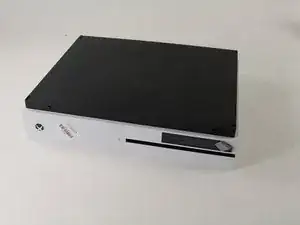
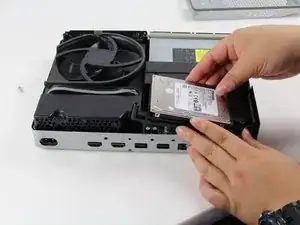
Se vuoi sostituire il disco rigido con uno più capiente, questa guida ti mostrerà come fare.

  1. AQtIBB1ZGqHTvNg4
    • Gira l'Xbox One S in modo che la parte inferiore sia rivolta verso l'alto.

  2. cI432T5plYCpwsEg
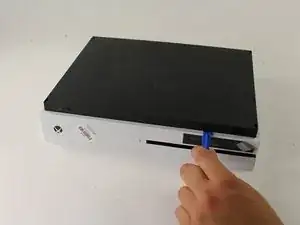
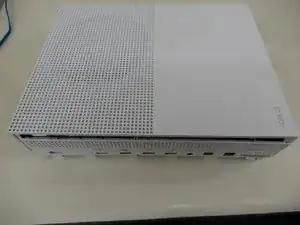
    • Comincia lavorando sul case posteriore dove c'è l'adesivo della garanzia. Infila uno strumento di apertura nella fessura tra la parte inferiore della copertura e la parte superiore forata. Quindi trova i ganci nella fessura che tengono insieme la copertura.

    • Usa lo strumento di apertura per rilasciare i ganci. Il modo migliore è fare leva per allontanare la copertura posteriore da quella inferiore.

    • Sentirai dei suoni di scatti mentre fai leva per aprire la copertura. Potrebbe essere abbastanza difficile rimuoverne la parte inferiore.

    • Potresti rompere i ganci mentre rimuovi la copertura inferiore.

    • Consigliamo di iniziare dal retro con l'adesivo della garanzia. Fai leva con lo strumento di apertura lungo il bordo posteriore finché tutti i ganci sono liberi, poi prosegui con gli altri lati. Quando tre lati sono liberi, comincia alla fine del lato opposto al pulsante sync. Fai attenzione e prenditi il tuo tempo, si separerà tutto senza danni.

    Be careful not to damage the pairing button on this part

    David -

    Important!!

    You've to start from the back corner where is the information label, because there is a main clip behind a warranty sticker

    Cristian Ramirez -

    They should add this to the guide! I didnt know that, and did some minor damage to the bottom piece where that main clip is.

    I dont mind because it's my own Xbox, but what if it belonged to a customer?

    Charles Jackson -

    They should add this to the guide! I didnt know that, and did some minor damage to the bottom piece where that main clip is.

    I dont mind because it's my own Xbox, but what if it belonged to a customer?

    💯% same opinion!

    profnussecke42o -

    This was hard! I tried using plastic pry tools, but they did not work. A metal tool did, but make sure to watch a video or two, to see what you actually are dealing with. After the videos it went quite smoothly.

    Peterdk -

    I legitimately cannot open the case where the warranty sticker is, ive tried everything, im resorting to a fork to try and open this

    Sohail ツShah -

  3. DGFtVxEdoZKRdLMd
    • Una volta rilasciati tutti i ganci, rimuovi la parte inferiore della copertura.

  4. GeIOPswgPOYsuGeJ
    GeIOPswgPOYsuGeJ
    uITOYPJDbxUgf4Lc
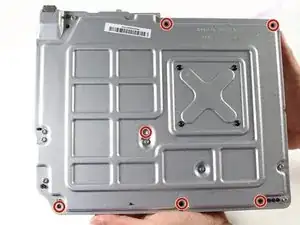
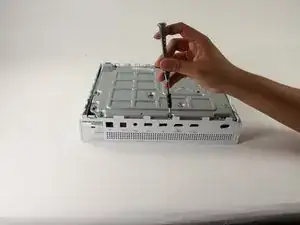
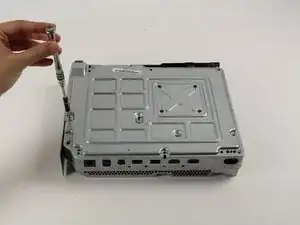
    • Usa un cacciavite Torx T10 per svitare le sei viti verdi da 50 mm segnate da F1 a F6 dalla copertura in metallo.

    My F3 isn't coming out. The screwdriver isn't sitting tight like it is for the other ones. Any idea on how to fix that?

    ben mccord -

  5. 3AbSAfsoTxUrMeTi
    3AbSAfsoTxUrMeTi
    wudY36aHJeyT6WjV
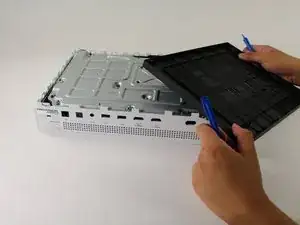
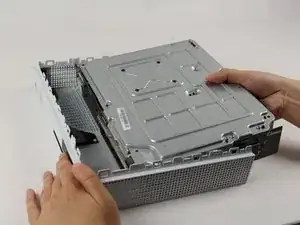
    • Separa delicatamente la copertura interna da quella bianca esterna usando il metodo appropriato.

    Essential tip: be sure to slide the metal housing backward, away from the from of the case as pictured above, rather than upward. If not, you can easily break off the teeny momentary switches on the IR blaster board!

    Mark Ross -

    “appropriate method is not descriptive like Mr. Ross’s comment. The original poster should edit the description to ensure people do in fact remove the box from the case appropriately. I would also add arrows to the picture.

    Ryan A -

    ____________⬆️

    ↖️Yes! I see it the same way!↗️

    ⬅️Arrows are always a good thing!➡️

    ↙️Can't do anything wrong with them! ↘️

    ____________⬇️

    😅😅

    profnussecke42o -

    I didn't realize that metal ribbon was connecting the case to the console and I yanked it w out realizing it was there. How o I get a replacement?

    Jerianna Mike -

  6. IIrck1QmH5CfYc1k
    • Gira la copertura interna in modo che la ventola sia verso l'alto.

  7. 4PBmHOYGGLW51Ecb
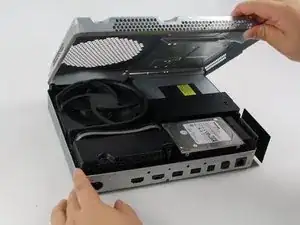
    • Per accedere alle componenti dentro alla copertura, puoi sganciare e sollevare il pannello superiore della copertura. Dovrebbe venire visa senza problemi.

  8. EFLSsRhhXsAEZnYh
    EFLSsRhhXsAEZnYh
    OjVWJsD26pdrus24
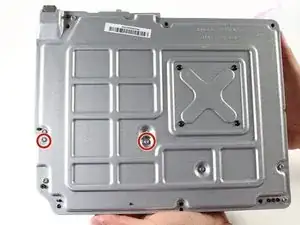
    • Per sostituire il disco rigido, gira la console a testa in giù e svita le due viti Torx T10 da 10 mm, la C3 e la C4, dal retro della Xbox One S.

    • Questo permetterà alla copertura in plastica del disco rigido di staccarsi dal resto della console.

    Some of my silver were gold screws, so just letting people know to look out for that!

    jovialkitten -

    The Torx screw circled on the left is actually C5

    Jaryn Wickman -

    I found the same. On my Xbox One S, it's C3 and C5 that hold in the hard drive caddy. C4 holds in the optical disk caddy.

    jamesr -

    Yeah, C3 and C5 on my console too.

    Jahn Roux -

    Funny thing on my console rev t t3 built feb 2018 it’s C4 and C5

    KingofRome -

    The instructions fail to mention that the top metal cover can be lifted off at this point without undoing any more screws.

    CityZ -

  9. X2IJJg3NqtsnAcbY
    X2IJJg3NqtsnAcbY
    NAHJXCj1SgvQNjOx
    3fEHBmUuTGRL3omb
    • Scollega delicatamente il disco rigido dalla scheda madre (dai due connettori in plastica).

    Do not disconnect the connector in the second image! There are tiny prongs that bend easily and if bent just a tad bit they will break off. I had first hand experience with this and I ended up breaking my Xbox because I could not put that cable back on.

    [deleted] -

    Do not remove the cable!!!! You can change while the cables are plugged. It took 2 hours trying to put mm precisely all the little pins because of the removal of the cables.

    Please update the post, I could easily end up as the Aaron, breaking the XBOX completly.

    Botond Kopacz -

    Yes, this has also happened to me the connectors had broken and the pins bent and snapped off.

    Samuel Garbutt -

Conclusione

Per rimontare il tuo dispositivo, segui le istruzioni in ordine inverso.

Victoria Law

Membro da: 26/04/17

973 Reputazione

Un commento

My F3 isn't coming out. The screwdriver isn't sitting tight like it is for the other ones. Any idea on how to fix that?

ben mccord -