Introduzione
Strumenti
-
-
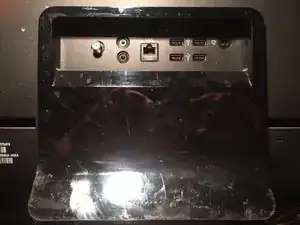
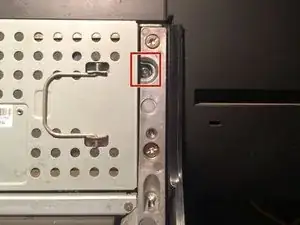
HP310-1037 Touchsmart PC with a dead hard drive. The hard drive is located behind the stand cover.
-
Lay the PC flat on the front to gain access to the stand cover
-
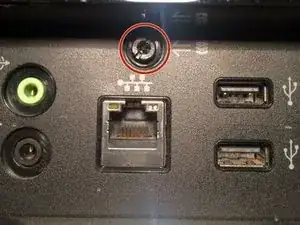
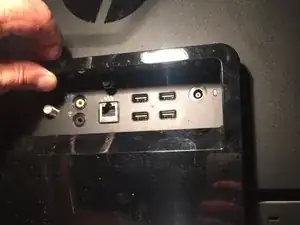
Remove the single screw that holds the stand cover to the chassis with a flat tip screwdriver
-
-
-
Remove the stand cover
-
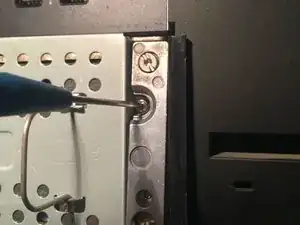
The hard drive caddy is held in place with 1 Phillips screw
-
Use a #0 Phillips screwdriver to remove that screw
-
-
-
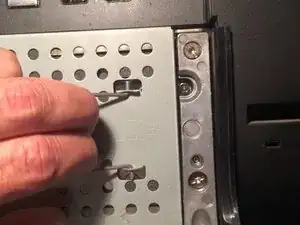
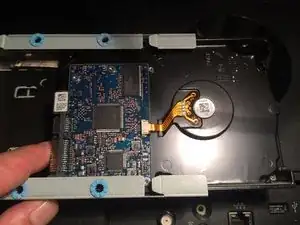
Lift the handle on the hard drive caddy
-
and pull it to the backside. This will remove the hard drive caddy from the computer.
-
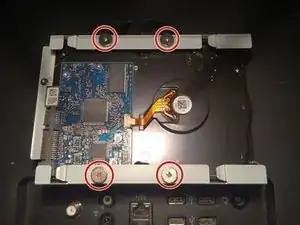
To remove the hard drive from the caddy, turn it over. There are four Phillips scres that hold the hard drive in place.
-
-
-
Once the four screws are removed, slide the hard drive out of the caddy.
-
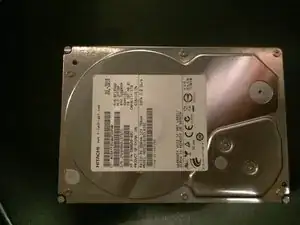
Here is the failed drive. It is a Hitachi HDS721010CLA332. Failure with this drive is all to common.
-
-
-
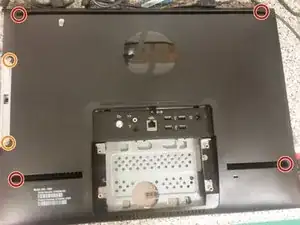
Remove the four Torx/Flathead screws securing the stand.
-
Lift the bottom part of the stand upwards, and it will come off.
-
-
-
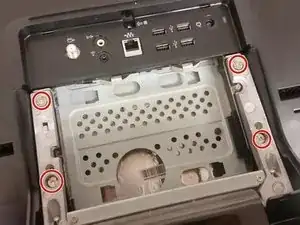
Remove the four Torx/Flathead screws securing the back cover.
-
Also unscrew the two captive Philips screws securing the disc drive, as these two screws also secure the back cover.
-
-
-
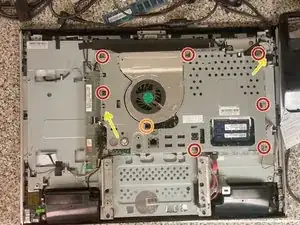
Remove the seven silver Torx/Flathead screws securing the metal shield.
-
Remove the single black Torx/Flathead screw securing the metal shield.
-
Remove the cables strung through the shield.
-
Pull up on the shield to remove it.
-
-
-
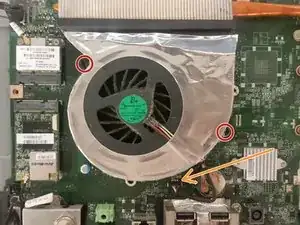
Remove the two Torx/Flathead screws securing the fan.
-
Pull up on the fan connector to remove it.
-
Lift the fan to remove it.
-
-
-
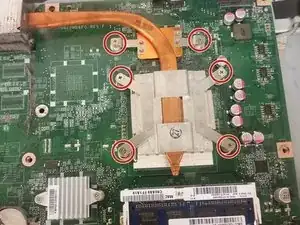
Remove the six Philips screws securing the heatsink assembly to the motherboard.
-
Carefully lift the heatsink. If it won't come off, twist it as you pull it off. If it still won't come off, pull harder.
-
-
-
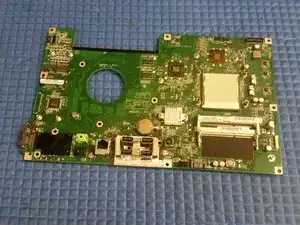
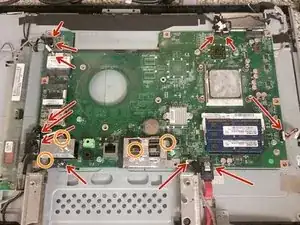
Remove all attached connectors from the motherboard.
-
Remove the four remaining screws securing the motherboard. You're done!
-


To reassemble your device, follow these instructions in reverse order.

Un commento
How do u take the DVD drive out?