Introduzione
To see how to replace your heatsink as well as your thermal paste, follow this guide. You will need an IFixit opening pick, a #0 Phillips screwdriver, a #000 Phillips screwdriver, a metal spudger, and tweezers with round and pointed tips.
-
-
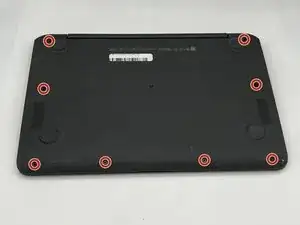
Position the Chromebook with the bottom facing up.
-
Locate the 8 screws on the back of the Chromebook.
-
Next, remove the 8 (8mm) screws using the phillips screw driver with the #0 bit.
-
-
-
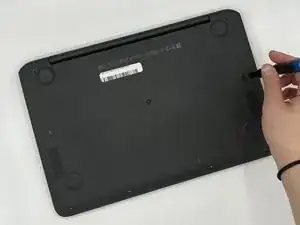
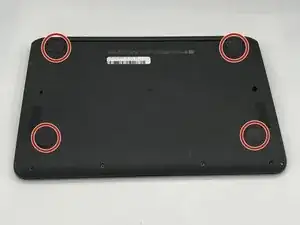
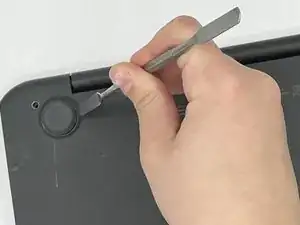
Locate the 4 rubber feet on the bottom of the laptop.
-
Pry them off with the metal spudger or an iFixit opening pick.
-
-
-
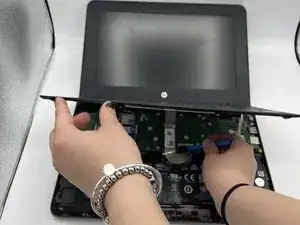
Flip over and open the Chromebook.
-
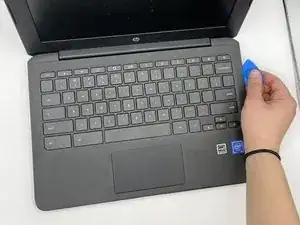
Locate the seem surrounding the keyboard and track pad.
-
Use an iFixit opening pick to pry the keyboard from the laptop
-
-
-
Gentally lift up the keyboard and locate the two ribbons attatched to the motherboard.
-
Use the IFixit Opening Tool to lift the two tabs located on the zero insertion force (ZIF) connectors.
-
To do this, use the tip of the IFixit Opening Tool to flip up the small locking flap and gently pull the ribbon out.
-
Then, fully remove the keyboard and set aside.
-
-
-
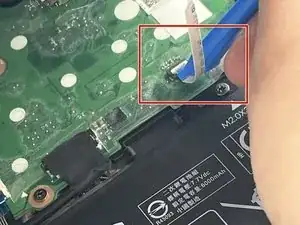
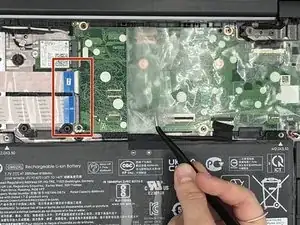
Locate the bundled cable connector connecting the battery to the motherboard.
-
Use the precision tweezers to peel back the black tape covering the bundled cable connector.
-
Next, use the precision tweezers to grab the edge of the connector and slowly pull the cable towards you.
-
-
-
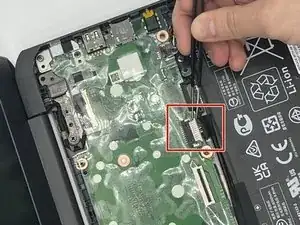
Locate the bundled cable connector connecting the speakers to the motherboard.
-
Using the precision tweezers, peel back the plastic that is covering the bundled cable connector.
-
Then, use the precision tweezers to grab the edges of the bundled cable connector and remove by pulling towards the battery.
-
-
-
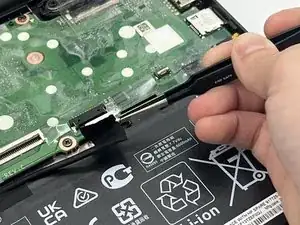
Locate the LDC cable connecting the screen to the motherboard.
-
Using the precision tweezers, peel back the plastic covering the LDC cable connector.
-
Then, use the precision tweezers to gently pull back the LDC cable towards the screen.
-
-
-
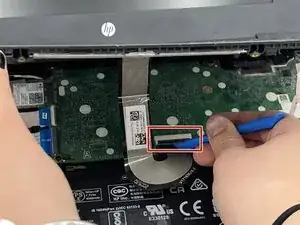
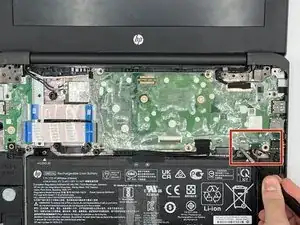
Locate the ribbons and their ZIF connectors connecting the motherboard and the daughterboard.
-
Use the precision tweezers to peel back the plastic and uncover the ZIF connectors located at the end of each ribbon.
-
Use the IFixit Opening Tool to flip up the locking flap holding the ribons in place.
-
Then, gently pull out each ribon.
-
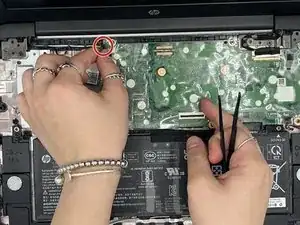
On the top left corner of the motherboard, gently unplug the bundled cable from the motherboard.
-
-
-
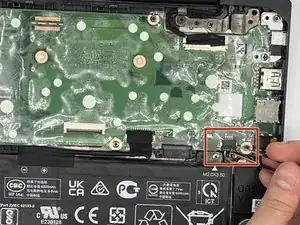
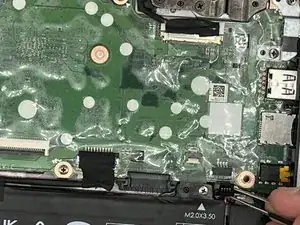
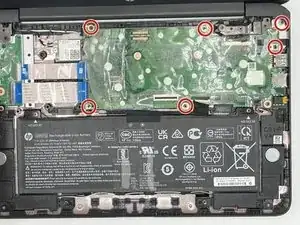
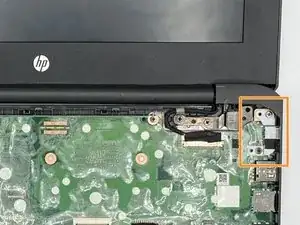
Locate the 6 screws holding the motherboard in place.
-
Using the philips screw driver with the #0 bit, unscrew the 6 (4mm) screws and set them aside.
-
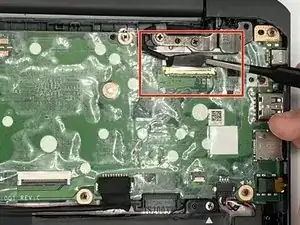
After all the screws are removed, remove the USB-C bracket in the top right hand corner and set aside.
-
-
-
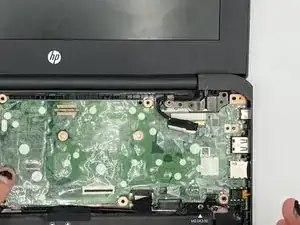
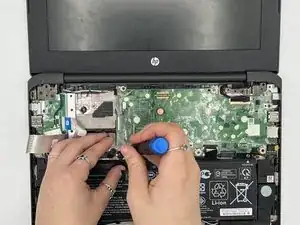
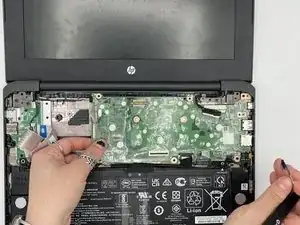
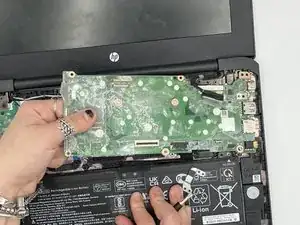
Once the motherboard is not connected to any other components of the Chromebook, gentely remove.
-
When removing the motherboard, lift up and to the left.
-
-
-
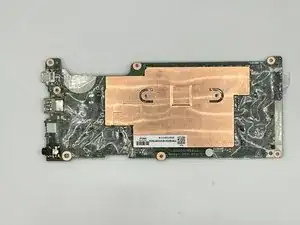
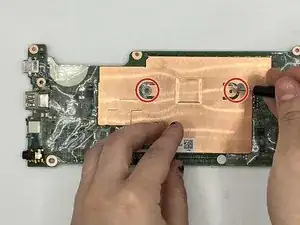
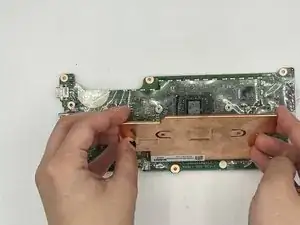
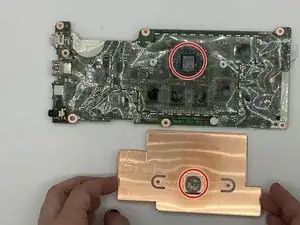
Once you have pulled your motherboard out from your laptop, flip the motherboard over and locate the two 2mm screws in the heatsink.
-
Using a #000 Phillips screwdriver, remove the screws from the heatsink.
-
-
-
Once you have removed the screws in the heatsink, pull the heatsink off of the motherboard and place it face down towards you.
-
-
-
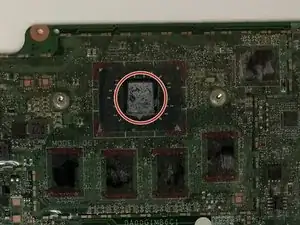
Locate your old thermal paste sites. To replace your heatsink, remove the thermal paste on the heatsink and CPU chip using a microfiber cloth and isopropyl alcohol.
-
Once you have cleaned off the thermal paste from your old heatsink, you are free to replace it.
-
-
-
Once you have cleaned off your old thermal paste, take your thermal paste and apply a small amount between the size of a rice grain and a pea in the plastic window on the CPU chip. Spread the paste evenly with a blunt tool.
-
After applying your paste, reapply your heatsink.
-


To reassemble your device, follow these instructions in reverse order.