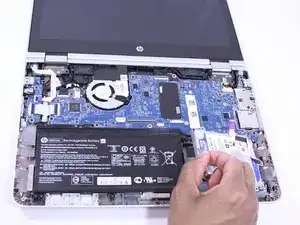
Introduzione

If the hard drive is malfunctioning or needs to be upgraded, use this guide to replace it.

  1. gYjHTcKfxLLAZLso
    • Shut down the computer.

    • Disconnect the power and all external devices connected to the computer.

    • Working on your device while it is turned on may result in electric shock.

  2. SovjkqN66AjVjmjq
    SovjkqN66AjVjmjq
    ikon1NpYoVFHUbxW
    • Use a Metal Spudger and remove the rubber foot closet from the bottom of the laptop.

  3. xO2oIVxVihIMUncV
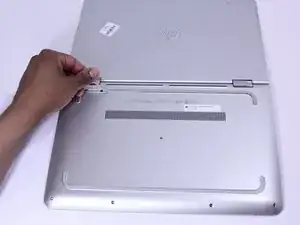
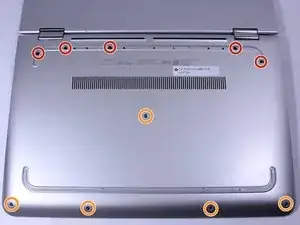
    • Remove all of the screws located on the bottom of the laptop:

    • 5 Phillips 2.4 x 5.7 mm screws

    • 5 Phillips 2.0 x 5.0 mm screws

    • Make special note of each screw and screw lock size and location during removal and replacement.

    “5 Phillips 2.4 x 5.7 mm screws”

    “5 Phillips 2.0 x 5.0 mm screws”

    I think the color for the sizes are mixed up, because the one near the screen bending part are the bigger ones, yet it says they are the “2.0 x 5.0 mm” but they are the bigger ones.

    If I’m wrong, tell me because I’m not sure if thats the ways they’re named because I’m not an expert at screw sizes.

    SomeRandomChild -

  4. Ol3BWZHvYObRMjw3
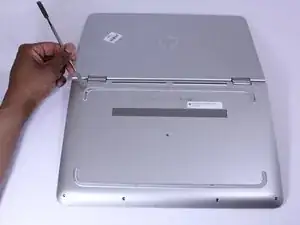
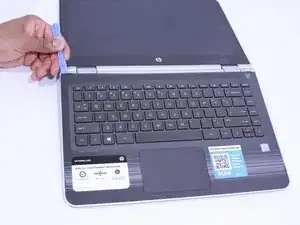
    • Turn the computer over onto its base, with the computer open and the keyboard facing upward.

  5. ySAp1JTGlC5IAsgH
    ySAp1JTGlC5IAsgH
    vJaw6GIZOCowQqxF
    • The keyboard is attached internally by clips. Use a small amount of force when removing the keyboard.

    • Use the Plastic Opening Tool to separate the keyboard from the base of the laptop.

  6. 6QdcixZ54hfSAaWW
    • Raise the keyboard slightly to access the touch pad and keyboard cables.

    • Raising the keyboard too far or with excessive force may cause damage to the keyboard, touch pad cables, or their connectors.

  7. 1aDcZCZsqdBRT4Vf
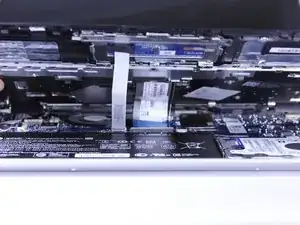
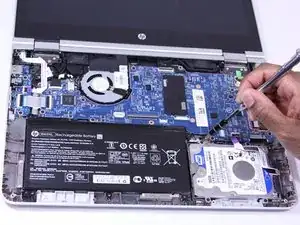
    • Disconnect the ribbon cables attaching the touch pad and keyboard to the system board (motherboard).

    • Using the Heavy-Duty Spudger lift up the plastic locks connecting the ribbon cable to the motherboard.

    • Use the blue plastic tab on the ribbon cable to pull it out from the lock on the motherboard.

  8. YOiNQ5J5dWZwvSgG
    • Lift the keyboard away from the base of the laptop.

  9. 2UAAkP1BlwGXK5Dx
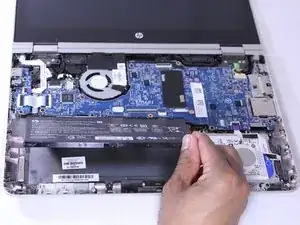
    • Using the Phillips 00 Screwdriver, remove 6 Phillips 2.0 x 4.6 mm screws from the perimeter of the battery.

    • Make special note of each screw and screw lock size and location during removal and replacement.

  10. xVkeRCgIawPWdweb
    • Carefully lift the battery up from lower right corner and disconnect it from the motherboard.

  11. IruSEX2SyHssistq
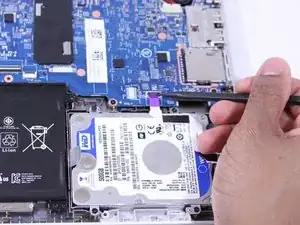
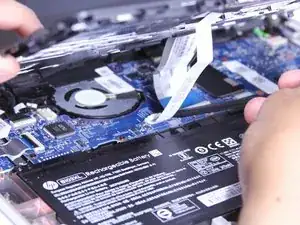
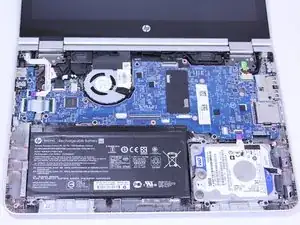
    • Disconnect the ribbon cables attaching the hard drive to the system board (motherboard).

    • Using the Heavy-Duty Spudger lift up the plastic locks connecting the ribbon cable to the motherboard.

    • Use the purple plastic tab on the ribbon cable to pull it out from the lock on the motherboard.

  12. fgVd44JhoTSiUG5i
    fgVd44JhoTSiUG5i
    VDFo4PUYTDsXK1A2
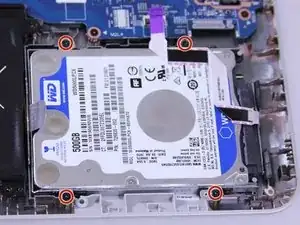
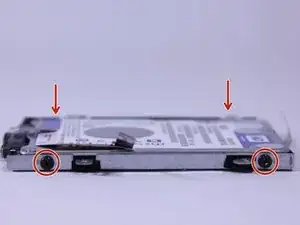
    • Using the Phillips00 Screw Driver, remove 4 Phillips 2.0 x 4.6 mm screws around the perimeter of the hard drive.

    • Make special note of each screw and screw lock size and location during removal and replacement.

  13. pG13el6IZlHBmADS
    • Using the tab provided, lift and remove the hard drive out of the laptop base.

  14. x3rUJwawQIhEqHYp
    x3rUJwawQIhEqHYp
    akvkStEDf6s5yFhW
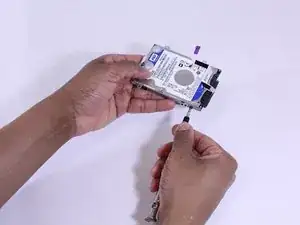
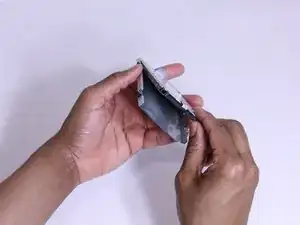
    • Using the Phillips00 Screw Driver, remove 4 Phillips 3.0 x 3.7 mm screws on exterior mounting bracket.

    • There are 2 Phillips screws on each side of the hard drive bracket.

    • Make special note of each screw and screw lock size and location during removal and replacement.

  15. 2hB5L4nvsxDDS1vx
    • Remove the mounting bracket.

Conclusione

Follow these instructions in reverse order to reassemble your device.

Subhleen

Membro da: 02/02/17

1268 Reputazione

8 commenti

Awesome. Thanks. This helped me a lot.

Gouse Khan -

Can anyone tell me the model number of the hdd ribbon cable please :)

James Harris -

I need to replace the data ribbon as well.

KurwynK -

Found it. part# 856011–001

KurwynK -

My HP Pavilion X360 M3-u00ldx is not recognizing my brand new Samsung 860 Evo 500GB ssd. Upon start up I get  3F0 error which states there is no hard drive. When I boot to a Windows 10 disc it also doesn't recognize it.


Any suggestions on how it can be recognized is appreciated.


Thank you for looking.

downdog89 -

I have the same issue, please let me know if you fix it.

Owen Schilling -

Very helpful, thank you! My model (m1-u001dx) had an extra screw under the long rubber strip in the middle in case that helps someone else.

Pat Paulson -

I have a x360 m3 from 2018 that looks identical to this one on the outside, but when I opened it up it had empty space where the SATA drive would have been. So be warned to disassemble before you buy your replacement part. In this case, the attachment point on the motherboard for the ribbon cable was bare, so even if I could have found the HD "caddy" there wouldn't have been a place to plug it in. My only option was to buy a new m.2 board.

alan e robinson -