
Introduzione
If your hp iPAQ h3850 speaker has lost the ability the spoken the audio, probability your speaker isn't work probably, so it needs a replacement to fix speaker.
The speaker is important part for hp iPAQ h3850 to play audio for hear music. So in order to replace the speaker part, you needed to buy the new part of speaker to replace old parts. You needed to be patient with disassembly the back so that you wouldn't break any of the parts that is still in good condition to use. The reason you needed patient is so parts won't be break and whole connector wouldn't be work to power iPAQ speaker. Also needs have steady hands to disassembly inside of speaker.
This hp iPAQ was the first mini pc to be use. The hp iPAQ maybe the prototype for mobile phones of today. Hp iPAQ was create at early 20's so the people might be reminisce about old days. This may the reason to repair iPAQ device.
The parts that connect to connector can be dangers because it can hurt the hands. So you should wear gloves to protect yourself from connector. The tools need for this repair are on essential electronics toolkit. So in the end, the toolkit is only you need to use for this repair and one part you should worried about is the connector.
Make sure to turn off your device before you begin disassembly and replace iPAQ speaker. After assembly the back cover of hp iPAQ h3850, you should turn it on to check if the hp iPAQ speaker works.
Strumenti
-
-
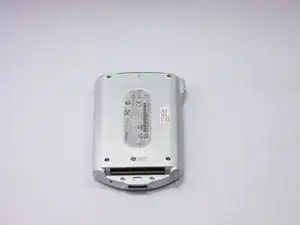
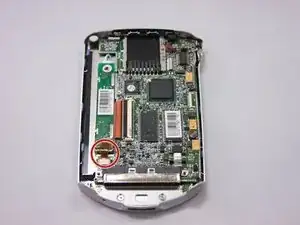
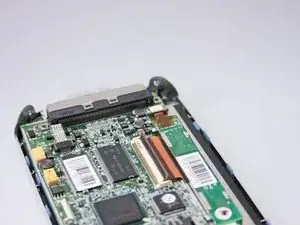
To start the disassembly of iPAQ speaker shown by picture, you must place speaker on a flat surface with the screen laying down.
-
-
-
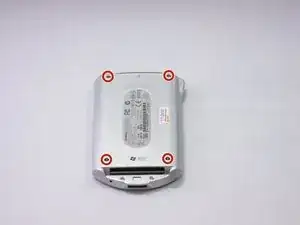
You must carefully remove the back cover using a plastic opening tool against the grooves along the sides of the iPAQ speaker.
-
-
-
Using the plastic opening tool, carefully detach the yellow ribbon from the connector pins to separate the iPAQ speaker into two halves. (This step isn't necessary for speaker removal it will just make the process a lot easier.)
-
-
-
Remove ribbon cable connected to iPAQ speaker logic board by pulling plastic clips on both sides towards top of iPAQ speaker.
-
Use plastic opening tool to carefully pull brown ribbon cable from connector.
-
-
-
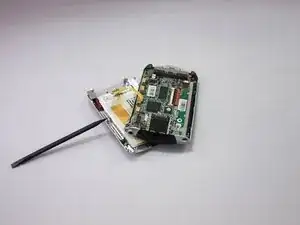
Use plastic opening tool to carefully remove display logic board from housing.
-
Unplug connector from the opposite end of the display logic board.
-
Completely remove component.
-
-
-
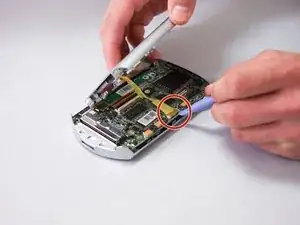
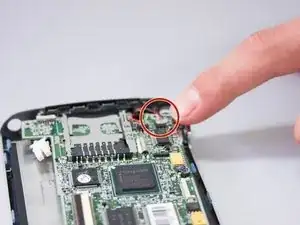
Flip up black plastic clip on large ribbon cable connector located towards center of mother board.
-
Use plastic opening tool to carefully remove ribbon cable from connector.
-
-
-
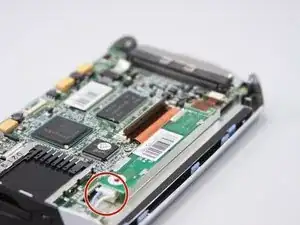
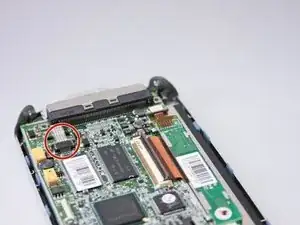
Gently pry clear/grey ribbon cable in the bottom corner of the device out of connector with plastic opening tool.
-
Use hands or tweezers to remove if necessary
-
-
-
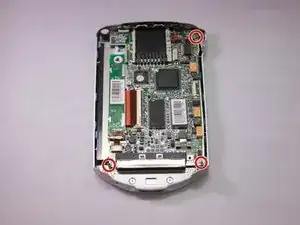
Remove four small screws from each corner of the motherboard using phillips head screwdriver.
-
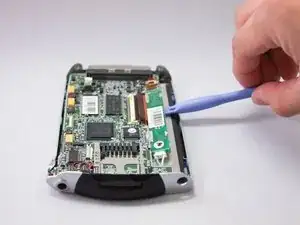
Use your hands/plastic opening tool to carefully lift the mother board out of housing.
-
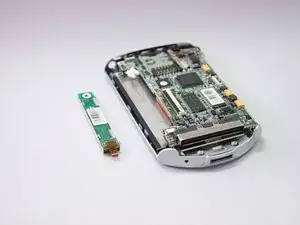
Place the motherboard to the side.
-
-
-
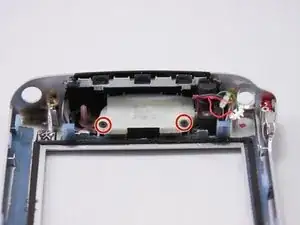
At the top of the iPAQ remove the screws holding down the speaker and housing.
-
When the screws are out pry out speaker along with the housing.
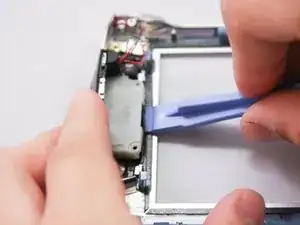
-
Lay down the speaker and housing with the housing on the bottom side and pry out the speaker with the plastic opening tool.
-
-
-
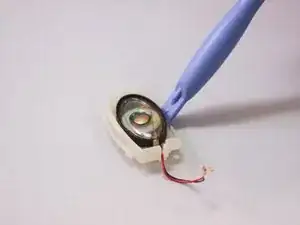
Insert replacement speakers as needed.
-
Follow steps in reverse order to reassemble the iPAQ.
-
To reassemble your device, follow these instructions in reverse order.