Introduzione

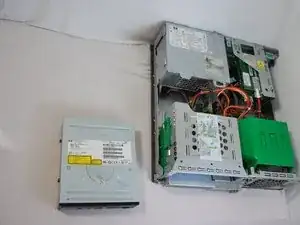
The Optical Drive is the technical term for a CD drive. This is the component that reads the disks and transfer the information into something that we can view on a monitor.

  1. XeA32coGGdperlKs
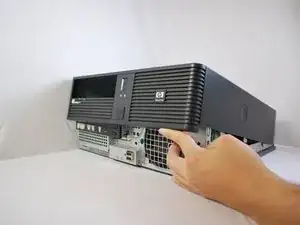
    • Make sure the computer is unplugged.

    • Be sure to touch any metal surface with your hand to discharge any static electricity that might have built up.

    • Make sure all auxiliary cords are disconnected from the desktop. If not, remove them using your hands.

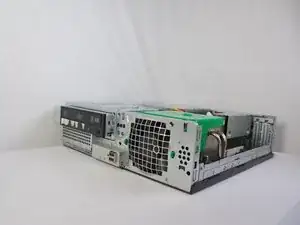
    • Set the desktop down horizontally with the front side facing you.

  2. BhklqdCSVaoSXICI
    BhklqdCSVaoSXICI
    VNtjnpfppErfvubU
    • Hold the desktop with two hands by grasping both sides of the desktop.

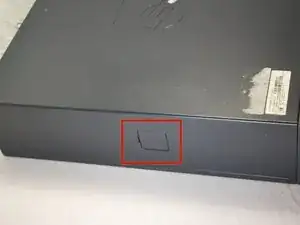
    • Press the buttons on both sides using your index fingers.

  3. AxVJuKkxHNMBNpwa
    AxVJuKkxHNMBNpwa
    iTRgQsHl55HnvnwF
    ipAINE3QDBxprqqv
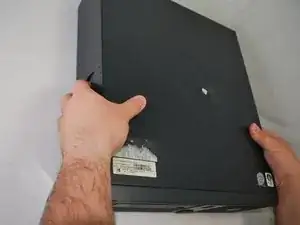
    • Slide the top cover about an inch forward using your thumb to push it towards you.

    • Make sure that the bottom is still secured by both hands.

    • Lay the desktop back on the table and pull the case forward as far as it can go.

    • Lift the cover up and off.

    In this step, make clear that the CPU is lifted in the air to aide in the cover separation. Cover removal for a CPU is usually the most time consuming step if not clearly outlined. Employ brevity but clarity.

    Mark -

  4. SJpOJBZVPTUCWsBv
    SJpOJBZVPTUCWsBv
    4BpZIO5f4vK4DQfG
    • Using your hand, grip the Optical Drive and lift it up into a 45 degree angle.

  5. MBiywxcjpHwXCjUH
    • Disconnect the power supply cord and the SATA cord using your hands to pull them out.

  6. k6CdqlaKgFQjpNNC
    k6CdqlaKgFQjpNNC
    RWBFNG5QeSLjxMWH
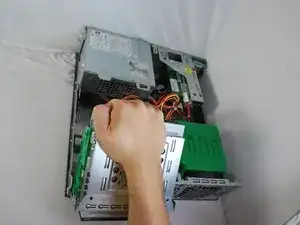
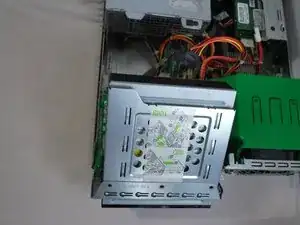
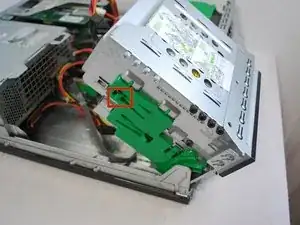
    • Using your left index finger, lift the upper green tab found on the left side of the green piece.

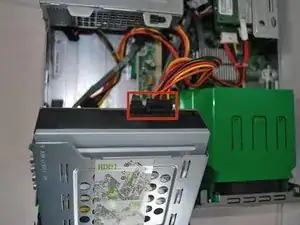
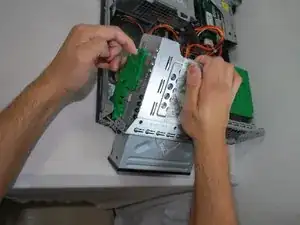
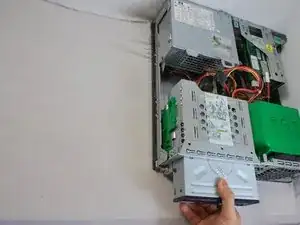
    • Using your opposite hand, use your fingers to push the back of the drive forward and slide it out away from the desktop.

  7. fpDGCeLwADUtuB1L
    fpDGCeLwADUtuB1L
    CsfnYhQfqtqPCEyM
    • Grasp the optical drive with your right or left hand and pull the drive out towards you.

    • It will help if you lay the device flat in order to remove the drive.

Conclusione

To reassemble your device, follow these instructions in reverse order.

Alyssa Briones

Membro da: 21/01/14

1699 Reputazione

0 commenti