Introduzione

Welcome to the Handspring Visor Edge Battery Replacement Guide. In this manual, you'll find step-by-step instructions to efficiently replace the battery of your device. Whether you're a tech pro or a beginner, follow these simple steps to breathe new life into your Visor Edge. Lets Get Started!

  1. PJYjTFpMIcaE1hmk
    PJYjTFpMIcaE1hmk
    REDJDZkY2BjIjDlp
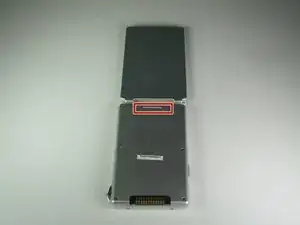
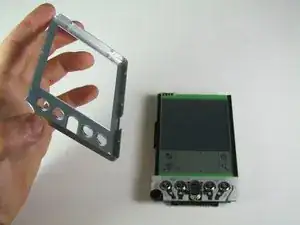
    • Open the Visor Edge and place it on a table facing down.

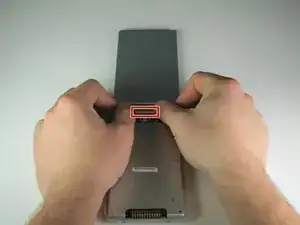
    • Gently push the tab that connects the flip cover (top half) to the PDA (bottom half) upward, lift the pieces apart to detach them.

    • Do not pull on the flip cover in an attempt to remove it from the PDA.

  2. tEKoGQZsFrcuCTwE
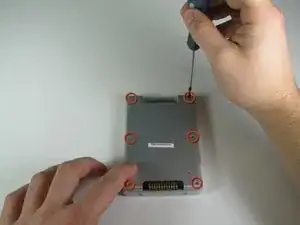
    • Remove the six 4.1 mm Phillips screws from the back plate using the #00 Phillips Scewdriver.

  3. nyfOtUGYbEddVfjC
    • Remove the gray back plate from the PDA.

  4. tKD1NBSQmbcEgDmO
    tKD1NBSQmbcEgDmO
    bQkWKp1RSmP2cVkK
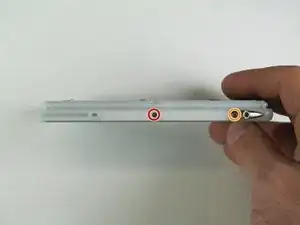
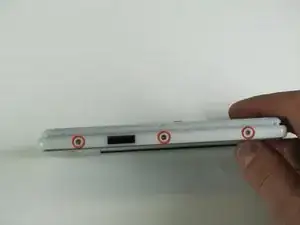
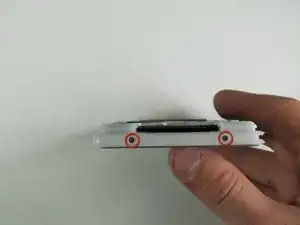
    • Remove the four 2.6 mm Philips screws that are on the sides of the frame.

    • Remove the 3.9 mm Philips screw holding the stylus holster to the frame.

  5. eVBHWGZ1GcntvSyw
    eVBHWGZ1GcntvSyw
    aElQdqUNMHMa2VVe
    • Remove the four 2.6 mm Philips screws on the top and bottom of the frame.

  6. BjNOalaltV2Ra1fy
    • Gently remove the white frame from the back of the PDA.

  7. 5fhVkcwgDhOBYWFW
    • Gently pull off the front cover.

  8. gMUjAcWTPcUB2rrl
    gMUjAcWTPcUB2rrl
    EyRpKwF2IFRPbJPm
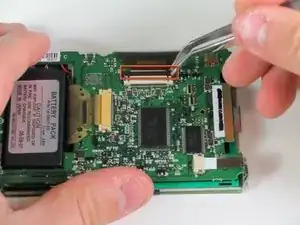
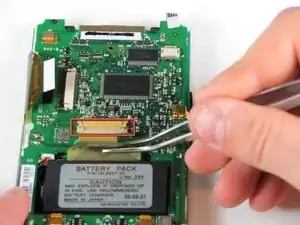
    • Gently use your finger or tweezers to push the brown lock away from the side of the circuit board that is holding the ribbon cable.

    • Remove the ribbon cable with tweezers.

  9. H1EMa15ZPVrXUwAb
    • Using the tweezers, pull back the ribbon cable on the top of the device.

    • Pull at the white part of the ribbon to avoid tearing.

  10. tjmIbkXQDsPwSG6g
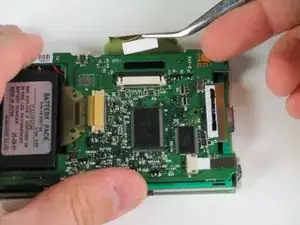
    • Using the same technique as with the other ribbons, locate and disconnect the ribbon cable above the battery pack.

  11. PMWWnOhAYDNGsdx6
    • All the ribbon cables should be disconnected from the mother board.

    • Remove the four 3.6 mm Phillips #00 screws located at each corner of the device.

  12. r2kaCBPbAiSMUutj
    r2kaCBPbAiSMUutj
    MBYpvI5HPSTSWomU
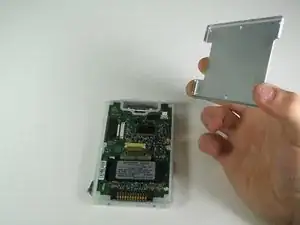
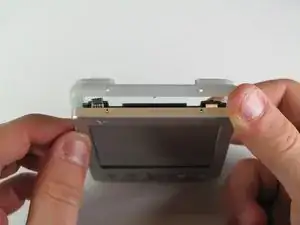
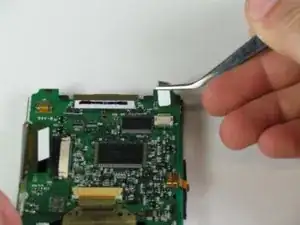
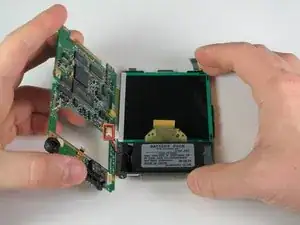
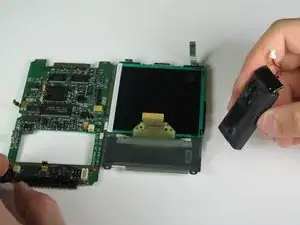
    • Carefully separate the circuit board and the screen. (Be careful of soldered wires when separating)

    • Be careful not to break the soldered wires that connects the circuit board to the battery pack.

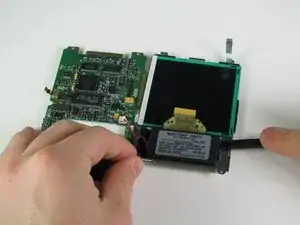
    • Disconnect the wire that connects the battery pack to the motherboard using tweezers.

  13. INB1abtbjMVEs5Zs
    INB1abtbjMVEs5Zs
    ELBi2yOEyEkA6CZS
    • Wedge the spudger under the battery to pry it apart from the adhesive.

Conclusione

To reassemble your device, follow these instructions in reverse order.

Christian Valoria

Membro da: 24/01/11

201 Reputazione

0 commenti