Introduzione

Sometimes, the LCD screen on Sony Handycam camcorders, can start wiggling. Essentially, what happens is that the hinge gets unscrewed from the rest of the camera, causing the screen to wiggle and not feel "sturdy".

  1. jQIHYVJA4C1AAtLa
    • Unscrew the 2 Phillips #00 screws on the right side of the camera.

  2. KUPOHwubA4ALg5vO
    • Unscrew the 4 Phillips #00 screws form the bottom of the camera.

  3. 3NS2mp1CnppiRaIB
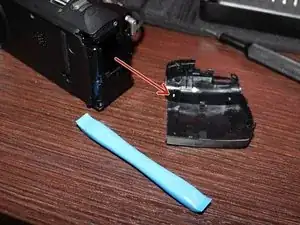
    • Remove the battery compartment cover by pulling it while "wiggling" it. It works like a hook.

  4. ZI5CrKE1aKDOEXC5
    ZI5CrKE1aKDOEXC5
    ZsPodLvNPQtGBC1V
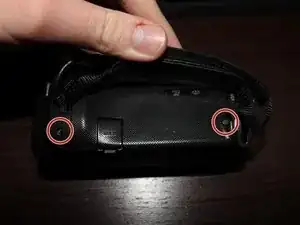
    • Unscrew the 2 Phillips #00 screws from the left side.

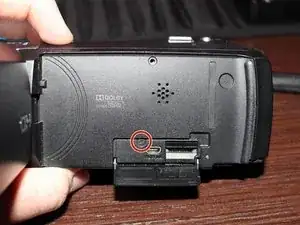
    • Unscrew the Phillips #00 screw from the small SD and HDMI compartment on the left side.

  5. 6Z4TnTMeLyYITYaB
    • Using the opening tool, remove the small panel at the back of the camera.

    • Always be careful when removing any panel, so you don't break any clips.

  6. gnPcjyBKAxuQLVZl
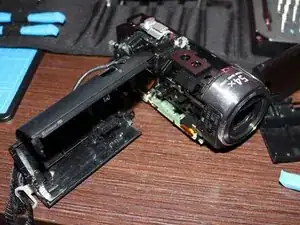
    • Carefully use the opening tool or guitar picks to remove the entire right panel from the camera.

    • Always be careful when removing any panel, so you don't break any clips.

  7. SLkpusOIFSXQZVVG
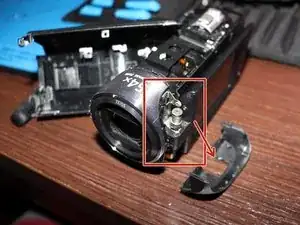
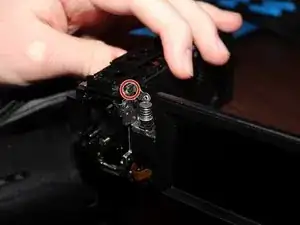
    • Pry the tiny panel off of the left side of the lens, between the lens and the screen hinge, revealing the hinge.

    • Always be careful when removing any panel, so you don't break any clips.

  8. KLsnNFp6xryJa1CS
    • Remove the plastic lens cover, and then remove the inside black "ring" that also contains the lens protector.

    • Always be careful when removing any panel, so you don't break any clips.

  9. HxK2e55DokTLBsSD
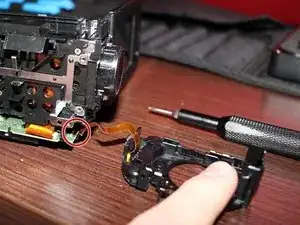
    • Remove the last ring from around the lens, very carefully as the microphone is on it, which is connected with a ribbon cable to the camera.

    • Remove the ring carefully, since it is connected to the motherboard with a ribbon cable.

    • Then, use a pair of tweezers to carefully disconnect the ribbon cable from the board.

  10. sbGYgN5VBDcIeGFR
    • Unscrew the Phillips #00 screw from the left side of the lens, next to the hinge.

  11. K6FEh1HYowLRY12W
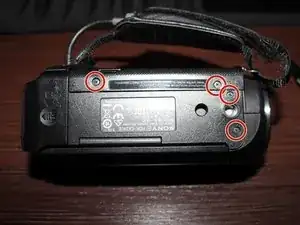
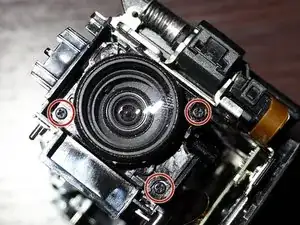
    • Unscrew the 3 Phillips #00 screws from around the lens of the camera.

    • Then, remove the lens using your tweezers.

    • Handle the lens with caution as it's fragile.

    • It might be a good time to clean the lens with a microfiber cloth since you've already opened the camera.

  12. bGPnENYKjukcOZGH
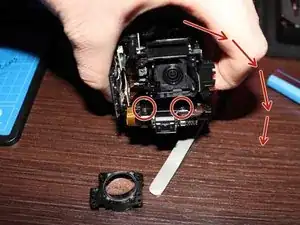
    • Tilt the camera to the side of the screen.

    • Pull apart the 2 sides of the camera to make some space.

    • Don't pull the 2 sides apart with too much force!

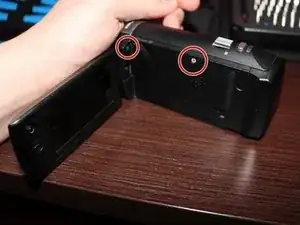
    • Using your Phillips #00 screwdriver, carefully screw tightly the 2 screws that hold the hinge on the camera.

    • You will need to use your screwdriver "diagonally" (not straight), since having clear access to the screws would require a lot more disassembly.

Conclusione

To reassemble your device, follow these instructions in reverse order.

Stratos Thivaios

Membro da: 27/02/23

838 Reputazione

0 commenti