Introduzione

This guide will walk you through the process of replacing a broken lamp cord and rotary switch with a new lamp cord and toggle switch. Using a lamp with a broken or faulty cord or switch is both dangerous and a fire hazard, and rotary switches are often difficult to use and easy to break.

Steps 14 and 18 require you to strip a wire. If you don't know how to do this, visit this guide on wire stripping to learn more.

Before you begin, be sure to unplug your lamp and move your lamp shade to an out-of-the-way location.

  1. UrE2AvcTTQFCkJr2
    • Unscrew the light bulb.

  2. arYRywwXAPPoD423
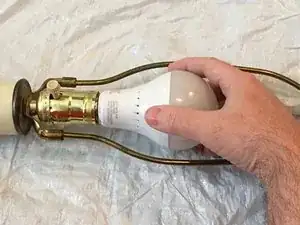
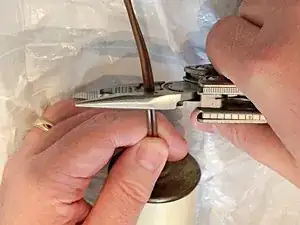
    • Pinch the lamp shade hanger inwards.

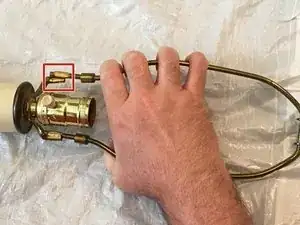
    • Move one side of the lamp shade hanger out from under the clamp.

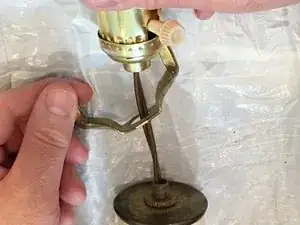
    • Take off the lamp shade hanger.

  3. WGXpcKQemgl2MBZW
    • Use the 1/4" flathead screwdriver to unscrew the socket screw to loosen the socket.

  4. RuTENPFtEHUFFi5p
    RuTENPFtEHUFFi5p
    423dLkSHlLSJke6h
    • Pull the socket away from the base.

  5. olWZOeLMJJMvO12G
    • Cut the lamp wire with your wire trimmers.

  6. KMDsNTHkMiwqawqN
    KMDsNTHkMiwqawqN
    w35nlNJIoVCXFn4y
    • Pull apart the socket cap and shell.

    • Use vice grips if necessary for this step.

  7. EKXgNEgQ43ZnL2LA
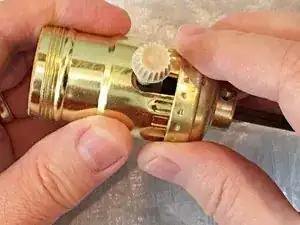
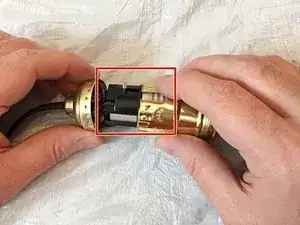
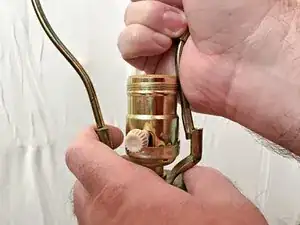
    • Take the socket out of the socket shell.

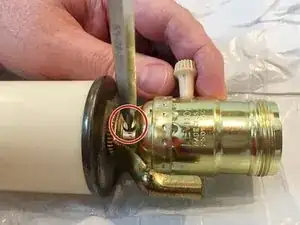
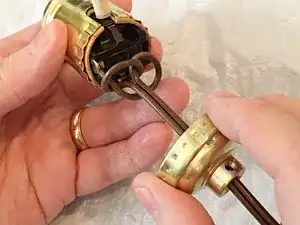
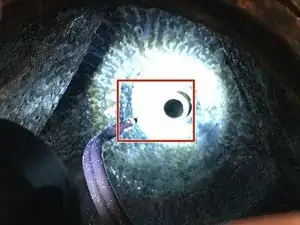
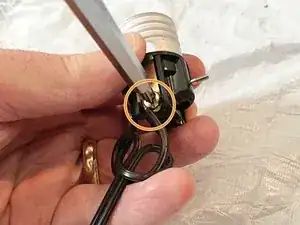
    • Use a Phillips #2 screwdriver to partially unscrew the screws holding the copper wire to the socket so that you can disconnect the copper wire.

    • You may want to leave the screws partially unscrewed for when you reach Step 15.

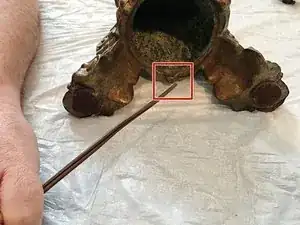
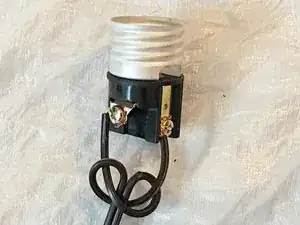
    • Take the old wire out of the socket.

    • Discard old wire out of the reach of children and animals. Copper wire splinters can cause serious harm.

  8. rvxgvG56L3labOyh
    • Pull the other end of the broken cord out of the bottom of the lamp.

  9. UKEDXYX2rVOPOF3P
    • Thread the new cord through the hole in the base of your lamp.

    • If you have trouble threading the wire, and your wire has a split end, consider using electrical tape to cover the end.

  10. 2GuTLf5Rw2PdIuKF
    • Thread the cord through the whole body of your lamp.

    • If you're still having trouble threading your lamp, you may want to disassemble your lamp body and thread the cord through each piece individually like this step's picture shows.

  11. UyQHDEZWeno1DUel
    UyQHDEZWeno1DUel
    USNdCEchXQgBGmjG
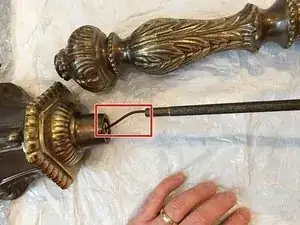
    • Thread the cord through the lamp shade hanger clamp.

    • Attach the lamp shade hanger clamp back onto the lamp body.

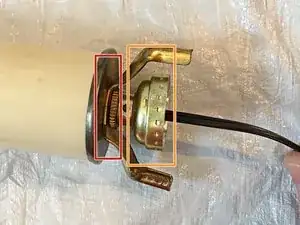
    • Thread the cord through the socket cap.

    • Attach the socket cap back onto the lamp body.

    • Screw the socket screw back into the socket cap with the 1/4" flathead screwdriver.

  12. IR3FDdOeHQjxeFKx
    • Split the end of the cord by about 2 to 3 inches.

  13. CmChXYcXGkGbDci5
    CmChXYcXGkGbDci5
    QgVmFQY4EBLwEOxh
    AL1SpUjUJr4FrAam
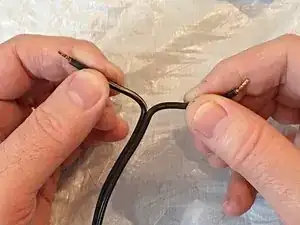
    • Tie an Underwriter's Loop with the following steps:

    • Loop the left side of the cord around and hold it behind the right side.

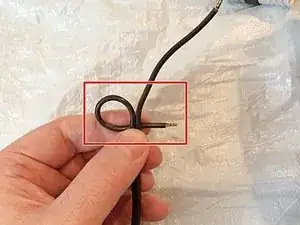
    • Loop the right side of the cord around the end of the left side.

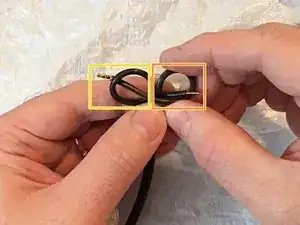
    • Thread the end of the right side through the left loop.

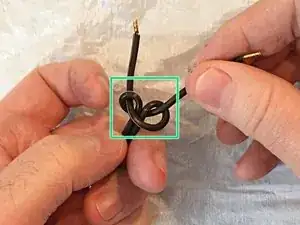
    • Gently pull on both ends of the cord to tighten the knot.

    • Do not tighten the knot all the way. A good underwriter's knot will have some flexibility and bounce. The purpose of this loop is to prevent strain on the cord whenever it is pulled so that the copper wires are not broken or pulled out of place.

  14. 6RyBDCNjiTiC6qwN
    6RyBDCNjiTiC6qwN
    36diLSO54FOUarov
    WuEJS65Sb2ijRncS
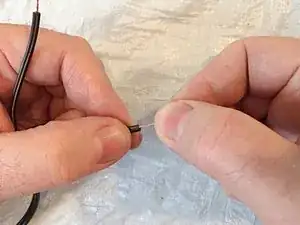
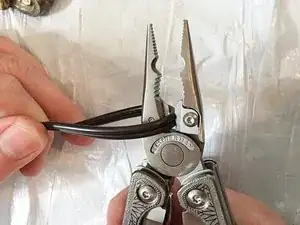
    • Using your wire trimmers or multi-tool, strip away the cord casing on each side to expose the ends of the copper wire.

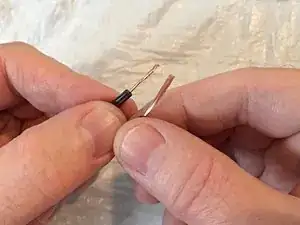
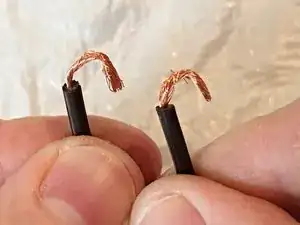
    • Gently twist the exposed copper wire on each side.

    • Bend the copper wire to create a hook shape.

  15. fxAfgKYcEy16Omac
    fxAfgKYcEy16Omac
    NLqf33K2sAkiutjN
    eabq32BVyKQxlccq
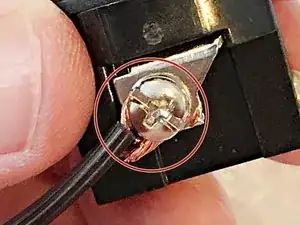
    • Hook the smooth side of your cord over the brass screw.

    • Gently tighten the screw with the Phillips #2 screwdriver until you can't pull the copper wire out.

    • Hook the ribbed side of your cord over the silver screw and tighten the screw with the Phillips #2 screwdriver.

    • Make sure you hook the correct end of your cord over the correct screw. Reversing your ends could result in electrocution or fire. Triple check your cord for the ribbed side (which will feel like it has little ridges) and the smooth side (which will be smooth).

    • Once you have tightened the screws, loosen the underwriter's knot slightly, so that there is plenty of slack in the knot.

  16. PTvysyDkfkVipOMt
    PTvysyDkfkVipOMt
    UJurNcCCvuMSCwKi
    • Place the socket shell back onto the socket.

    • Push the socket shell and cap back together.

    • At this point, you are done working with the body of the lamp until step 24.

  17. HSqXwfZQsoylFsMJ
    • From this point forward, until Step 24, you will work with the cord tail that comes from the bottom of your lamp.

    • Mark where you want your toggle switch to go.

    • Using the wire trimmers, cut the cord on the mark.

  18. ECwYlSusZktCCeOJ
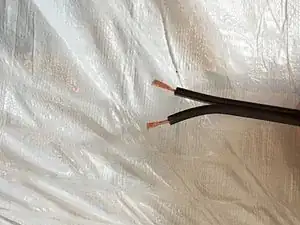
    • Pull the ends of the cord apart.

    • You may need to cut between the sides of the cord to be able to pull it apart.

    • This step repeats the skills used in Step 14.

    • Using your wire trimmers or multi-tool, strip the cord casing away from the copper wire on both sides of the cord.

    • Gently twist both ends of the copper wire.

  19. DlFs1Z52LdCJKUuW
    DlFs1Z52LdCJKUuW
    lST14YBqgiVPsYZI
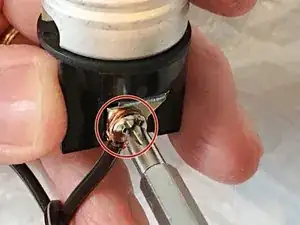
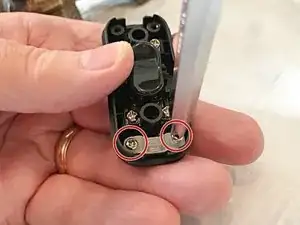
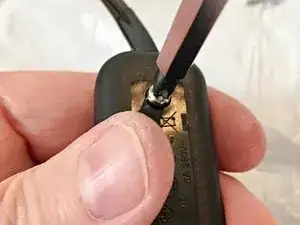
    • Unscrew the two screws on the back of the toggle switch with the Phillips #2 screwdriver to open up the switch.

  20. QOhrAU2QgFKXavV5
    • Unscrew the two screws on the wire clip with the Phillips #2 screwdriver.

  21. cGYa4gCQ1ytQvAVx
    cGYa4gCQ1ytQvAVx
    sxSfevXNRdgV3Ai3
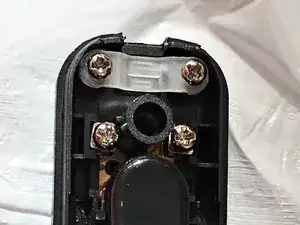
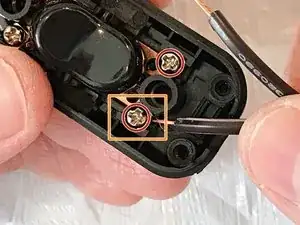
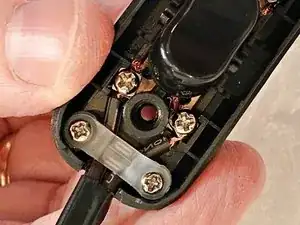
    • Loosen, but don't remove, the four screws on the copper plates with the Phillips #2 screwdriver.

    • In the following step, with the toggle switch used in this guide, the ribbed side of the cord attaches to the terminal marked "N." The smooth side of the cord attaches to the terminal marked "L."

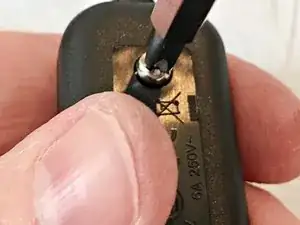
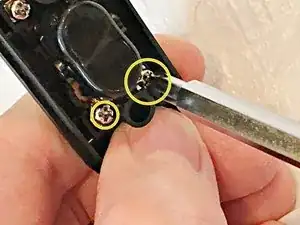
    • To place the wire, follow these steps:

    • Thread one end of the copper wire through the hole underneath one screw.

    • Tighten the screw with the Phillips #2 screwdriver so that it clamps the copper wire to the copper plate.

    • Repeat the above steps for each end of the cord.

  22. EkiPDlNwlgqLO2Zv
    EkiPDlNwlgqLO2Zv
    YH2EEVyUfEJdSdtI
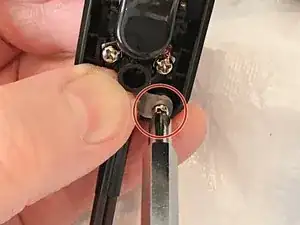
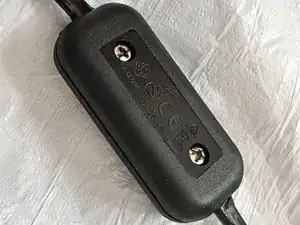
    • Hold a wire clip over one end of your cord.

    • Screw the clip back onto the switch with the Phillips #2 screwdriver.

    • Repeat for the other side.

  23. hTUjP3WpXWEmClXP
    hTUjP3WpXWEmClXP
    WgsHnVHJRgTDgfPm
    • Screw the bottom of the switch back on with the Phillips #2 screwdriver.

  24. dfxligQ3jqBddIHY
    • From this step until the end of the guide, you will be working with the main lamp body again.

    • Replace the lamp shade hanger into the clamp.

  25. xIq6ELQBWPHXCGEE
    • Screw the light bulb back into the socket.

  26. CxAELIcENMtnQt2K
    • Replace the lamp shade.

  27. qNuOt6pEVjKHvMIW
    • Plug in your lamp to check that you did the wiring correctly.

    • Use caution when you test your lamp. Be sure to do this in a controlled environment with no children or animals present in case your wiring is incorrect.

Conclusione

You should now have a fixed, functional lamp with a new cord and toggle switch.

Rebecca Johnson

Membro da: 20/02/21

385 Reputazione

0 commenti