
Introduzione
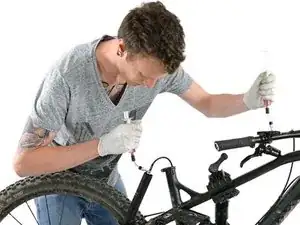
If your saddle doesn’t go up anymore or the system is not working correctly, it’s time to bleed your Reverb.
To avoid a mess and getting dirty wear gloves and an old shirt and keep a cleaning cloth on hand. Wear safety glasses to protect your eyes from dust and/or liquids.
Strumenti
-
-
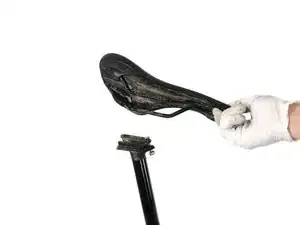
Use an allen key to loosen the screws which hold the saddle in its place.
-
Remove the saddle and the upper part of its clamp.
-
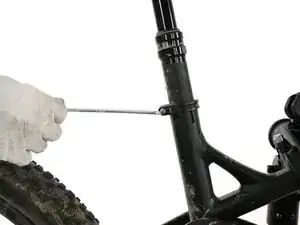
Use an allen key to loosen the seat post clamp.
-
-
-
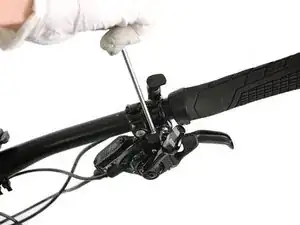
Remove the screw which is holding the gearshift in its place with an allen key.
-
Put the gearshifts to the side.
-
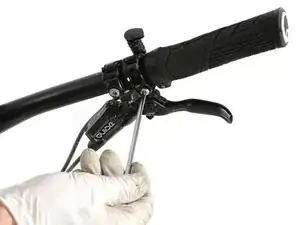
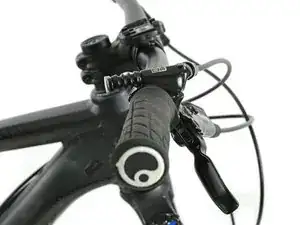
Loosen the clamp screw from the Reverb-remote until you can move it.
-
-
-
Install and orient the remote on the handlebar with the bleed port level, or at the highest point.
-
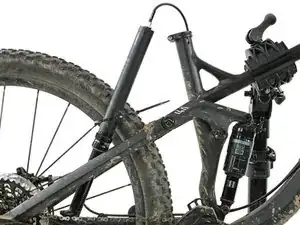
Remove the seatpost.
-
Attach the seatpost to the rear wheel with zip ties. Avoid any tension on the hose.
-
-
-
Rotating the speed adjuster to the slowest setting is critical for a successful bleed. Failure to do so may result in insufficient fluid volume inside the hydraulic remote system.
-
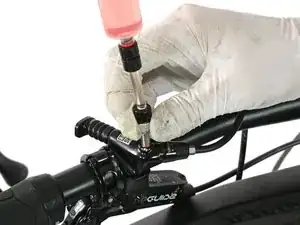
Draw 20 ml of Reverb hydraulic fluid into the syringe. Hold the syringe upright, cover the tip with a shop towel, and gently depress the plunger to purge any air bubbles from the syringe.
-
-
-
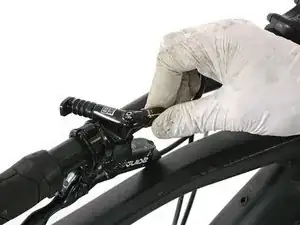
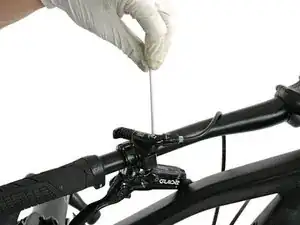
Remove the bleed screw.
-
Thread the standard syringe bleed fitting into the remote bleed port.
-
-
-
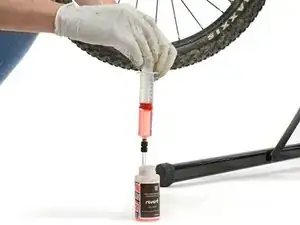
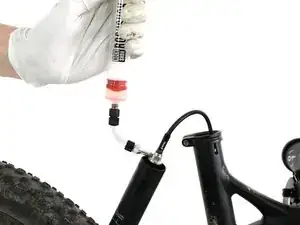
Draw 5 ml of fluid into the second RockShox bleed syringe. Hold the syringe upright, cover the tip with a shop towel, and gently depress the plunger to purge any air bubbles from the syringe.
-
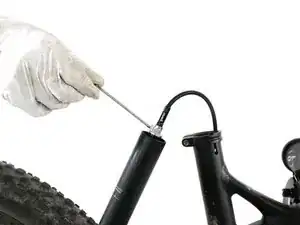
Remove the bleed screw at the seat post and thread the standard syringe bleed fitting into the seat post bleed port.
-
Depress the remote syringe plunger while pulling the seatpost syringe plunger out.
-
Depress the seatpost syringe plunger while pulling the remote syringe plunger out. Repeat these steps until bubbles are no longer pulled from the remote and seatpost.
-
-
-
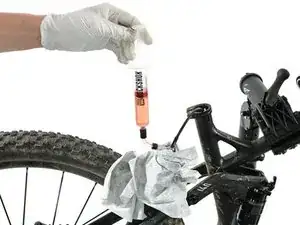
Remove the syringe from the seat post. Install the bleed screw and tighten it. Spray isopropyl alcohol on the seatpost and hydraulic hose and clean them with a shop towel.
-
Pull up on the syringe plunger and push the remote actuator. Depress the syringe plunger until the actuator fully extends. Repeat this process until bubbles are no longer pulled from the remote into the syringe. Then remove the syringe. Install the bleed screw and tighten it. Spray isopropyl alcohol on the remote and clean it with a shop towel.
-


To reassemble your bike, follow these instructions in reverse order.
