Introduzione

  1. uyFjWn1qHiv6tcZX
    • Scollegare il sensore termico del disco rigido dal bordo superiore della scheda logica.

    • Estrarre il connettore in senso parallelo alla superficie della scheda logica.

    On my iMac (20" intel core duo Model A1207) this was not a "connector" rather it was four separate (loose) wires! So I did not remove them for fear of reconnecting them in the wrong order. Instead I first loosened the drive bracket and removed its cables, then I pryed the thermal sensor from the side of the drive.

    sanjaygovindjee -

    Citazione da sanjaygovindjee:

    On my iMac (20" intel core duo Model A1207) this was not a "connector" rather it was four separate (loose) wires! So I did not remove them for fear of reconnecting them in the wrong order. Instead I first loosened the drive bracket and removed its cables, then I pryed the thermal sensor from the side of the drive.

    I agree!! LEAVE them attached, it simplifies things greatly!

    smitty7x -

    I did remove the cables, but I think I have a wrong order now, the fans are on full power when switching on. What is the right order?

    post -

    I have tried it. The cables should have the same order than on the other plug. No. 1 to No. 1, No. 2 to No. 2 and so on.

    The fans are quiet again now. :-)

    post -

    Yep just done the power board on this imac and I say leave the thermal cable connected because its 50% sure to break up! ,just undo the harddrive, carefully move it downwards towards the speaker housing on the logicboad(tape it to the speaker housing).

    you will still be able to access the power board cable under the logic board

    Supadupa -

  2. VtZ2jsbKAUPMvpao
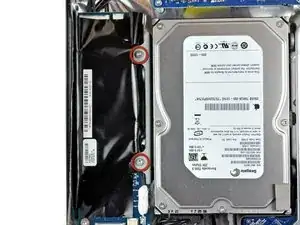
    • Rimuovere le due viti Torx T10 da 9,2 mm che fissano la staffa del disco rigido al case posteriore.

    The HDD in the 17" model has a slightly different mount. It is actually a black plastic spring pressure mount, and just slips out when you push down on the plastic spring mount.

    robino -

  3. L2h1VtCVYBJLkmBw
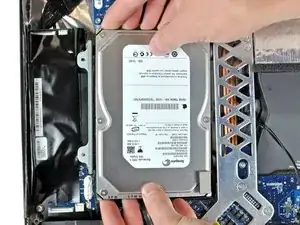
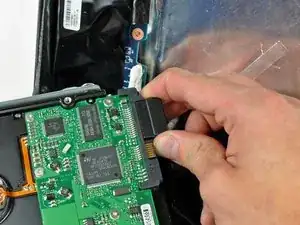
    • Sollevare il disco rigido dal bordo sinistro per rendere accessibile l'inverter e tirarlo verso il bordo sinistro dell'iMac per sganciare i piedini di montaggio dal case.

    • Durante l'installazione, non premere gli anelli di tenuta in gomma attraverso il case con i piedini di montaggio del disco rigido, poiché per recuperarli potrebbe essere necessario rimuovere la scheda logica.

    The 17" model's mount is the reverse of this. Sorry I have no pictures. The mounting pins on the 17" model are on the opposite side of the drive, and the drive itself is turned over so that the drive's circuit board is showing.

    robino -

    Great guide. I followed it all and my iMac has gone from no power up at all to powering up...of sorts.

    Now when I power up I get a chime and a brief blue screen with a window mentioning wireless mouse then all is blank. if I touch the power button I will get the blue screen briefly again.

    Therefore could something else be wrong.

    Any help appreciated.

    Chris -

  4. TXsnFLmDcsSR62Vj
    TXsnFLmDcsSR62Vj
    Bsq6UCKwh32nA4dK
    • Estrarre i connettori SATA di alimentazione e dati dal disco rigido.

    • Fare attenzione durante la rimozione del cavo del sensore termico del disco rigido dalla parte inferiore del telaio del dissipatore.

Conclusione

Per riassemblare il dispositivo, seguire queste istruzioni in ordine inverso.
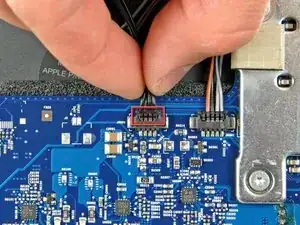
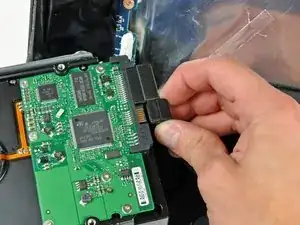
Walter Galan

693762 Reputazione

0 commenti