Introduzione
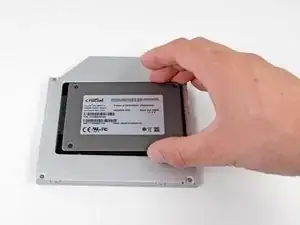
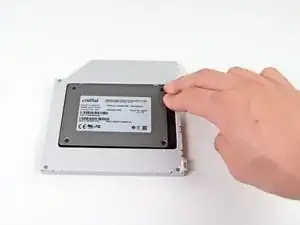
L'aggiunta di un secondo disco nel computer portatile offre diversi vantaggi, fra cui velocità più elevate, maggiore spazio di archiviazione e la possibilità di installare nuovi software senza problemi. Utilizzare questa guida per eseguire l'installazione mediante il nostro case per hard drive nell'alloggiamento ottico.
-
-
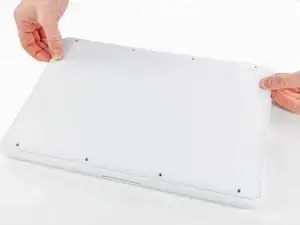
Sollevare leggermente il case inferiore in prossimità dell'apertura della presa d'aria.
-
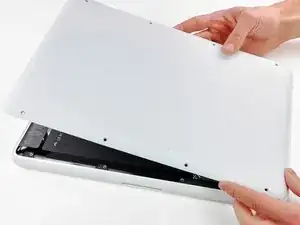
Continuare a far scorrere le dita fra i case superiore e inferiore finché quello superiore non si sgancia dalle levette di fissaggio.
-
-
-
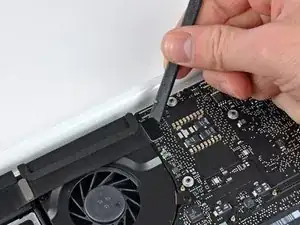
Mediante l'estremità piatta di un inseritore, sollevare il connettore del cavo della batteria dal connettore femmina sulla scheda logica tirandolo verso l'alto.
-
-
-
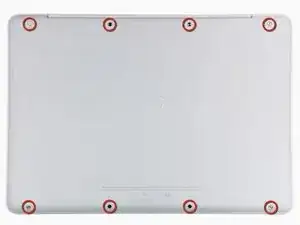
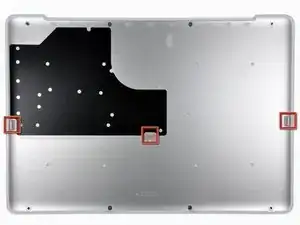
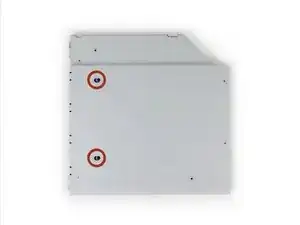
Rimuovere le viti seguenti dal lato con unità ottica della presa posteriore:
-
Due viti Torx T8 da 10 mm
-
Due viti con testa a croce da 5 mm
-
-
-
Rimuovere le viti seguenti dal lato della porta della presa d'aria posteriore:
-
Due viti Torx T8 da 10 mm
-
Due viti con testa a croce da 5 mm
-
-
-
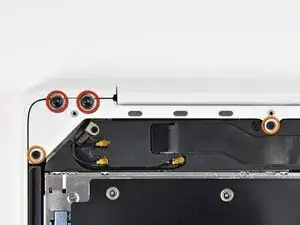
Rimuovere la vite con testa a croce da 12 mm che fissa la parte superiore dell'alloggiamento dell'altoparlante posteriore al case superiore.
-
-
-
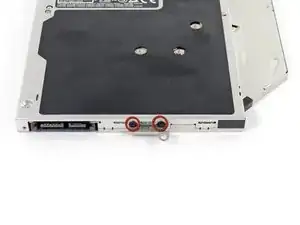
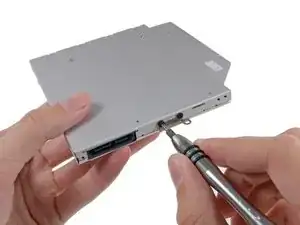
Rimuovere la vite con testa a croce da 2,2 mm inserita in senso orizzontale nella parte laterale dell'unità ottica.
-
-
-
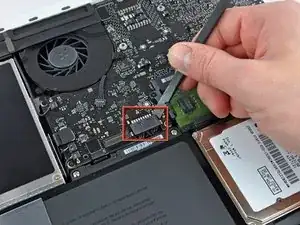
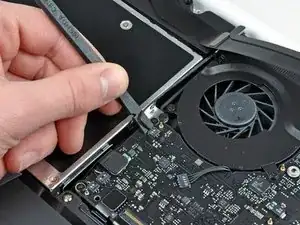
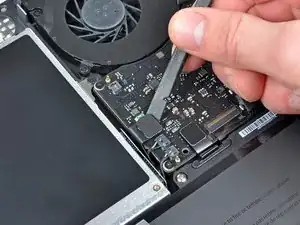
Utilizzare l'estremità piatta di un inseritore per rimuovere il connettore del cavo piatto AirPort/Bluetooth dalla scheda logica.
-
-
-
Utilizzare l'estremità piatta di un inseritore per rimuovere il connettore dell'altoparlante posteriore dalla scheda logica.
-
-
-
Ruotare con attenzione il gruppo dell'altoparlante posteriore (con cavi AirPort/Bluetooth ancora collegati) fuori dal case inferiore.
-
-
-
Utilizzare l'estremità piatta di un inseritore per rimuovere il connettore dell'unità ottica dalla scheda logica.
-
-
-
Rimuovere la vite con testa a croce da 4,5 mm che fissa la staffa dell'unità ottica al case superiore, in prossimità della ventola.
-
-
-
Rimuovere le due viti con testa a croce da 2,5 mm che fissano l'unità ottica al case superiore, in prossimità della relativa apertura.
-
-
-
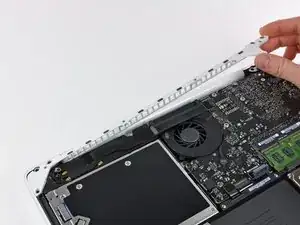
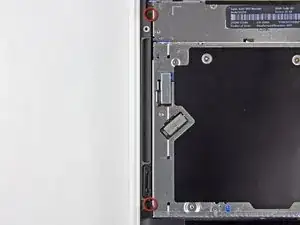
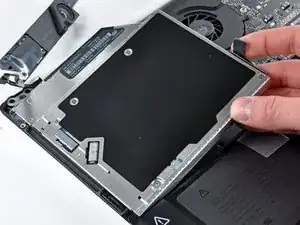
Sollevare l'unità ottica da un punto vicino al suo connettore ed estrarla dal case superiore per rimuoverla dal computer.
-
-
-
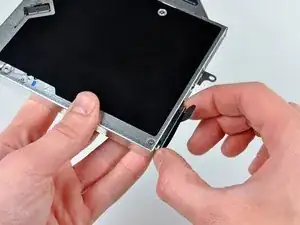
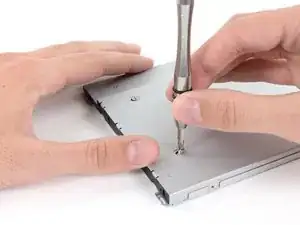
Rimuovi le due viti nere a croce Phillips #0 che fissano la piccola staffa di montaggio in metallo. Trasferisci questa staffa alla tua nuova unità ottica o al case del disco fisso.
-
-
-
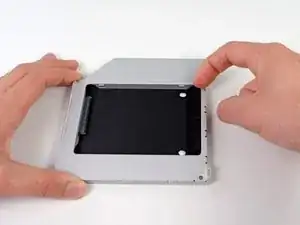
Rimuovi il distanziale di plastica dal case del disco rigido nell'alloggiamento dell'unità ottica premendo una delle clip poste da ciascun lato e sollevandolo dal case.
-
-
-
Verifica che i connettori del disco rigido siano rivolti verso il basso prima di posizionarlo nel case.
-
Posiziona il disco rigido delicatamente nell'apposito slot del case.
-
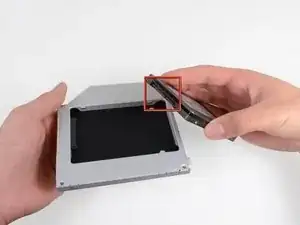
Tenendo saldamente il case in posizione con una mano, premi con l'altra il disco rigido nei connettori del case.
-
-
-
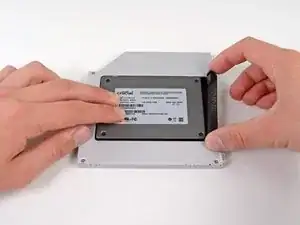
Una volta agganciato il disco rigido, reinserisci il distanziale di plastica tenendo il disco premuto contro la parte inferiore del case.
-
-
-
Collega la staffa dell'unità ottica al nuovo case mediante due viti con testa a croce Phillips #0.
-
Ricollega tutti i cavi rimossi dall'unità ottica originale nel case dell'alloggiamento ottico.
-
-
-
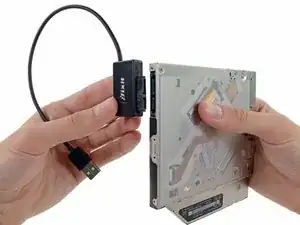
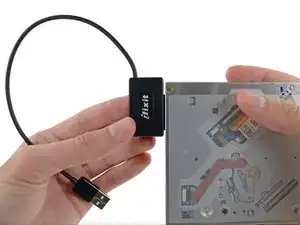
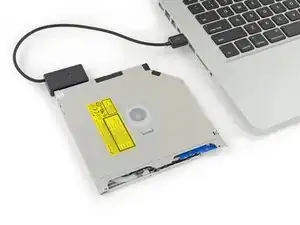
Non buttare via questo disco! Puoi ancora usare l'unità ottica esternamente con l'aiuto del nostro cavo USB per Unità Ottica SATA.
-
Allinea la spina del cavo SATA con la presa sull'unità e connettila bene.
-
Collega il connettore USB al tuo portatile e la tua unità ottica è pronta all'uso.
-


Per riassemblare il dispositivo, segui queste istruzioni in ordine inverso.

10 commenti
when i did i have a gray screen and in the middle i have a question mark in a file and it flashing
You haven't installed and software on the new hardrive. Install some using a boot disk or USB
Hi! I have a big problem... I have MB unibody 09. After install the hdd the MB doesn't switch on, so I reinstall the dvd unit and after try sometimes the laptop starts and at the status bar appears there has no a battery and the fan works very hard.
I find an area near the switch battery ( in the mainboard), that I unplugged to install the hdd, where there is an small chip that takes a very high temperature when I plug the batery connector... So what could be the problem, and what can I do?
I followed step by step so I Don't know where can be the problem... Some help please!
Is it possible to remove the optical drive and connect a sata extension cable where it was connected to the motherboard? The sata extension cable would stick out thru the cd entry. this way one could had a sata port to connect external hard drives faster than by the usb 2.0 ports! I don't understand much about electronics so I'm sorry if it's a stupid question.
According to this page http://support.apple.com/kb/HT1651?viewl..., the 8 screws are not identical.
Can anybody tell me where each kind of screw is supposed to go?
Gregoire -
They are all 100% Identical. You were probably looking at a different model, or Apple has entered the wrong information... Hey, It happens...
Owen Davies -
The screws on the Late 2009 are identical. The blue lock compound might make tightening some require a little more effort.
svenaustx -
Can I replace it with a SATA 3 cable?
nm -
A1342 macbook does not have the right controller to support sata III
Owen Davies -
hi, i just got back from the apple store and they are really keen for me to upgrade to a new laptop since my battery is old and the screen is cracked, so glad i found ifixit i would love to upgrade this puppy! gonna make it a real sleeper! styler hall wrote about sticking 16 gb of ram in his a 1342 ? is this a simply mather of ordering 3 4gb sticks ?aslo i currently have 4 gb and would like to upgrade to 8 ( or indeed 16) does that mean i need to buy all new sticks or can i continue to use the old one and stick a new one next to it ?
thanks again mick van aar, perth western aus.
michelvanaar -
The A1342 will take up to 16 GB of RAM, however, there are only two RAM slots, so use two 8-GB RAM modules. Other World Computing (OWC) is a great reference source for info on exactly which RAM to use with which model; prices are usually much better on EBay though. Add an SSD from OWC and your machine will really scream!
I hope that helps!
gdesbrisay -
Gregoire is right. The 8 screws are absolutely NOT identical, I’m looking at them right now, weeowey weeowey.
John Guzman -
I just wanted to say that, in 2020, i used these instructions to replace the magsafe socket on my A1286, mid-2012, pre-Retina MacBook Pro. The internal layout is not quite the same but close enough for me to do the job. I skipped the steps of fully disconnecting the fans and speakers because of what others had said about breaking the sockets. it just meant I had to be extremely careful when lifting up the main board so that I did not tear and break the connections. I was able to disconnect the old magsafe socket with the board flat and in situ, but there was no where near enough room to be able to aline and press home the new par home. Reluctantly i had to lever up the board. This was difficult as there is a tapped post that holds a screw in the way close to where the USB sockets are, that prevented the board lifting up and out. I had to be quite forceful to manouevre the sockets out from the edge of the case.
Paul Burridge -