
Introduzione
L'aggiunta di un secondo disco rigido nel computer portatile offre diversi vantaggi, fra cui velocità più elevate, maggiore spazio di archiviazione e la possibilità di installare nuovi software senza problemi. Utilizzare questa guida per eseguire l'installazione mediante il nostro case per disco rigido nell'alloggiamento ottico. Alcuni alloggiamenti delle unità hanno un'altezza di 7 mm, mentre altri di 9,5 mm. In base alle dimensioni dell'alloggiamento dell'unità, potrebbe essere necessario un distanziatore per posizionare correttamente l'SSD.
-
-
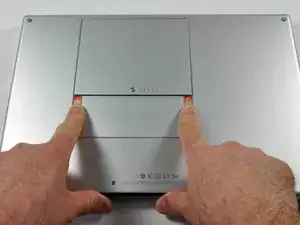
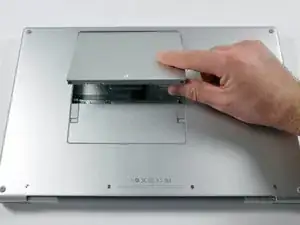
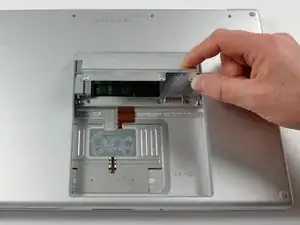
Premere con le dita entrambe le linguette di sgancio della batteria verso l'esterno e sollevare la batteria dal computer.
-
-
-
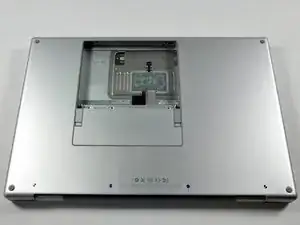
Rimuovere le tre viti con testa a croce da 2 mm dallo sportello della memoria.
-
Sollevare lo sportello della memoria affinché sia possibile prenderlo e farlo scorrere verso di sé, estraendolo dall'alloggiamento.
-
-
-
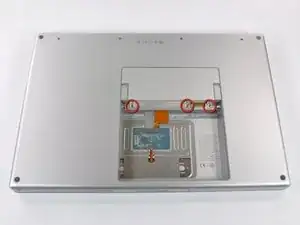
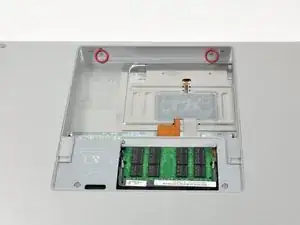
Rimuovere le due viti con testa a croce da 2,8 mm nello scomparto della batteria in prossimità della chiusura.
-
-
-
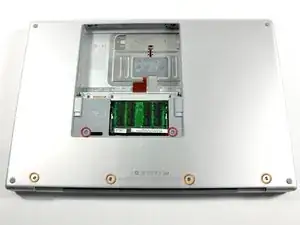
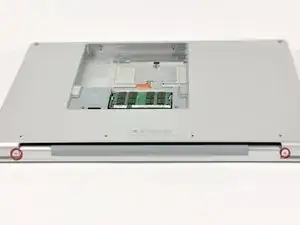
Rimuovere le 6 viti seguenti:
-
Due viti Torx T6 da 10 mm su entrambi i lati dello slot RAM.
-
Quattro viti con testa a croce da 14,5 mm lungo il cardine.
-
-
-
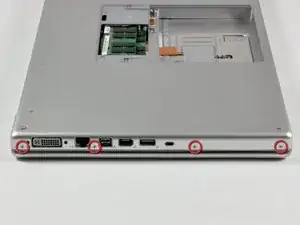
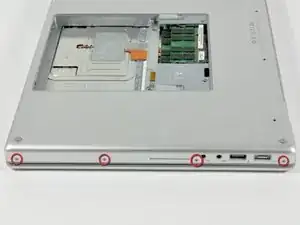
Ruotare il computer di 90 gradi e rimuovere le viti con testa a croce da 3,2 mm dalla parte posteriore del computer.
-
-
-
Ruotare il computer di 90 gradi e rimuovere le viti con testa a croce da 3,2 mm dalla parte laterale del computer.
-
-
-
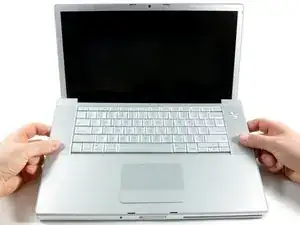
Sollevare il case dalla parte posteriore e, mediante le dita, liberarlo progressivamente dai lati. Dopo aver liberato i fianchi, potrebbe essere necessario inclinare il case verso l'alto e verso il basso per liberare la parte anteriore del case superiore.
-
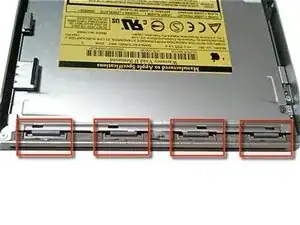
Sono presenti quattro levette di plastica sopra lo slot del DVD e in alto e a sinistra del sensore infrarossi. Queste levette potrebbero essere difficili da sganciare senza fare leva. Inoltre, potrebbe essere difficile riagganciarle durante il riassemblaggio.
-
-
-
Scollegare il cavo piatto della tastiera e del trackpad dalla scheda logica, rimuovendo il nastro secondo necessità.
-
Rimuovere il case superiore.
-
-
-
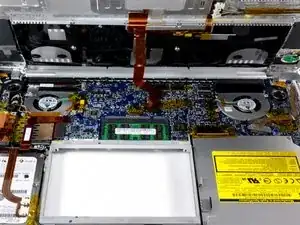
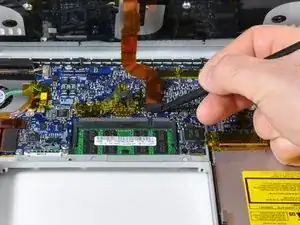
Utilizzare l'estremità piatta di un inseritore per scollegare il cavo piatto arancione dell'unità SuperDrive dalla scheda logica, rimuovendo il nastro secondo necessità.
-
-
-
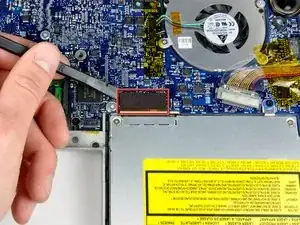
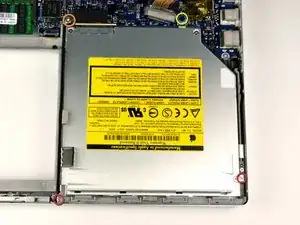
Rimuovere le 4 viti seguenti:
-
Due viti con testa a croce argentate da 3,3 mm su entrambi i lati dell'unità SuperDrive.
-
Una vite Torx T6 argentata da 4,7 mm dall'angolo superiore sinistro dell'unità.
-
Una vite con testa a croce nera da 6,2 mm dall'angolo superiore destro dell'unità.
-
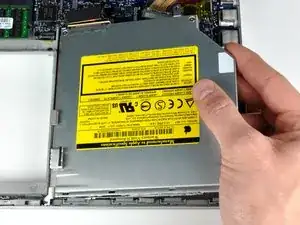
Sollevare l'unità ottica e rimuoverla dal computer.
-
-
-
Rimuovere le due viti con testa a croce argentate che fissano la staffa di montaggio al lato sinistro dell'unità ottica.
-
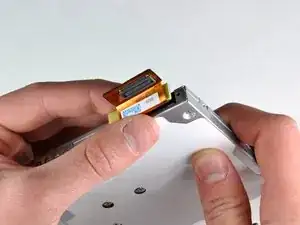
Ruotare l'unità e scollegare il cavo piatto arancione dall'unità ottica.
-
-
-
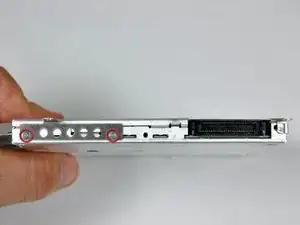
Rimuovere le due viti con testa a croce che fissano la staffa di montaggio al lato posteriore dell'unità ottica.
-
-
-
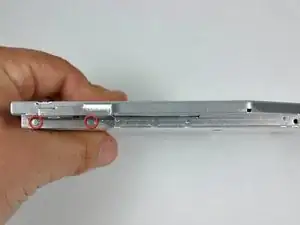
Ruotare l'unità e rimuovere le due viti con testa a croce che fissano la staffa di montaggio al lato destro dell'unità ottica.
-
-
-
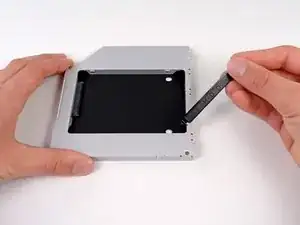
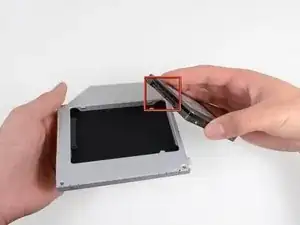
Rimuovi lo spaziatore in plastica dall'alloggiamento dell'unità disco premendo una delle clip presenti su ciascun lato; sollevalo verso l'alto per estrarlo dall'alloggiamento.
-
-
-
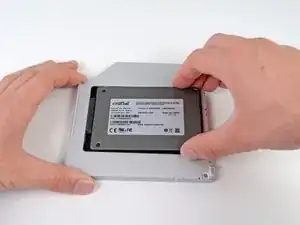
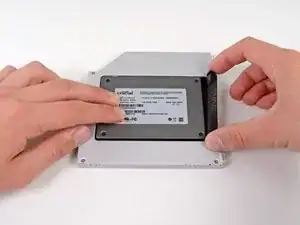
Accertati che i connettori del disco rigido siano a faccia in giù prima di disporre l'unità nell'alloggiamento.
-
Posiziona il disco rigido nell'apposito alloggiamento.
-
-
-
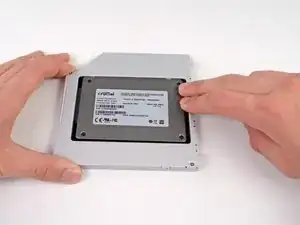
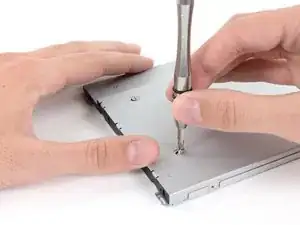
Una volta posizionato il disco rigido nel suo alloggiamento, reinserisci lo spaziatore in plastica mentre tieni l'unità a contatto con la parte inferiore dell'alloggiamento.
-


Per riassemblare il dispositivo, seguire queste istruzioni in ordine inverso.

14 commenti
i dont see how any of you guys installed the hard drive. the ATApi on the mother board is a different from the hard drive. any one know the solution to this? please help
iFixit sells a SATA to ATAPI cage for the hard drive. You'll get slightly slower speeds than via a SATA connection, so if you're thinking of installing an SSD I would move the spinning hard disk to the cage. The photos shown in the guide after step 16 are incorrect, as they reference the SATA optical drive included on newer MacBook Pro models.
Had trouble getting MBP to recognise the secondary HDD in the Optical Bay Enclosure. I could hear it spin but Disk Utility did not recognise it.
After a few hours I realised I did not push the orange SuperDrive ribbon cable into the logic board (Step 10) all the way in.
Lesson: Be gentle but not too gentle! Everything works now.
jerlou3 -
Hi,
Can someone help me?
I think that the optical drive has a ATAPI connection, not a SATA connection, as it's showed (image 20). Am I right?
Consequently, the second disk enclosure has to have a ATAPI connection for the motherboard and a SATA connection for the HD.
Additionally, the optical drive to USB cable has to be a PATA to USB.
Any help will be appreciated!
Email sales [at] ifixit [dot] com
Before start, make a clone of your old HD into the new one, if you don't want to initiate a fresh copy. (Carbon Copy software is good).
ColmillodeChile -
Besides using WD 500GB models, are the WD 640GB and WD 750GB (the 9.5mm thickness model) good to go for? I am still considering as I have heard from other websites on the computer does not draw enough power to power up the 640 and 750 as it has the clicking sound and the rainbow keeps appearing. Anyone has install one before yet?
Please advice. Appreciated! Thanks a million to all the Mac gurus out there!
Danny Lim -
What is this about removing the PRAM battery causing a reinitialization of the HDD? For serious?
Adrian -
No, that's nonsense
max damage -
Wait, I misunderstood you. I thought the comment was directed at the PRAM battery removal page. Silly me.
Nevermind. Yes, it is always a good idea to backup one's data before doing stuff like this. I never do, and have never had any problems, but it's still a good idea.
Adrian -
The two screws removed in step 3 should not be mixed with screws in steps 5 through 7. Though similar, they are actually slightly shorter and have a bigger head. If you put the longer screws back in here when reassembling, the button to unlatch the top will not work properly.
Doug -
I think you may have commented on the wrong page. This page only has 3 steps, and the screws are removed in step 2, not 3.
(Installazione della memoria RAM nel MacBook Pro Core 2 Duo da 15" modelli A1226 e A1260)
Don -
I'm not sure how the user notes get attached to the various procedures here, but my comment does seem to show up properly when viewing the steps for Hard Drive Replacement. However, the number of the step may be off if viewed as part of another procedure.
Doug -