Introduzione
È possibile installare dischi rigidi dallo spessore massimo di 9,5 mm. Alcuni alloggiamenti delle unità hanno un'altezza di 7 mm, mentre altri di 9,5 mm. In base alle dimensioni dell'alloggiamento dell'unità, potrebbe essere necessario un distanziatore per posizionare correttamente l'SSD.
-
-
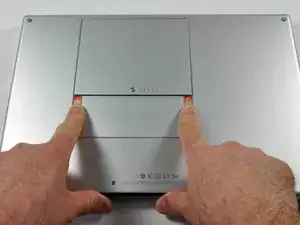
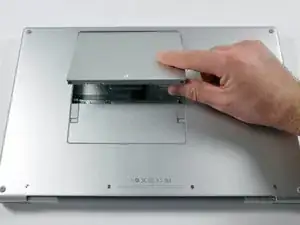
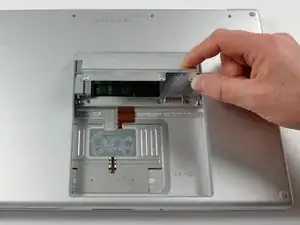
Premere con le dita entrambe le linguette di sgancio della batteria verso l'esterno e sollevare la batteria dal computer.
-
-
-
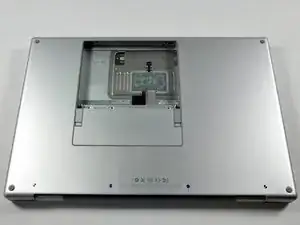
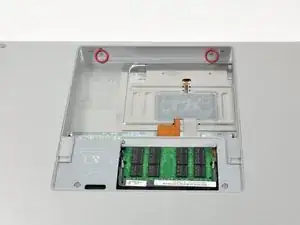
Rimuovere le tre viti con testa a croce da 2 mm dallo sportello della memoria.
-
Sollevare lo sportello della memoria affinché sia possibile prenderlo e farlo scorrere verso di sé, estraendolo dall'alloggiamento.
-
-
-
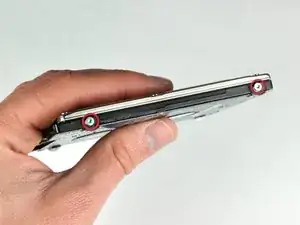
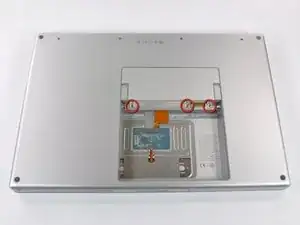
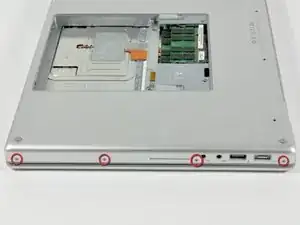
Rimuovere le due viti con testa a croce da 2,8 mm nello scomparto della batteria in prossimità della chiusura.
-
-
-
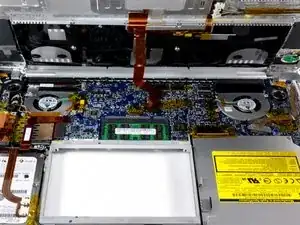
Rimuovere le 6 viti seguenti:
-
Due viti Torx T6 da 10 mm su entrambi i lati dello slot RAM.
-
Quattro viti con testa a croce da 14,5 mm lungo il cardine.
-
-
-
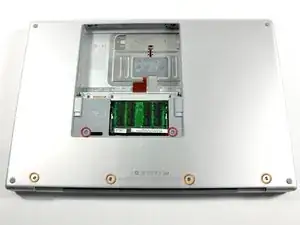
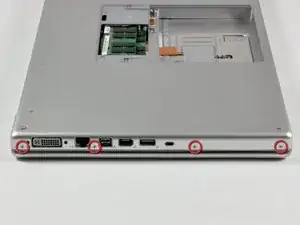
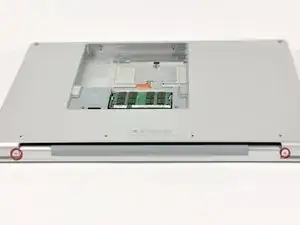
Ruotare il computer di 90 gradi e rimuovere le viti con testa a croce da 3,2 mm dalla parte posteriore del computer.
-
-
-
Ruotare il computer di 90 gradi e rimuovere le viti con testa a croce da 3,2 mm dalla parte laterale del computer.
-
-
-
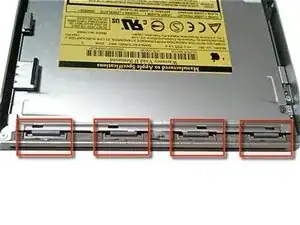
Sollevare il case dalla parte posteriore e, mediante le dita, liberarlo progressivamente dai lati. Dopo aver liberato i fianchi, potrebbe essere necessario inclinare il case verso l'alto e verso il basso per liberare la parte anteriore del case superiore.
-
Sono presenti quattro levette di plastica sopra lo slot del DVD e in alto e a sinistra del sensore infrarossi. Queste levette potrebbero essere difficili da sganciare senza fare leva. Inoltre, potrebbe essere difficile riagganciarle durante il riassemblaggio.
-
-
-
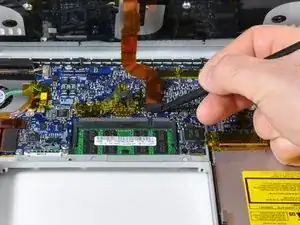
Scollegare il cavo piatto della tastiera e del trackpad dalla scheda logica, rimuovendo il nastro secondo necessità.
-
Rimuovere il case superiore.
-
-
-
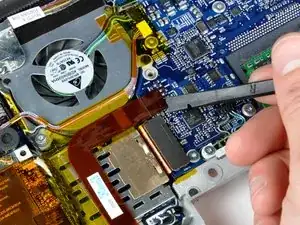
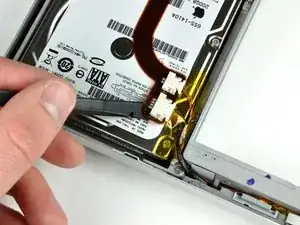
Scollegare il cavo piatto arancione del disco rigido dalla scheda logica.
-
Rimuovere il nastro secondo necessità e utilizzare un inseritore (o inserire con attenzione una carta di credito sotto il nastro) per allentare con cautela l'adesivo che fissa i connettori del sensore infrarossi e della spia della modalità sospensione alla parte superiore del disco rigido.
-
-
-
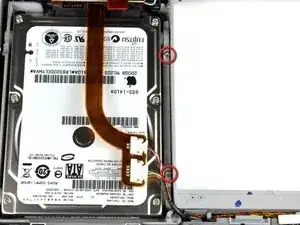
Rimuovere le due viti Torx T6 da 8,2 mm che fissano la staffa di fissaggio del disco rigido al case inferiore.
-
Sollevare la staffa di fissaggio del disco rigido e rimuoverla dal computer.
-
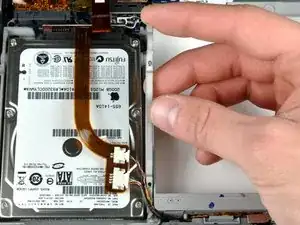
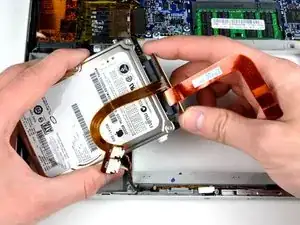
Sollevare il disco rigido con una mano e utilizzare l'altra per scollegare il relativo cavo.
-
-
-
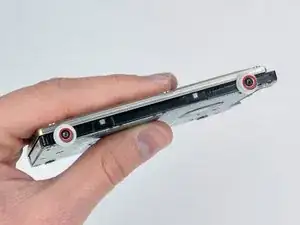
Rimuovere le due viti Torx T6 argentate da 6 mm dal lato sinistro del disco rigido.
-
Trasferire queste viti nel nuovo SSD.
-
-
-
Rimuovere le due viti Torx T6 nere e i due paracolpi in gomma bianchi dal lato destro del disco rigido.
-

Per riassemblare il dispositivo, seguire queste istruzioni in ordine inverso.

22 commenti
Hi folks, is it possible to inserting a new 1 GB 2,5" HDD with a thickness of 12.5 mm into the MBP?
can anyone help me?
Sorry about my bad english...
Andreas from germany
Not to the pre-unibody MBPs it isn't possible, no. Maximum size 9.5 mm drives
I used the A1260 hard drive replacement guide to swop out a Western Digital Scorpio SATA (WD3200BEVT) 320 Gig 5400rpm for a Western Digital SATA (ST9750420AS) Momentus 750 Gig 7200rpm. (http://www.seagate.com/www/en-us/product...) The whole operation went flawlessly thanks to the guide. The improvement in speed / access with the bigger, faster hard drive is very noticeable. Just to let people know that the installation of a 750 gig drive is an accomplished fact in a A1260 series MacBook Pro.
Thanks for the very thoroughly and easy-to-follow guide. I'm no technical genius, but thanks to the guide I manage to replace the original disc with a Toshiba THNS 512GG8BBAA. I printed out the instructions and attached the screws with scotch to the right picture as I went along - not a chance of mixing or loosing the screws. It all went well, and the improvement is awesome!
HansO -
Before start, make a clone of your old HD into the new one, if you don't want to initiate a fresh copy. (Carbon Copy software is good).
ColmillodeChile -
Besides using WD 500GB models, are the WD 640GB and WD 750GB (the 9.5mm thickness model) good to go for? I am still considering as I have heard from other websites on the computer does not draw enough power to power up the 640 and 750 as it has the clicking sound and the rainbow keeps appearing. Anyone has install one before yet?
Please advice. Appreciated! Thanks a million to all the Mac gurus out there!
Danny Lim -
What is this about removing the PRAM battery causing a reinitialization of the HDD? For serious?
Adrian -
No, that's nonsense
max damage -
Wait, I misunderstood you. I thought the comment was directed at the PRAM battery removal page. Silly me.
Nevermind. Yes, it is always a good idea to backup one's data before doing stuff like this. I never do, and have never had any problems, but it's still a good idea.
Adrian -
The two screws removed in step 3 should not be mixed with screws in steps 5 through 7. Though similar, they are actually slightly shorter and have a bigger head. If you put the longer screws back in here when reassembling, the button to unlatch the top will not work properly.
Doug -
I think you may have commented on the wrong page. This page only has 3 steps, and the screws are removed in step 2, not 3.
(Installazione della memoria RAM nel MacBook Pro Core 2 Duo da 15" modelli A1226 e A1260)
Don -
I'm not sure how the user notes get attached to the various procedures here, but my comment does seem to show up properly when viewing the steps for Hard Drive Replacement. However, the number of the step may be off if viewed as part of another procedure.
Doug -