
Introduzione
Aggiornamento del disco rigido per un maggiore spazio di archiviazione.
-
-
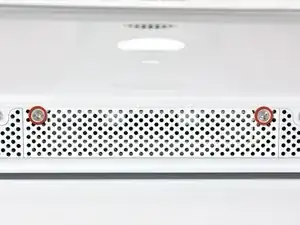
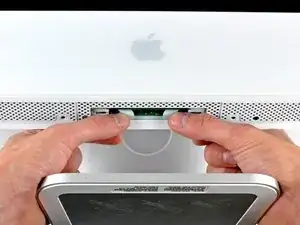
Allenta le due viti con testa a croce Phillips che fissano lo sportello di accesso all'iMac.
-
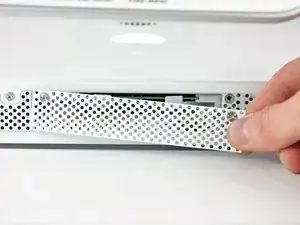
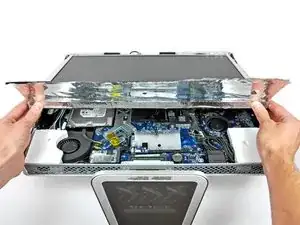
Rimuovi lo sportello di accesso.
-
-
-
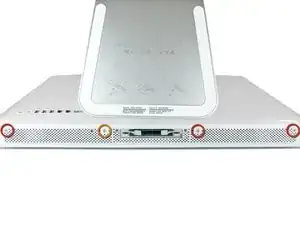
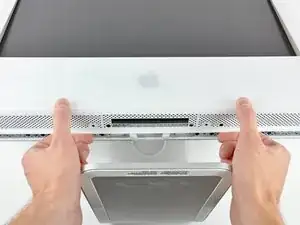
Rimuovere le viti seguenti lungo il bordo inferiore dell'iMac:
-
Tre viti Torx T8 da 6 mm
-
Una vite Torx T8 da 8 mm (lato destro dello slot RAM nel modello 2105)
-
-
-
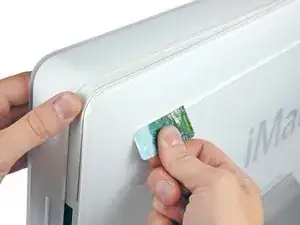
Inserire una scheda di plastica nell'angolo della fessura di ventilazione accanto alla parte superiore del case posteriore.
-
Premere la scheda verso la parte superiore dell'iMac per sganciare la chiusura della mascherina anteriore.
-
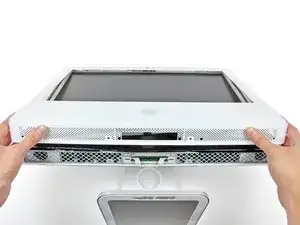
Rimuovere la mascherina anteriore dal case posteriore.
-
Ripetere la procedura per l'altro lato della mascherina anteriore.
-
Se la mascherina non si sgancia, provare a sollevare leggermente il bordo inferiore della mascherina anteriore dal case posteriore (l'operazione viene spiegata nei passaggi successivi) e ripetere la procedura di sgancio della chiusura.
-
-
-
Poggiare l'iMac dal lato della staffa su una superficie piatta.
-
Per sollevare la mascherina anteriore dall'iMac, eseguire queste operazioni contemporaneamente:
-
Premere con i pollici le alette della memoria RAM e tenere l'iMac verso il basso.
-
Tirare con gli indici il piccolo ponte sulla mascherina anteriore verso di sé.
-
Tirare la mascherina anteriore verso l'alto con gli indici.
-
Dopo che il piccolo ponte ha liberato le alette della memoria RAM, sollevare la mascherina anteriore dal bordo inferiore, quanto basta a liberare il bordo inferiore del case posteriore.
-
-
-
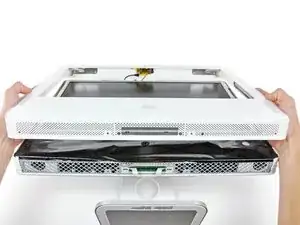
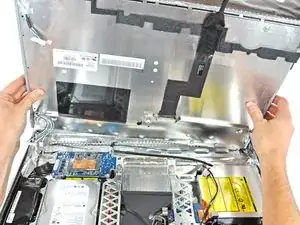
Sollevare la mascherina anteriore dal case posteriore e ruotarla per rimuoverla dal bordo inferiore dell'iMac. Attenzione: i cavi del microfono e della fotocamera sono ancora collegati al bordo superiore.
-
-
-
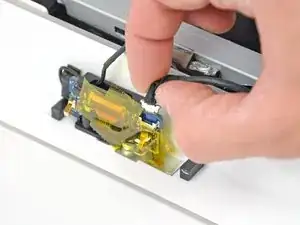
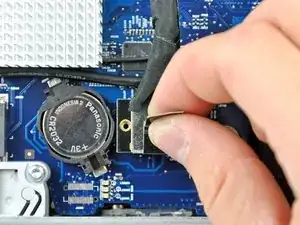
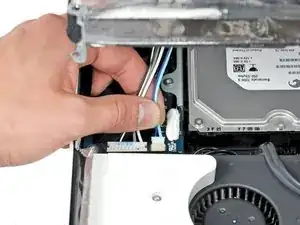
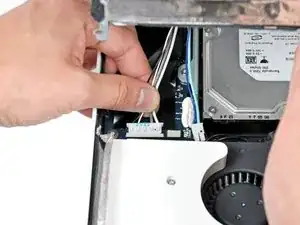
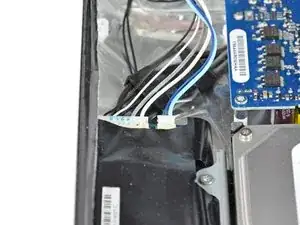
Scollegare il cavo del microfono.
-
Scollegare il cavo della fotocamera estraendone il connettore dal connettore femmina sulla scheda della fotocamera.
-
-
-
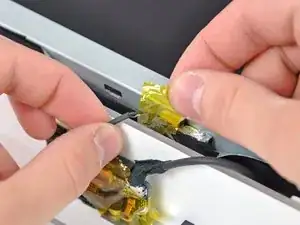
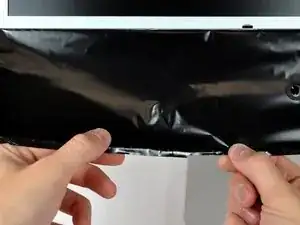
Fissare la schermatura EMI sulla superficie del display con del nastro per tenerla da parte.
-
-
-
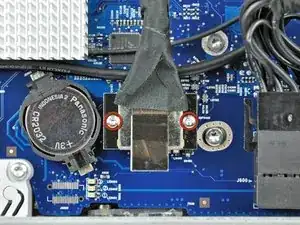
Rimuovere le due viti Torx T6 da 5 mm che fissano il connettore del cavo dati del display alla scheda logica.
-
Estrarre il connettore del cavo dati del display dalla scheda logica tramite la linguetta d'estrazione nera.
-
-
-
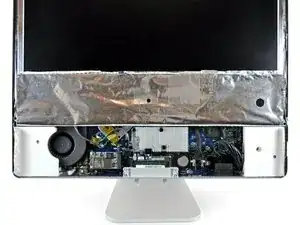
Lasciare pendere la schermatura EMI inferiore dal display.
-
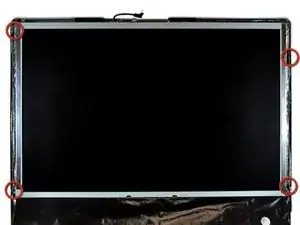
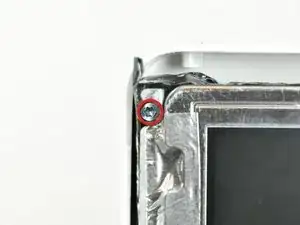
Rimuovere le quattro viti Torx T10 da 7,5 mm che fissano il display al case posteriore.
-
-
-
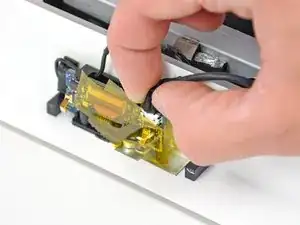
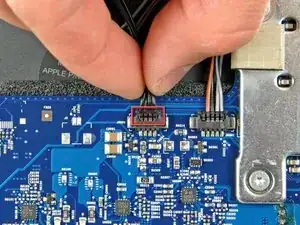
Scollegare i due cavi dell'inverter presso il bordo superiore dell'inverter spesso, mediante il metodo spiegato nel passaggio precedente.
-
-
-
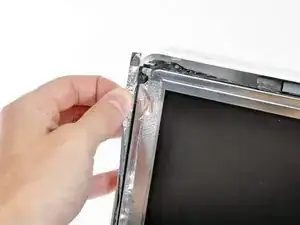
Ruotare il display finché non è quasi perpendicolare al case posteriore e sollevarlo per rimuovere la schermatura EMI fissata sul bordo superiore.
-
-
-
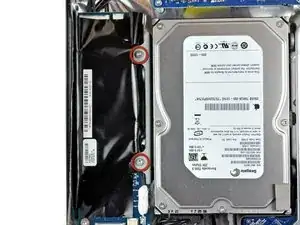
Rimuovere le due viti Torx T10 da 9,2 mm che fissano la staffa del disco rigido al case posteriore.
-
-
-
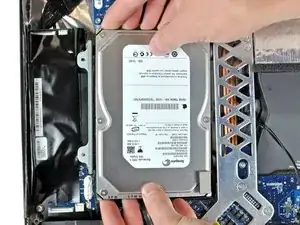
Sollevare il disco rigido dal bordo sinistro per rendere accessibile l'inverter e tirarlo verso il bordo sinistro dell'iMac per sganciare i piedini di montaggio dal case.
-
-
-
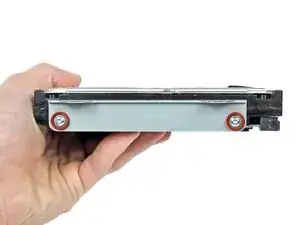
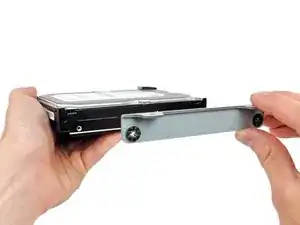
Rimuovere le due viti Torx T8 da 12 mm con bordino che fissano la staffa del disco rigido a quest'ultimo dal lato del connettore.
-
-
-
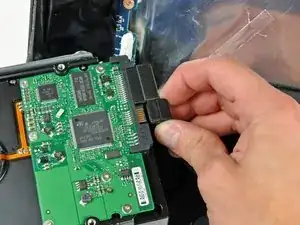
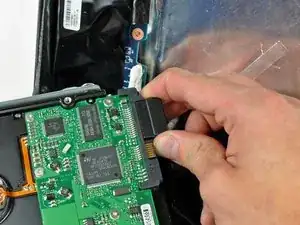
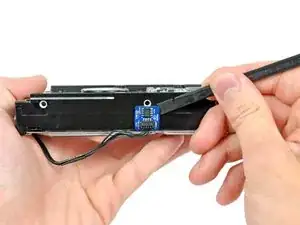
Mediante l'estremità piatta di un inseritore, rimuovere la scheda del sensore termico dall'adesivo che la fissa al disco rigido.
-

Per riassemblare il dispositivo, seguire queste istruzioni in ordine inverso.

19 commenti
I was able to exchange hard drives between a 17" model and a 20" model. The 17" model has a slightly different architecture inside, but I have made some notes about that on the appropriate Step.
robino -
I recently used this guide to install an Hitachi 3 TB 7200rpm drive. Works like a champ.
iFixit is a great resource. Thank you!
John C -
I used this guide in conjunction with this video for reference that was really helpful: http://www.youtube.com/watch?v=ShY8zuT-w... (and part 2). Repair went really easy (just take it slow). Hardest part for me was pulling out the screen. The torx screws are pretty far in and the 26 piece kit I bought from here wasn't long enough to reach (the extension has a large round magnet on it that will not insert far enough because of limited space). Thankfully I had a torx at home that was longer for that specific size, so I was able to unscrew just enough with MY torx and use the magnetic one to grab the screw (absolutely necessary to have a magnetic version). Bought the Western Digital drive and found out that it would not format with the original OS Tiger disk. Only OS Snow Leopard's Disk Utility would read the HD properly and format for Mac. If buying the Western Digital, make sure you have a newer OS to install than Tiger. I read about possible problems with OS Leopard's Disk Utility and WD drives as well, but I cannot speak specifically for that.
Swapping in a new CPU and an SSD took me about 10 hours. I did take a dinner break and spent another hour rooting around in my garage to find my thermal paste. Still, this procedure can take a long time.
gordonhamachi -
Only a french translation proposal. We use to say “démontage” instead of “installation'“ in that specific case. ;-) (Dismantling)
francis barbier -