Introduzione
Utilizzare questa guida per sostituire un alimentatore guasto. La sostituzione dell'alimentatore richiede la rimozione del gruppo della scheda logica.
-
-
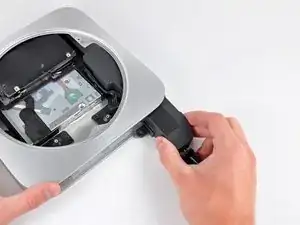
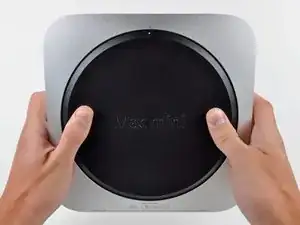
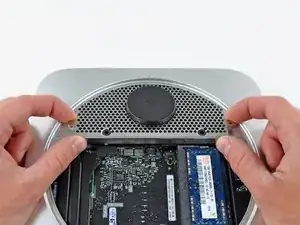
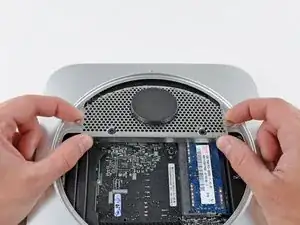
Posizionare i pollici negli incavi tagliati nel coperchio inferiore.
-
Ruotare il coperchio inferiore in senso antiorario finché il puntino bianco dipinto su di esso non è allineato con il cerchio in rilievo sul case esterno.
-
-
-
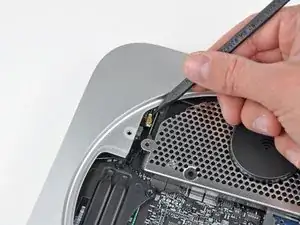
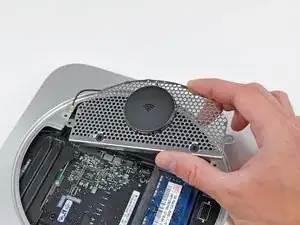
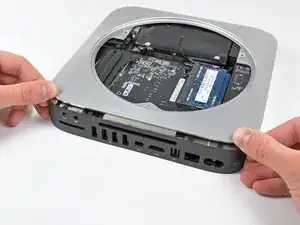
Inclinare il Mac mini abbastanza da sganciare il coperchio inferiore dal case esterno.
-
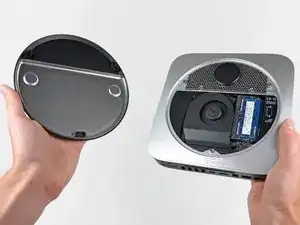
Rimuovere coperchio inferiore e conservarlo altrove.
-
-
-
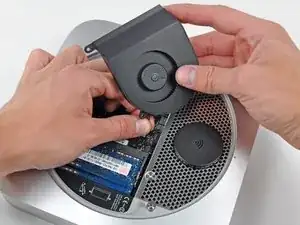
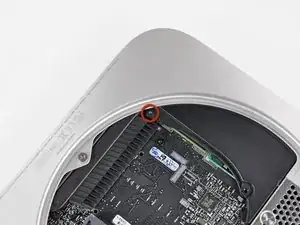
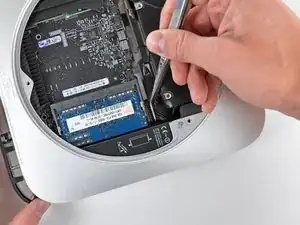
Rimuovere le due viti Torx T6 da 11,3 mm che fissano la ventola alla scheda logica, in prossimità della piastra dell'antenna.
-
-
-
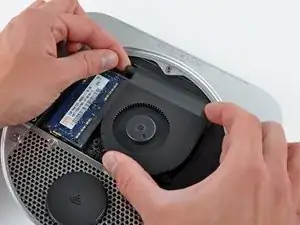
Sollevare la linguetta della ventola più vicina alla memoria RAM più vicina al distanziatore fissato al case esterno.
-
-
-
Sollevare la ventola dal Mac mini affinché sia possibile accedere al connettore.
-
Tirare con attenzione i cavi della ventola verso l'alto, per sollevare il connettore dal connettore femmina sulla scheda logica.
-
Rimuovere la ventola.
-
-
-
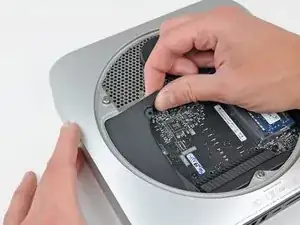
Sollevare la mascherina dall'estremità più vicina alla piastra dell'antenna.
-
Ruotare la mascherina fuori dal case esterno e rimuoverla dal Mac mini.
-
-
-
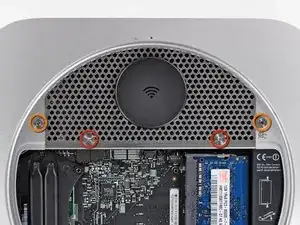
Rimuovere le viti seguenti, che fissano la piastra dell'antenna al Mac mini:
-
Due viti Torx T8 da 6,6 mm
-
Due viti Torx T8 da 5 mm o viti esagonali da 2 mm (vanno bene entrambi i cacciaviti)
-
-
-
Sollevare delicatamente la piastra dell'antenna dall'estremità più vicina alla memoria RAM.
-
Estrarre con attenzione la piastra dell'antenna direttamente dalla montatura rotonda nel case esterno.
-
-
-
Mediante la punta di un inseritore, scollegare con attenzione il connettore dell'antenna dalla scheda AirPort/Bluetooth.
-
-
-
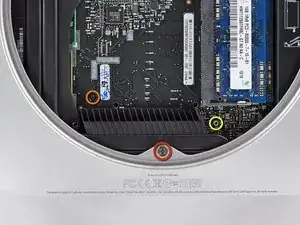
Rimuovere le tre viti seguenti:
-
Una vite Torx T8 da 5 mm o vite esagonale da 2 mm (vanno bene entrambi i cacciaviti)
-
Una vite Torx T6 da 16,2 mm
-
Un distanziatore Torx T6 da 26 mm
-
-
-
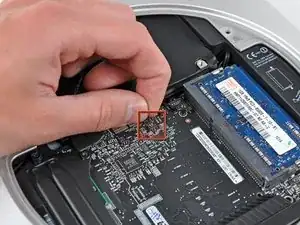
Estrarre con attenzione i fili da entrambi i sensori termici del disco rigido verso l'alto, per sollevare i connettori e rimuoverli dai rispettivi connettori femmina sulla scheda logica.
-
-
-
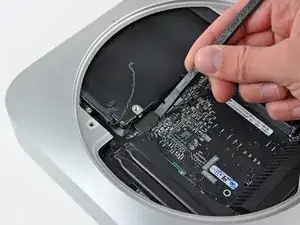
Utilizzare l'estremità piatta di un inseritore per scollegare i connettori del disco rigido e dell'unità ottica dai rispettivi connettori femmina sulla scheda logica.
-
-
-
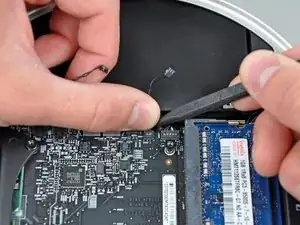
Per scollegare il sensore termico dell'unità ottica, tenere i cavi fra il pollice e un inseritore e tirare quest'ultimo vero l'alto per sollevare il connettore e rimuoverlo dal rispettivo connettore femmina sulla scheda logica.
-
-
-
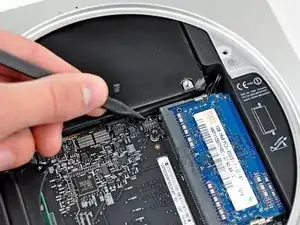
Mediante la punta di un inseritore, scollegare il connettore del cavo del sensore infrarossi dal connettore femmina sulla scheda logica tirandolo verso l'alto.
-
-
-
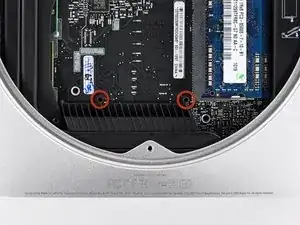
Utilizzare i due fori evidenziati in rosso. Verificare che avvenga il contatto con il case esterno sotto la scheda logica prima di procedere con l'operazione.
-
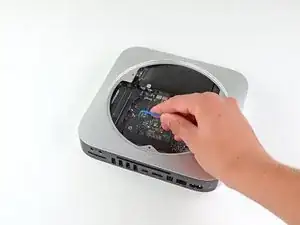
Tirare con attenzione l'attrezzo verso la scheda I/O. La scheda logica e il gruppo della scheda I/O dovrebbero scorrere leggermente fuori dal case esterno.
-
Interrompere l'operazione quando la scheda I/O è visibilmente separata dal case esterno. Rimuovere l'attrezzo per la rimozione della scheda logica per Mac mini.
-
-
-
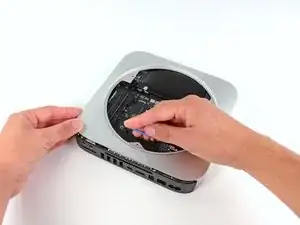
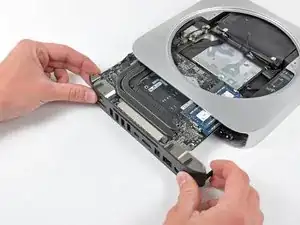
Premere contemporaneamente le due levette di plastica nei lati all'estrema sinistra e destra della scheda I/O verso la parte centrale di quest'ultima, rimuovendola dal case esterno.
-
-
-
Estrarre il gruppo della scheda logica/scheda I/O dal case esterno affinché sia possibile accedere al connettore dell'alimentazione.
-
Utilizzare un paio di pinzette per scollegare il cavo di alimentazione dalla scheda logica.
-
-
-
Rimuovere con attenzione il gruppo della scheda logica dal Mac mini, facendo attenzione ai cavi che potrebbero incastrarsi.
-
-
-
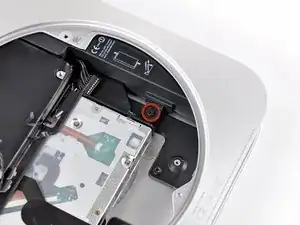
Rimuovere la vite Torx T6 da 7,9 mm che fissa l'alimentatore e l'unità ottica al case esterno.
-
-
-
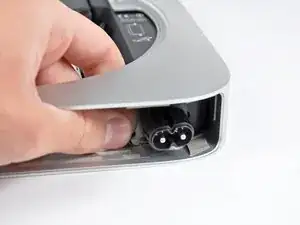
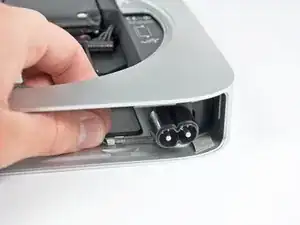
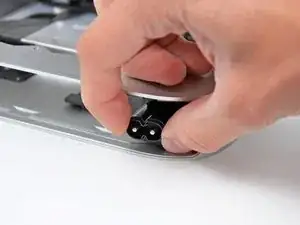
Rimuovere l'elemento di fissaggio metallico argentato del connettore C.A. in ingresso dal lato del case esterno e rimuoverlo dal Mac mini.
-
-
-
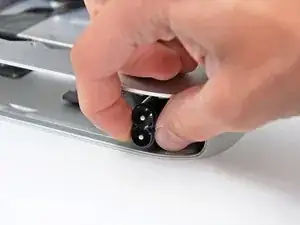
Far scorrere l'alimentatore fuori dal Mac mini, facendo attenzione ai cavi che potrebbero incastrarsi.
-


Per riassemblare il dispositivo, seguire queste istruzioni in ordine inverso.

Un commento
Perfect! Perfect!