Introduzione
Rimozione della mascherina anteriore per accedere ai componenti interni dell'iMac.
-
-
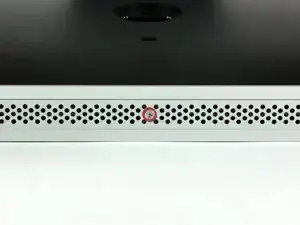
Allentare la vite con testa a croce al centro dello sportello di accesso.
-
Rimuovere lo sportello di accesso dall'iMac.
-
-
-
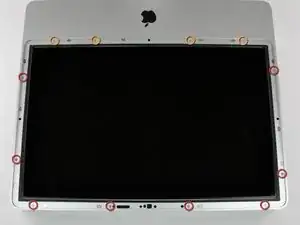
Rimuovere le 12 viti seguenti, che fissano la mascherina anteriore al case posteriore:
-
Otto viti Torx T8 da 13 mm.
-
Quattro viti Torx T8 da 25 mm.
-
-
-
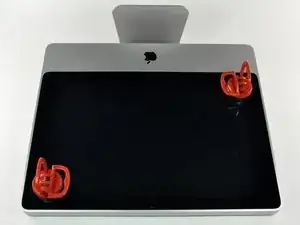
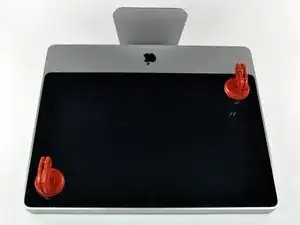
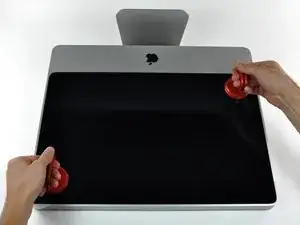
Metti le mani agli angoli superiori della cornice (di lato) e solleva la cornice a 2-3 cm dal corpo lavorando dall'alto. Dopodiché puoi anche sganciare la parte inferiore della cornice (i moduli di memoria impediranno che la parte inferiore della cornice si stacchi prima). Durante il rimontaggio, inizia con la parte inferiore della cornice.
-
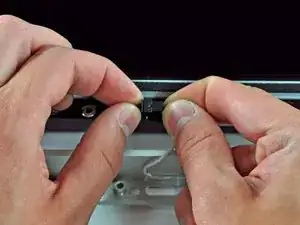
Per staccare completamente la cornice: scollega il connettore del cavo del microfono, rimuovendo il nastro adesivo se necessario.
-
Per tenerlo collegato, lascia il cavo del microfono collegato alla scheda logica e posiziona la cornice "sopra" la scocca, con il cavo del microfono che forma un cardine.
-
-
-
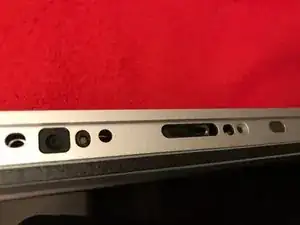
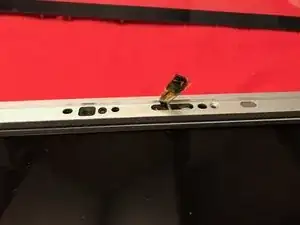
assicurarsi di infilare il cavo del microfono e il connettore nel foro vicino alla scheda della telecamera.
-
Far passare delicatamente il connettore e i cavi del microfono attraverso lo slot lungo 2-3 cm a destra della telecamera iSight. Una volta che la cornice è stata montata correttamente, spingere delicatamente il connettore del microfono e il cavo nella cornice attraverso quella fessura.
-
Per riassemblare il dispositivo, seguire queste istruzioni in ordine inverso.

isn't it actually pc2-5300s ?
grze -
It is for the 2133, the 2210 uses 6400
maccentric -
There are comments elsewhere in this step by step re. the bezel removal. That step does NOT show how to remove it. Well, take the 5:39 secs to watch the above video. It clearly shows how the aluminum framed bezel easily comes off once you've seen it done. To whoever decided to preface these instructions with that video, thank you.
ECJohansen -