Introduzione

  1. TXYGnwDDEuXhoLjf
    • Use a plastic opening tool to pry around the edges of the circular rubber panel.

  2. WWEaDOUkoKJmuvBr
    • Once the edges are loose, pull off the rubber button panel completely.

    • New adhesive will have to be applied when reassembling.

    I used a heat gun here to heat the adhesive before I attempted to pry. Using heat, I was able to remove the circuit board with the rubber overlay still attached. Use common sense on how much heat to apply. Don’t melt the plastic or rubber. Perhaps 60ºC

    Michael Pitts -

  3. VvkQbTLtn2FKlGVk
    • Use your plastic opening tool to pry the button board loose by lifting the edges.

  4. jHSSEdV3HJODNtwi
    • Lift the button board, exposing the attached cable.

    • New adhesive will have to be applied when reassembling.

    How can I get one of these to replace?

    St. Bre Dook -

  5. BSCOToMEDYqQVv3C
    • Pull black piece on top of socket away from board to loosen, then detach the cable.

    Sir where is shop button board

    bhhed expose -

    Sir where is shop button board .

    bhhed expose -

  6. M6YghAOfEQXTXkEA
    M6YghAOfEQXTXkEA
    xujU11HsB2tcSRob
    BrtYFEPFJX2NqION
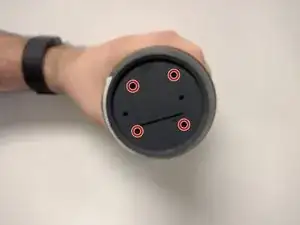
    • Take out the four 9mm black PH0 screws from the top and bottom of the device.

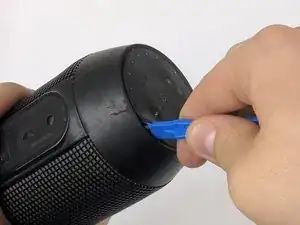
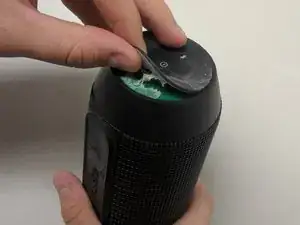
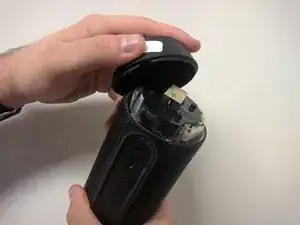
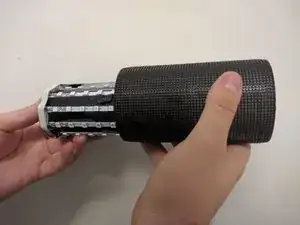
    • Pull off cap by hand.

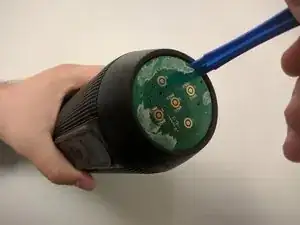
    • The outer casing can now be removed.

  7. mgMEAGVp5CRKOFTf
    mgMEAGVp5CRKOFTf
    yNo1qZAop5BcTeZg
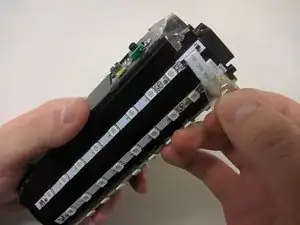
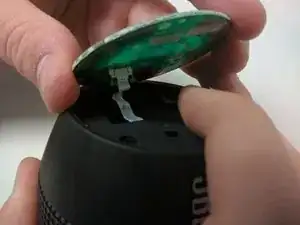
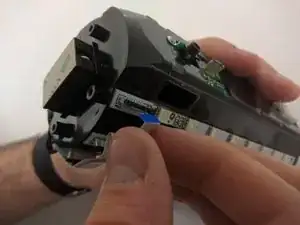
    • Remove the tape around the cables on the top of the device.

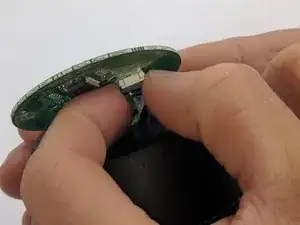
    • Remove the cables by lifting up on the black bracket and then pulling the cable out.

Conclusione

To reassemble your device, follow these instructions in reverse order.

Maxwell Busenbarrick

Membro da: 15/09/16

1353 Reputazione

0 commenti