Introduzione

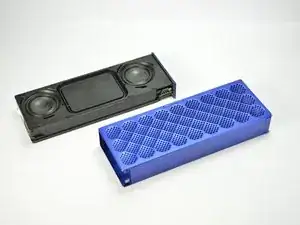
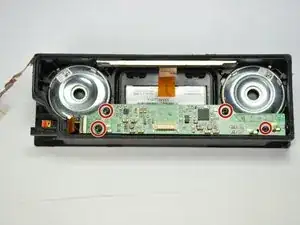
The two speakers in the Jawbone MINI JAMBOX are what provide the sound. Excessive use of the speakers can lead to them becoming damaged, and the device becoming unusable.

  1. HBum2ikkKuW34H3j
    HBum2ikkKuW34H3j
    eoEMhESyuSTWDfLo
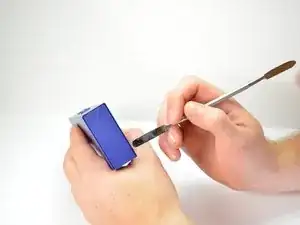
    • Using the standard metal spudger, begin by prying at the bottom of the plain rubber end cap (the end without the USB or auxiliary input).

    I was able to remove the cover without cosmetic damage. I used a 6” sharp knife blade, slid it into the crack and twisted. As Kevin states in Step 2, you are trying to lift up the center of the long edge. The top short end has two tabs and the bottom end has one big tab in the center.

    Student4Life -

    Yes I agree with Student4Life. Just insert the spudger into the top short edge (the edge without rubber foot) and you can remove the cover without noteble damage.

    Leon -

  2. Z6TciTdNrtnKKBjj
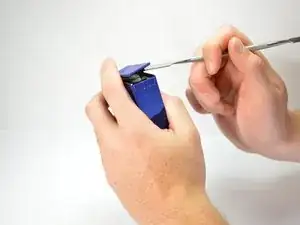
    • Continue prying around the end panel, prying at different points until the entire panel is out of its seating.

    • Carefully remove the end panel.

    • The tabs which connect the panel are on the short sides.

    • WARNING: you will likely cause cosmetic damage to the end cap.

  3. i4dDCGcEMxpMmWNF
    • Slide out the rubber foot located on the bottom of the case.

  4. QWVL5nH6pOXDvr1v
    • Using a T6 bit, remove the flat topped 5mm screw located on the bottom of the casing, underneath the rubber foot.

    • This is the only flat topped screw in the speaker, so keep track of which one it is.

    I didn’t have a T6 bit. My set only went down to T7. I was able to seat a jeweler’s flat-blade screwdriver into the head, press down firmly, and turn the screw head. Even after breaking the screw loose, there was significant drag to turn it, so be careful of the tool slipping out of the screw head.

    Student4Life -

  5. wgRUW4DRvUleRCG6
    wgRUW4DRvUleRCG6
    oNYs1jbu6D2DDdBw
    nZJ22ZrUsgKciJ4c
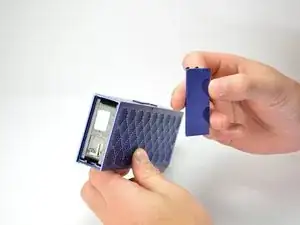
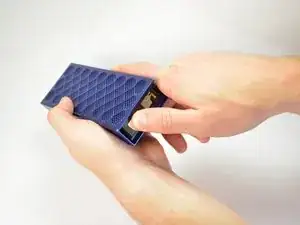
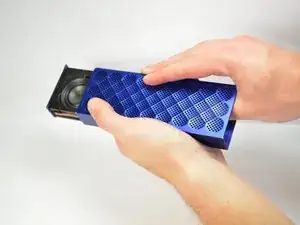
    • Push against the side without end cap to slide the internal components out of the case.

    • While holding the metal outset casing with one hand, press on the black inner plastic casing with your thumb.

    • It will be very difficult the first time. There is a rubber seal on the outside of the plastic inner case that creates a lot of friction with the metal outer case.

  6. XErAhoqwLDUs3D2A
    • Remove all connecting ribbons from the motherboard.

    • One ZIF or "zero insertion force" ribbon connecting at the side.

    • One standard ribbon connector in the middle (Note: this ZIF ribbon is lightly glued to the surface).

    I was able to skip steps 6, 7, 8, and 9 after disconnecting only the battery ribbon cable. The battery ZIF socket has a wide black lever that needs to be tilted up from the outside edge to release (and again tilted flat during reassembly to clamp) the cable connection. Skipping steps 6-9 meant that on step 10 I had to remove the battery clip from behind the motherboard that I didn’t remove.

    Student4Life -

  7. o1HWNUxLlg4hKbUD
    • Unscrew all four 5mm T6 screws holding the motherboard to the plastic case.

    • Unlike the flat top screw holding the metal housing, these screws are roundtop.

  8. eBCq1QuGanXFuktO
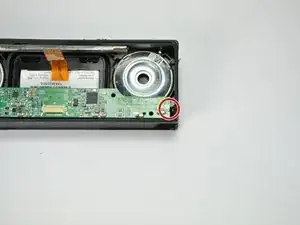
    • Desolder the grounding plug from the motherboard.

    • Make sure your soldering iron is tinned and carefully touch the tip of your iron to the grounding lug. Allow the the solder to liquify. While liquified, lift the motherboard off the grounding lug.

    • WARNING: Do not allow the solder to spill over and bridge any connection on the motherboard.

    • New to soldering? Look at iFixit's soldering guide here.

  9. lhePZwQqqIRGpxnt
    • Carefully lift the motherboard out of the plastic housing.

  10. NYDBJGsBx4ITUYPC
    NYDBJGsBx4ITUYPC
    jT2DXQih2E5YKJqA
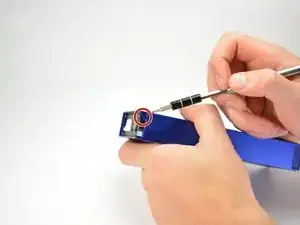
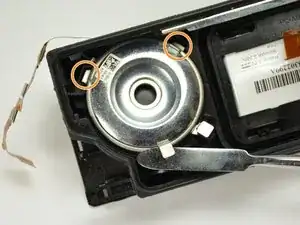
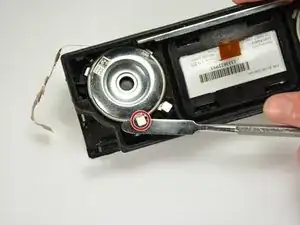
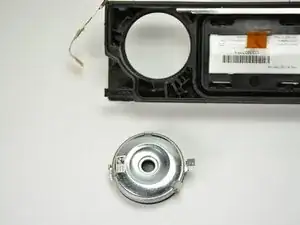
    • In order to remove the speakers, you must rotate them. Rotate the circled tabs away from their adjacent tabs.

    • Once the speakers are completely rotated, you should see new tabs rotate into sight (see the orange marks).

  11. xP65IJlINsHjECAG
    • Carefully lift the speaker out of the plastic casing using the rotated metal tabs.

  12. clhtIPvfSwy1ZSPt
    • Replace the blown speaker with a new one and reassemble the JAMBOX.

Conclusione

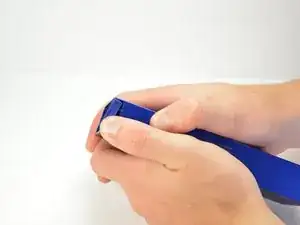
To reassemble your device, follow these instructions in reverse order.

Liam McDonnell

Membro da: 01/04/15

559 Reputazione

3 commenti

where can i buy replacement speakers

Jeffrey S Wardell -

What is the serial number or supplier for the speakers? Need to buy replacement.

candacec -

Thank you for the instructions. I was wondering where to start.

Pradeep Mangalagiri -