Introduzione

Use this guide to test and replace the ice dispensing switch on your LG model LFX25973 refrigerator.

The ice dispensing switch causes the ice-making system to feed either cubed or crushed ice through the ice dispensing chute, as well as triggering the ice dispensing door to open.

If the switch malfunctions, the refrigerator will not dispense ice or will dispense a large quantity, likely unwanted.

The most challenging part of the repair is removing the dispenser assembly from the door of the unit.

  1. SaOfLbkeAxgmho5g
    • Unplug your refrigerator before you begin your repair.

    • If you are testing or repairing the following items, you may also need to shut off and disconnect the water supply:

    • Condenser Fan Motor

    • Compressor Motor and Thermal Overload Device

    • Water Supply Valve Assembly

  2. YnD1owCUK34FFw6O
    YnD1owCUK34FFw6O
    2noNGCAMp4wNxHS1
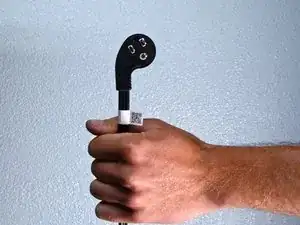
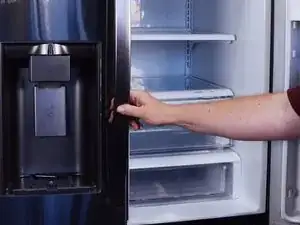
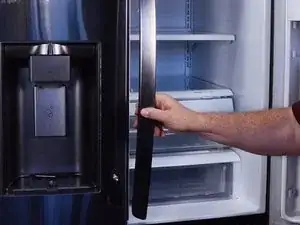
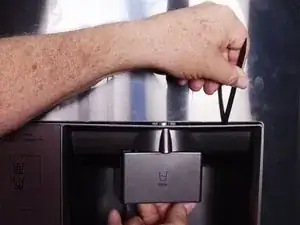
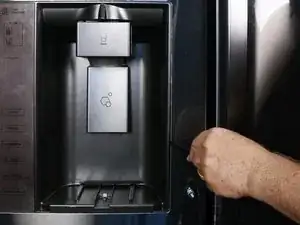
    • To remove the left door handle, first open the right door.

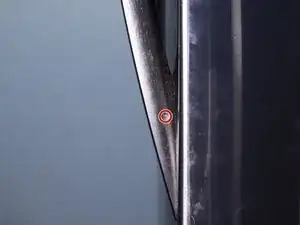
    • Use a 2 1/2 mm hex wrench to loosen the set screws in the top and bottom of the left door handle.
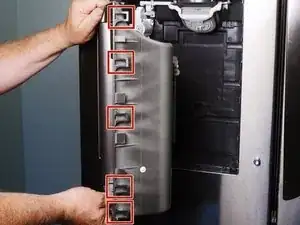
  3. XMGHNVoNnAOWx4Kq
    XMGHNVoNnAOWx4Kq
    PyjMWcjXW4iUnPJM
    • Pull the left door handle straight off to remove it.

  4. oWRuHRCXTr5NIiJj
    oWRuHRCXTr5NIiJj
    6YnrPsqbNcVsCy5Z
    wi5wKPOXHqFUorWV
    • The dispenser assembly is secured by very strong clips, making it very difficult to remove. Take note of the clip locations shown in the photos:

    • Right side clips

    • Top clips

    • Left side clips (Note, the dispenser is being held upside down for the photo, so the upper left side clips are at the bottom of the photo.)

    • During disassembly, you may break some of these clips. If you do, don't worry; the assembly does not need all the clips to be properly secured.

  5. CTnElETjK1fvgHlS
    CTnElETjK1fvgHlS
    RvDfjYthuD2bX5A3
    lIXtiBlYvAhIsjyk
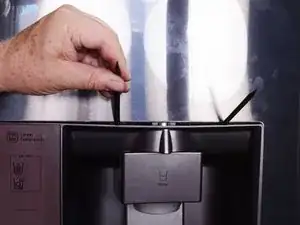
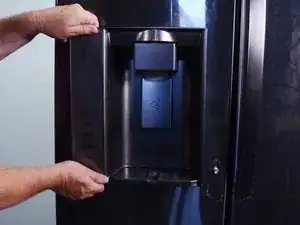
    • Use a spudger to pry out the top edge of the dispenser assembly.

    • Once you've created a gap, use your fingertips to pull the edge downward.

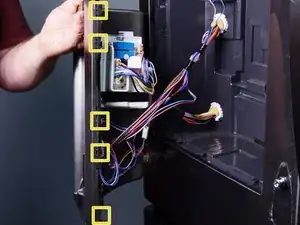
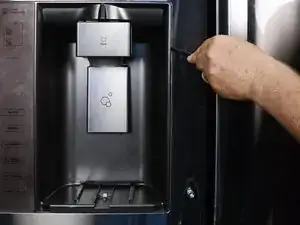
    • Use additional spudgers to unfasten the clips securing the dispenser assembly to the refrigerator door.

    • Optionally, you may use a flat-blade screwdriver to assist in this process. Be careful not to damage the door; you may scratch the door surface or dent the rim of the dispenser opening.

    LG offers a method to release the dispenser as follows: 1. Pull out the drain pan. 2. Hold the inner side of the dispenser cover with both hands at the handle/paddle to pull it forward. 3. If the nozzle interferes with the button, push it out of the way. Note: We were unable to do this. The service manual was unclear.

    Bill Gilbert -

  6. UqfsBqNHfDLgOCps
    UqfsBqNHfDLgOCps
    qCXylBXaBARHqLKo
    KGVyTxLyWKShZ2KB
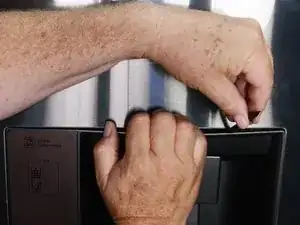
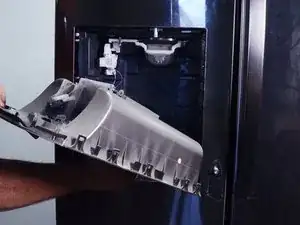
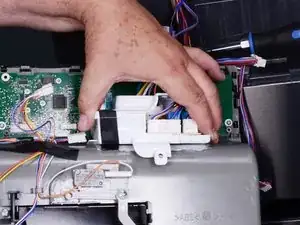
    • Grasp the top edge of the dispenser assembly in the middle and pull outwards.

    • Continue prying and pulling around the perimeter of the assembly to release it.

  7. 3WPKXqZXT1qGYgBh
    3WPKXqZXT1qGYgBh
    6bkP1VQPOygboFQi
    Abw3uAOxHiNwfot5
    • Grasp the assembly firmly and pull it out of the refrigerator door.

    • Don't try to pull the assembly completely off the refrigerator door. The assembly is still connected with numerous wires. These are mainly connected to the left side of the dispenser.

  8. XWPnTU6YIUWsn5ia
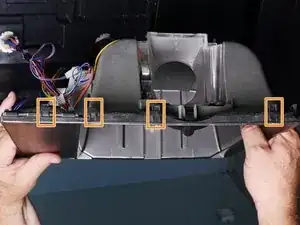
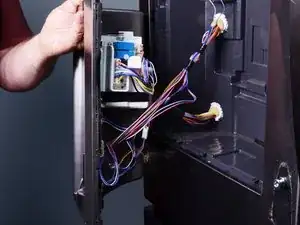
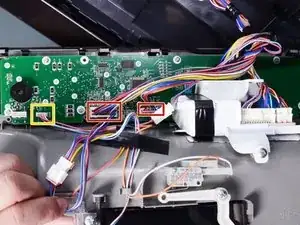
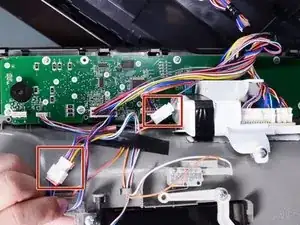
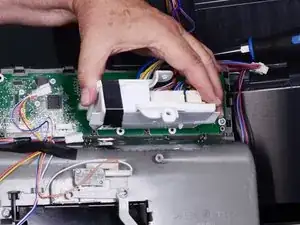
    • Squeeze the two multiple wire connectors and pull them straight off to disconnect them from the display board.

    • Do not attempt to remove the four-wire connector from the board as it is not removable.

  9. Zi1IQrhZEPXYa14O
    Zi1IQrhZEPXYa14O
    rweD6YFQIajWSLNo
    • Squeeze and separate the two-wire harness connector and the four-wire harness connector.

  10. sr1iewixrcTvlsHn
    sr1iewixrcTvlsHn
    rlCyVYPQlAPSdvpN
    F61E6PgFJmrLlgo2
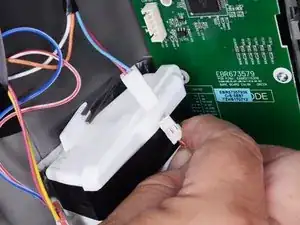
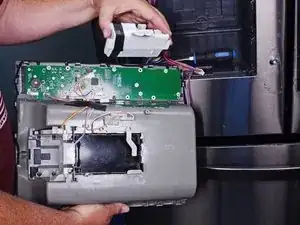
    • Use a Phillips screwdriver to remove the 11 mm‑long screw securing the white circuit board holder to the dispenser assembly.

    • Lift and remove the circuit board holder from the dispenser assembly.

  11. dNEyUhpEplmQn6ff
    • You can now remove the dispenser from the refrigerator.

    • The white circuit board holder can be suspended from the harness wires, as its weight is minimal.

  12. sDCHR1mcfoRWIf5e
    sDCHR1mcfoRWIf5e
    wKXloHBSxCmlTQLg
    • If you have a multimeter, you can test to see if your ice dispensing switch is good or not.

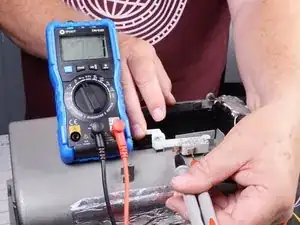
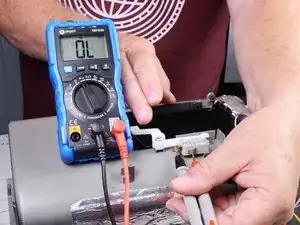
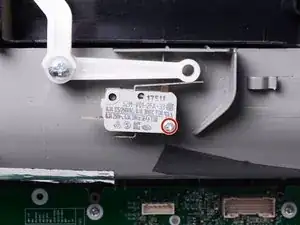
    • Set your multimeter to the continuity function with beeper.

    • Touch one probe to each of the switch terminals at the same time.

    • Use your finger to press the operating lever connected to the switch; the meter should sound and read 1Ω or less.

    • Release the lever, and the meter should not sound and should read OL for open loop.

    • If the switch does not operate as described in the steps above, follow the next steps to replace it.

  13. sJfCK3qR1eAHuTcN
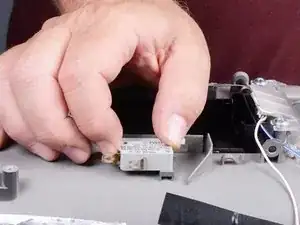
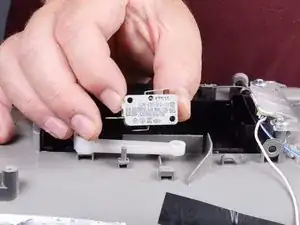
    • Use a Phillips screwdriver to remove the 18.2 mm‑long screw securing the ice dispensing switch to the dispenser assembly.

  14. COtHSBLyTgQLZ3rS
    COtHSBLyTgQLZ3rS
    ZW1xWEHYZbSEtWMj
    • Lift the ice dispensing switch off the peg, and remove it.

Conclusione

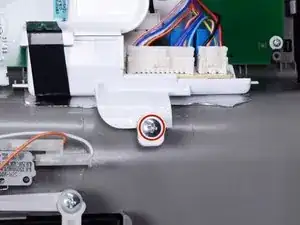
To reassemble your device, follow these instructions in reverse order.

Take your e-waste to an R2 or e-Stewards certified recycler.

Repair didn’t go as planned? Try some basic troubleshooting, or ask our  Answers community for help.

Bill Gilbert

Membro da: 30/06/22

29837 Reputazione

0 commenti