Introduzione

Capita abbastanza spesso che la leva del tostapane non resti più giù, ma gli elementi riscaldanti funzionano ancora. Nella maggior parte dei tostapane, la leva è trattenuta in basso da un elettromagnete, e qui spesso si trova il problema: o la bobina è difettosa, oppure l'elettromagnete è sporco di briciole di pane e non riesce più a trattenere. Questo problema può essere facilmente risolto, e la riparazione è simile per molti tostapane.

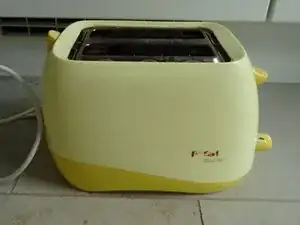
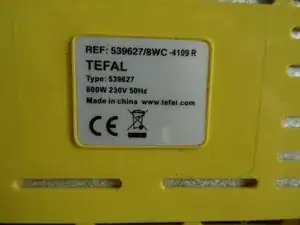
La riparazione è illustrata su un modello Tefal 539627

  1. BYVu2P5TkCMG26ID
    BYVu2P5TkCMG26ID
    monUJOrJGSEAhjyY
    • La riparazione viene effettuata su un vecchio modello Tefal 539627, ma è simile per molti tostapane.

    • Scollegare la spina di alimentazione prima di procedere alla riparazione!

    The repair is done on an old Tefal model 539627, but is the same for many toasters. Unplug the power cord before repairs

    Matthew Newton -

  2. 1jvG1lEFmnyRAcbZ
    1jvG1lEFmnyRAcbZ
    uMDDMrkjlkZLbIBq
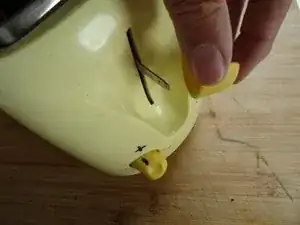
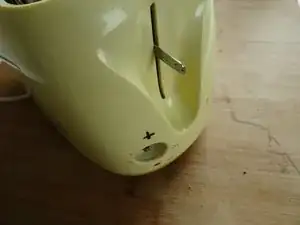
    • Estrarre la manopola che copre la leva se presente; per farlo è necessario esercitare molta forza.

    Pull the button on the slider, you need a lot of strength to do this.

    Matthew Newton -

  3. tjjkkFyt4lOPSl1Z
    tjjkkFyt4lOPSl1Z
    YDrEHuVbIS6VmCHM
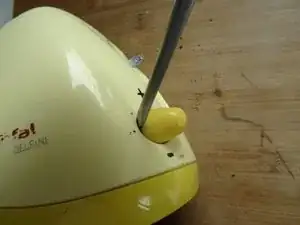
    • Estrarre anche la manopola del regolatore; in questo caso è stato utilizzato un attrezzo per fare leva.

    Also pull off the knob on the controller, a lever tool was used here.

    Matthew Newton -

  4. IHJCWJOQd55rw2yN
    • Posizionare il tostapane capovolto sul piano di lavoro.

    • Estrarre il vassoio delle briciole.

    Place the toaster face down on the work surface. Pull out the crumb drawer.

    Matthew Newton -

  5. jYaTIV6jbiFW1gVH
    jYaTIV6jbiFW1gVH
    qoOxj3EyWDJXGFPJ
    • La parte superiore è avvitata alla parte inferiore. In questo caso, sono presenti cinque viti a stella in fori profondi.

    • Inserisci qui la traduzione

    • Inserisci qui la traduzione

    • Inserisci qui la traduzione

    The upper part is screwed to the lower part. Here there are five Phillips screws that are in deep holes. Three of the screws are in the front half. Two of the screws are in the other half under the crumb drawer. Unscrew and remove all screws.

    Matthew Newton -

  6. RN5bokfkqT5ZNQlh
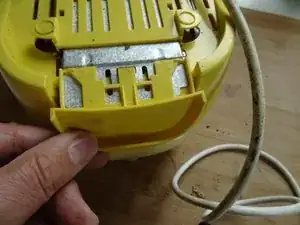
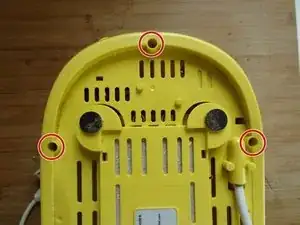
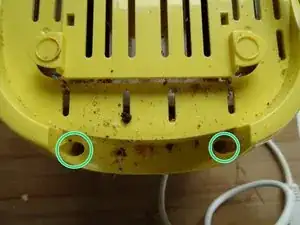
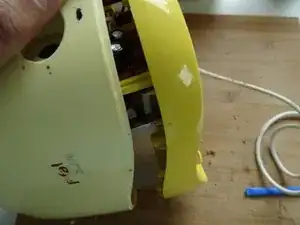
    • Inserire uno strumento di plastica nella giuntura tra la parte superiore e quella inferiore e allargare la fessura su tutto il perimetro.

    • Estrarre la parte superiore dalla parte inferiore, facendo attenzione agli assi del regolatore e della leva.

    • Questo potrebbe richiedere un po' di forza.

    • Sollevare la parte superiore e metterla da parte.

    Insert a plastic tool into the seam between the upper and lower part and enlarge the gap all around. Pull the top off the bottom, paying attention to the axes of the controller and the slider. This may require some strength. Lift the top off and put it aside

    Matthew Newton -

  7. bR4qyI4QUiObTkwh
    bR4qyI4QUiObTkwh
    PN1HKgpEoOPSO5RD
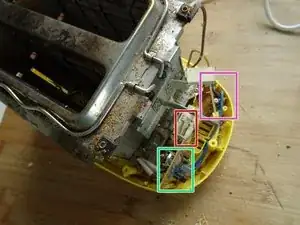
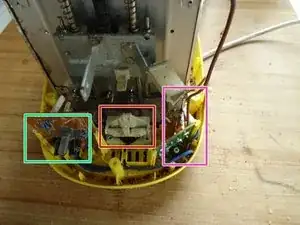
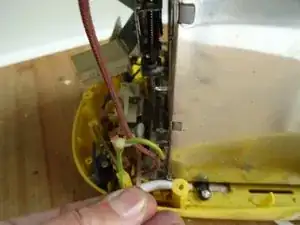
    • Qui si possono vedere le principali parti interne:

    • I contatti per i fili di riscaldamento. Vengono commutati quando il cursore si sposta verso il basso.

    • Il controllo del tempo. Più lungo è il tempo, più scuro è il toast.

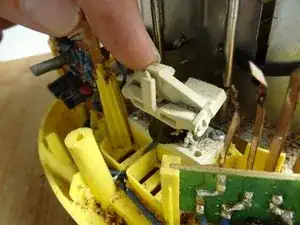
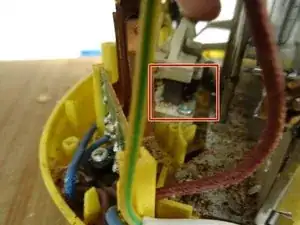
    • Il magnete. Tiene ferma la leva. È qui che bisogna cercare il guasto!

    Here are the main internal parts: The contacts for the heating wires. They are switched when the slider moves down. The timing. The longer the time, the darker the toast becomes. The holding magnet. He holds the slider down. Here you have to look for the error

    Matthew Newton -

  8. HCquvw2AACuvpi2R
    HCquvw2AACuvpi2R
    wu2ZbMDIB3FjcGV6
    • Il magnete è dotato di un dispositivo di inclinazione in ferro, qui incorporato in una parte in plastica stampata. Quando il magnete si attrae, trattiene il gancio sul cursore.

    • Pulire accuratamente lo spazio tra il magnete e il supporto del ferro. A tale scopo, utilizzare un cotton fioc imbevuto di alcol.

    There is an iron tilting device on the magnet, here embedded in a molded plastic part. When the magnet pulls in, it holds the hook on the slide. Thoroughly clean the space between the magnet and the iron holder. Use a cotton swab with alcohol.

    Matthew Newton -

  9. HO3vtXm6TYv2kUZt
    • Attenzione alla tensione di rete: non toccare le parti conduttrici!

    • Inserire la spina di alimentazione e verificare se la riparazione è andata a buon fine.

    • Scollegare il tostapane e pulirlo accuratamente prima di rimontarlo.

    Caution mains voltage: do not touch conductive parts! Insert the power plug and test whether your repair was successful. Pull the power plug again and clean the toaster thoroughly before assembling

    Matthew Newton -

Conclusione

Eseguire i passaggi in ordine inverso per riassemblare il dispositivo.

VauWeh

Membro da: 19/10/15

198797 Reputazione

7 commenti

Hey super, das klappte!!

rauh.georg -

Mein Toaster sieht leider anders innen.. schade, das hat nicht geklappt.

Elke Kratzer -

Hallo Elke,

es gibt neben den Toastern mit dem Magneten noch eine andere, weit verbreitete Toaster-Bauart, bei dem ein kleiner Haken aus Kunststoff oder Metall den Auswurf solange unten hält, bis ein Bimetall sich entspechend erwärmt oder eine Zeitschaltuhr auslöst. Häufig greifen diese kleinen Haken nicht mehr, und der Auswurf rutscht immer nach oben. Hier hilft in der Regel eine kleine Dreikantfeile oder die Rekonstruktion des Hakens.

Bei einigen Fällen ist aber auch der “Zeitgeber” defekt.

Michael -

Danke für die Tipps, sie konnten problemlos auf meinen Severin Toaster übertragen werden. Hat wunderbar geklappt.

Peter F.

28.1.22

Peter F. -

Hat leider nicht funktioniert! Toaster der Marke Koenic KTO 120 elektr. HALTEMAGNET defekt. Konnte einfach ohne Abdeckung ( ACHTUNG AUF STROMFÜHRENDE TEILE ) getestet werden = Magnet ohne Funktion !!,

Das Gerät ist noch keine sechs Monate alt… , Definitiv keine Kaufempfehlung!

Quattrose -

Danke!!! jetzt macht er wieder was er soll...hätte schon fast einen neuen bestellt. (Elta)

Grüße aus Österreich

Henryk Schwarzer -

Hat geklappt. KRUPS macht es einem aber schwerer. Eine der Schrauben ist nicht Kreuzschlitz, sondern TX10 mit Stirnloch (ein Schelm, wer ....). Das muss man bei einem schwarzen Gehäuse erstmal erkennen. Bei mir Schwachstelle dann aber nicht der Magnet selbst, sondern die Kontaktkorrosion an den Kupferlaschen, die beim Herunterdrücken des Hebels den Stromkreis schließen (vgl oben Bild bei Schritt 8, da sieht man sie rechts) oder eben auch nicht mehr. Da hilft dann Kontaktspray eher als Alkohol.

Otto Strasmann -