Introduzione

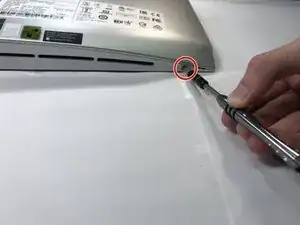
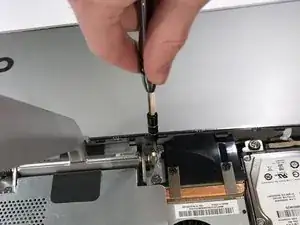
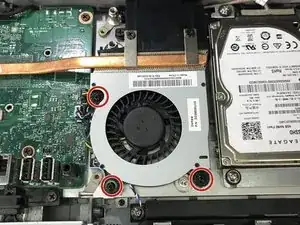
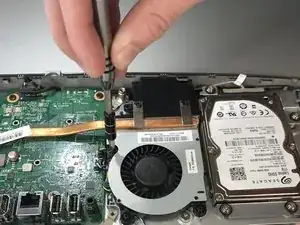
This requires a Phillips head screwdriver. Be careful not to drop the screws into the rest of the computer.

  1. SurgjSBtFgf3PDG2
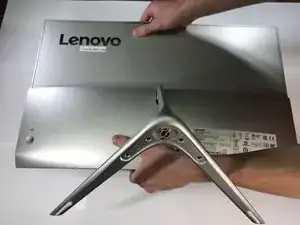
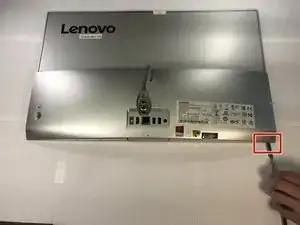
    • Turn off the computer, unplug all cables, and let it cool down. Lay the computer flat on its screen.

    • Make sure that the work surface is flat and has nothing sharp on it.

  2. Rf24NsS3E3NgpCbT
    Rf24NsS3E3NgpCbT
    leaW5cDvCekI1GlN
    • Remove the monitor stand screw in the bottom of the stand, and remove the stand completely.

    No need to remove stand. Back still comes off easily.

    Marvin -

  3. duWxbSSLLfWPXuiC
    • Remove the two screws on the bottom of the computer, one on each side.

  4. UUXarlJwUNOD5BbA
    UUXarlJwUNOD5BbA
    6vOvMefAUOdLjAeW
    fOnlRkERNeyICGbq
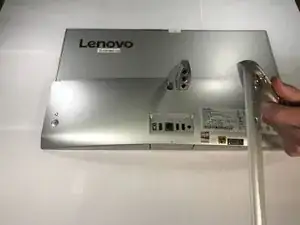
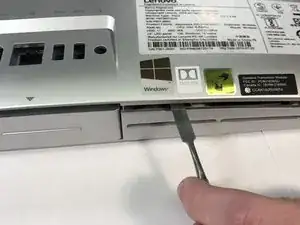
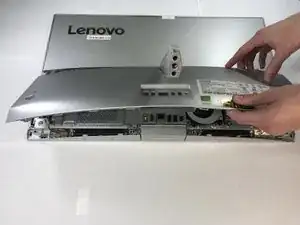
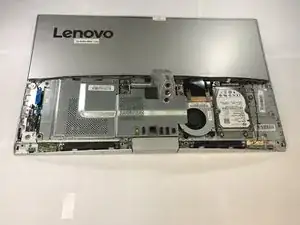
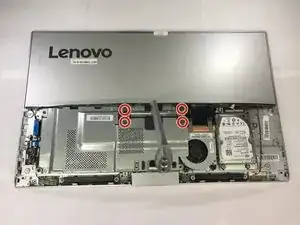
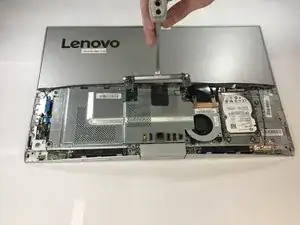
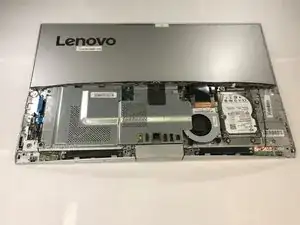
    • Locate the slot on the right side of the computer next to the screw hole. Use a plastic opening tool or spudger to pry off the rear cover. (Don’t be afraid to use a little force.)

  5. iaiBwCIUbNLImslE
    iaiBwCIUbNLImslE
    X14svCIZ4Ga1KgKJ
    • Once it has been separated, lift to remove.

  6. QHT14QUxrSIToSJE
    QHT14QUxrSIToSJE
    bH3U5NjDZKIclj3S
    • Remove the four screws that secure the arm stand.

  7. cxserAJxYuYDwLpr
    cxserAJxYuYDwLpr
    NbRXIn5ewHW5YCyZ
    • Lift up to remove the arm stand.

  8. DdJalTMRbZlKs3nG
    DdJalTMRbZlKs3nG
    nkppRCq4OQweMo3Q
    • Remove the three screws that secure the fan.

    You forgot to show how to remove de plate that covers the mother board, But thank you anyway for your efforts in helping us.

    Mario

    Mario Escovar (Mario La Vera) -

  9. tKBNfYRBga2pbtHR
    tKBNfYRBga2pbtHR
    uHrRPfKvFfDXQEme
    • Disconnect the fan power cable from the motherboard, and remove the fan.

Conclusione

To reassemble your device, follow these instructions in reverse order.

Jackson Blake

Membro da: 23/01/18

1119 Reputazione

0 commenti