Introduzione

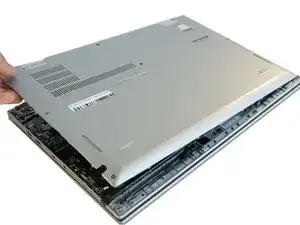
If your Lenovo ThinkPad X1 Yoga 2nd Generation won’t turn on use this guide to replace the motherboard.

First check that it is not a faulty battery by checking or replacing the battery first as this could be the reason the Lenovo ThinkPad won’t turn on. Before replacing the battery, ensure your power adaptor is not the issue as well. To check if your adaptor is the problem, borrow and test a different adaptor. If the laptop charges during the test, you need to replace your power adaptor.

Before beginning, make sure to power off your phone completely and disconnect from any external power source.

  1. RUVanctWGYInflPC
    • Ensure the laptop is powered off and the charging cable is disconnected before opening the back cover.

    • Flip over the laptop to access the back cover.

  2. CIooEkrOuiwyjePc
    CIooEkrOuiwyjePc
    ncptBZUdWSkQD3Ke
    • Use a Phillips #0 screwdriver to remove the eight 8 mm screws.

    More pricesely, screws need to be unscrewed, but not removed, since they stay attached to the back cover. Trying to remove them may damage the small gaskets around the screw shaft.

    Edouard Rossignol -

  3. 5YNLPLYLjWPDbLPI
    • Remove the back cover.

    • A popping sound may occur when the back cover is removed.

    Good solution, but where do I find the battery?

    Brian Arnold -

  4. PICdA6GZFLXDNXLw
    PICdA6GZFLXDNXLw
    MQ1thHDgkauXxrgR
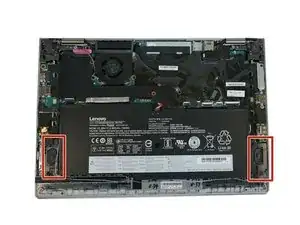
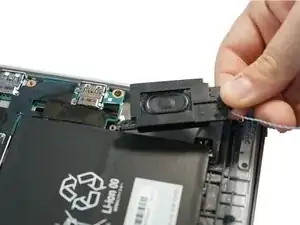
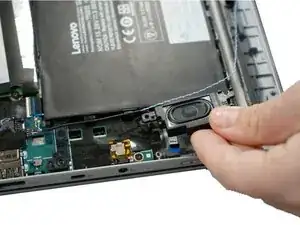
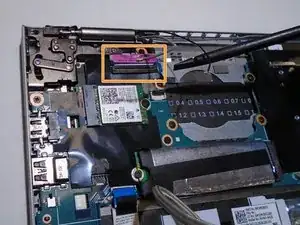
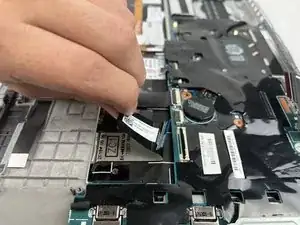
    • Follow the ribbon cable that runs from the left speaker to the motherboard.

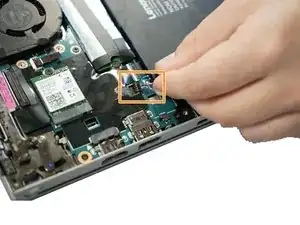
    • Pull the black connector up and release the cable wire by hand.

    • If needed, pull this connector up using the Pro/ESD/Angled tweezers.

  5. cpE231ZGmboWYgMi
    cpE231ZGmboWYgMi
    hibJkwMQYWDmDB6L
    • Remove two 6 mm Phillips #0 screws from each speaker.

  6. gTaOaeZiCBeNUQ1K
    gTaOaeZiCBeNUQ1K
    jHeQt2bOxnAWCZFb
    • Use your fingers to remove the speakers from the device.

  7. 4BKE1HuVTFBFwbFH
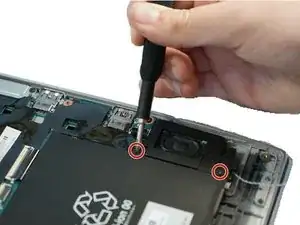
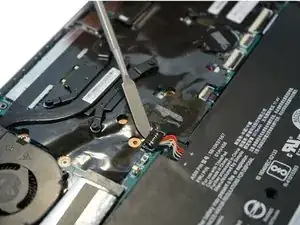
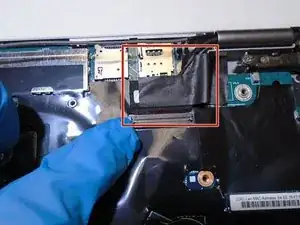
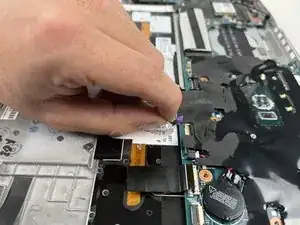
    • Use a spudger to pop the ribbon cable that runs from the upper-middle portion of the battery to the motherboard out of the motherboard.

    • Do not use a metal spudger as indicated in the photos. The metal spudger should only be used for serious prying power. If it's used on the internal components of a device, it may puncture or damage the components in your device.

  8. OHQ516jIe1qAR4KM
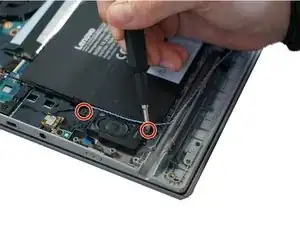
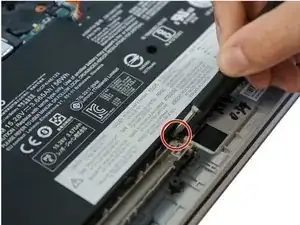
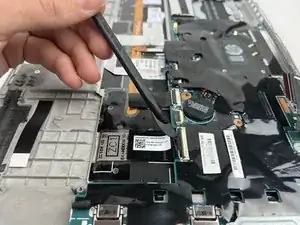
    • Use a Phillips #0 screwdriver to remove one 6 mm screw from the bottom-middle portion of the battery.

  9. GSHhKXZdlLRPOQxd
    • Remove the battery.

  10. CnVbHPviQanM2CDk
    CnVbHPviQanM2CDk
    GgwTJZrVHJuMuQFr
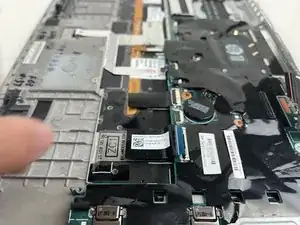
    • Lift up the small, metal tab using a spudger.

    • Do not use the metal spudger unless if it's being used for serious prying power. The metal spudger may damage or puncture internal components in the device if too much pressure is applied.

    • Gently lift the ribbon cable from its socket using nylon-tipped reverse tweezers.

  11. mNkKLc5cWSMnttwC
    • Using the Phillips #0 screwdriver, unscrew the four 4 mm screws directly next to the fan.

  12. 35wB5vhjJZH1VXu4
    35wB5vhjJZH1VXu4
    iPBISDFabBdIimOv
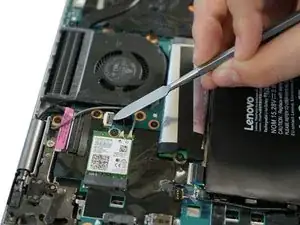
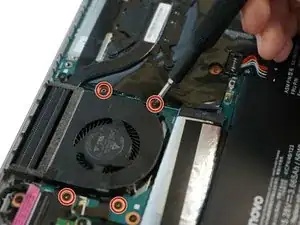
    • Loosen the four 5 mm screws in the metal extension attached to the fan.

    • The screws do not need to be completely removed from the fan.

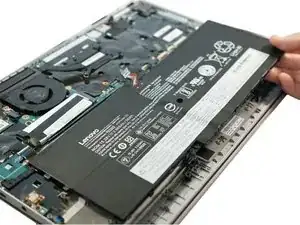
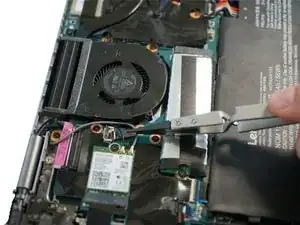
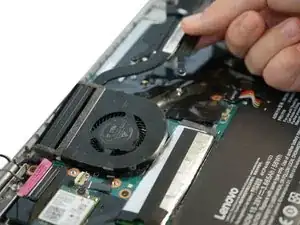
    • Remove the fan using your fingers.

  13. ZPRVUCwSeoX1eYMD
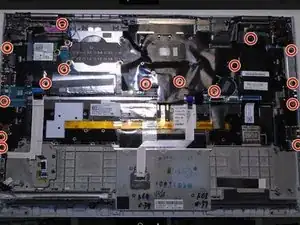
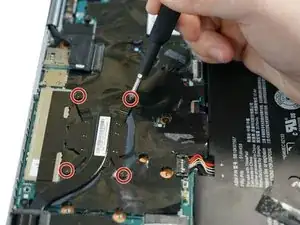
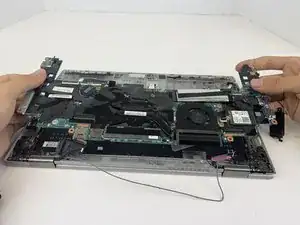
    • Using a Phillips #0 screwdriver, remove all 16 of the 6 mm screws connecting the motherboard to the computer.

  14. gKNHepFGeygm3iIr
    gKNHepFGeygm3iIr
    BENeRBUhFMgUEdKA
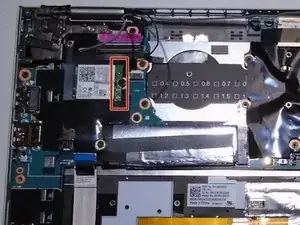
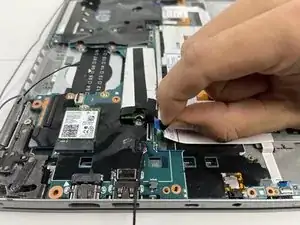
    • Using the nylon spudger, disconnect the grey and black wires.

    • Using the nylon spudger, gently disconnect the pink tab from the motherboard.

  15. uupHvC2wRNTOLosk
    • Carefully remove the black tape with your fingers.

    • Do not remove the sticky residue from the back of the section.

  16. auQkcSF4QnkPb5Cn
    auQkcSF4QnkPb5Cn
    eQyyBcAwqEN5QBAe
    IX2BgRxDpIUbMoLc
    • Lift the Black flap using a plastic spudger.

    • Pull out the ribbon cable with the black tab.

  17. kRXHMkcck4U2pPPX
    • Remove the purple tab by gently pulling it out.

  18. 61k5KW2XQDLqZmGa
    • Remove the blue tab by gently pulling it out.

  19. 56MZJkkuQkUToHYM
    56MZJkkuQkUToHYM
    TbcVQIxZmiDFMQPQ
    1tRLPGnZDM4e3vsR
    • Gently lift up on the sides with your hands and remove the motherboard.

Conclusione

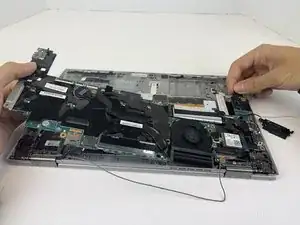
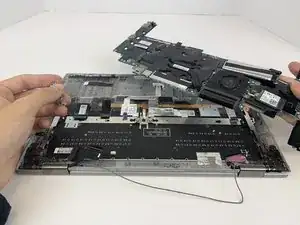
To reassemble your device, follow these instructions in reverse order.

Madeline Elizabeth Schmuck

Membro da: 16/02/21

133 Reputazione

Un commento

So searching for motherboards, there are several different "gens". Can any of these be used to replace one? Or is it necessary to replace with the same gen?

Bryant Hayward -