Introduzione

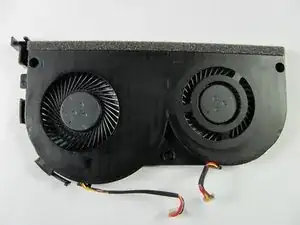
This guide will walk you through two basic steps: removing the back and removing the fan.

  1. qEQ1lpaFaCGGs5EJ
    qEQ1lpaFaCGGs5EJ
    GYafKgk6lucwbcQD
    • Remove all twelve 6 mm screws from the back of the laptop using a Phillips #1 screwdriver.

    • Apply a lot of pressure to prevent the screws from stripping.

    • Make sure to turn off the computer first!

  2. ZxxlLVPuGCks3hI4
    ZxxlLVPuGCks3hI4
    BYLyJjlICPAOxARB
    • Gently pull the back cover off the laptop. It should come off easily.

  3. fWGQTk1cflNrnCNn
    fWGQTk1cflNrnCNn
    rbWCJrNVhrHRAt4g
    • Remove the three 3.5 mm screws from the fan with a Philips #1 screwdriver.

  4. 2gIfG1LdyMsxhWaV
    2gIfG1LdyMsxhWaV
    HIbSb6H2TdlDOE2S
    mqEJqWPvRVcvjyvs
    • Pull the wire tabs up one at a time to separate them from the motherboard.

    • Do not pull too hard on the wire tabs. It may damage the connection between the wires and motherboard.

  5. f4lUjXQe6qPDrUcy
    f4lUjXQe6qPDrUcy
    v3VPCu5T4ty6XYkF
    DJTILdKL4QTYkCpy
    • Remove the black and white antenna cables from the wireless card.

    • Do not pull too hard on the antenna cables, as it might damage the connection to the wireless card.

    Is the black and white wire the one connected to the screen?

    Emi Hua -

  6. SrQJQXOSOK3y3GMo
    SrQJQXOSOK3y3GMo
    gNvkY4ZRoIFylrUY
    PSglPECydFLkLqaX
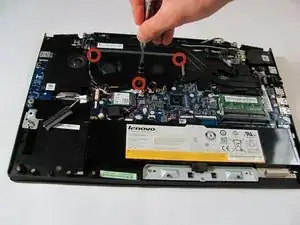
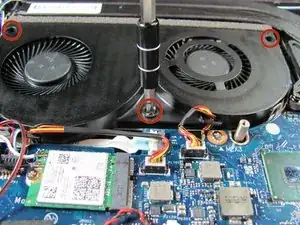
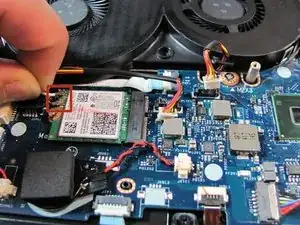
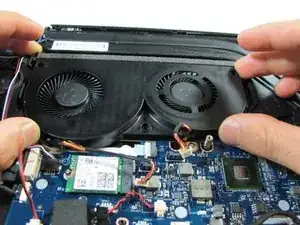
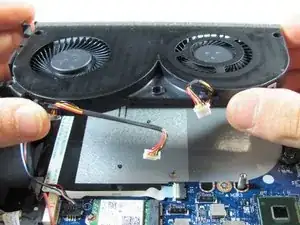
    • Lift up the fan slightly.

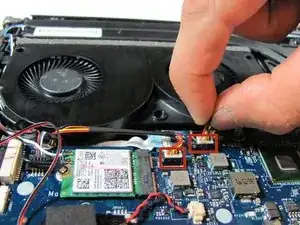
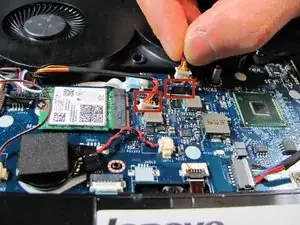
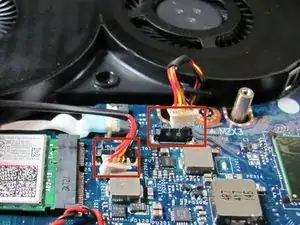
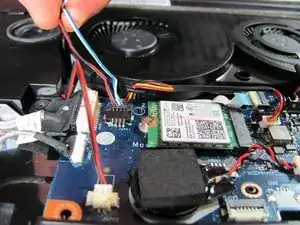
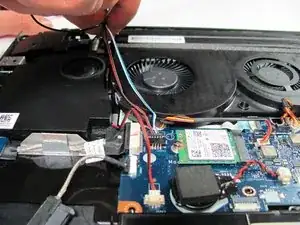
    • Gather the antenna cables(black and white) and speaker wires (red, black, blue, and white). Carefully move them away from the fan.

  7. XNm2yYL1FCyFH3kN
    XNm2yYL1FCyFH3kN
    XmPhw1wnNyKsHW52
    • Lift the fan off of the laptop.

Conclusione

To reassemble your device, follow these instructions in reverse order.

Vivian

Membro da: 22/01/15

351 Reputazione

0 commenti