Introduzione
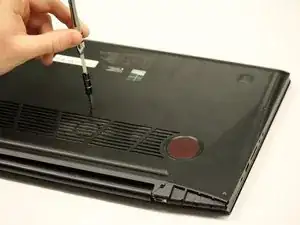
In this guide, the reader will go through the necessary instructions needed to replace a non-functioning motherboard in the Lenovo Y50-70 Touch Laptop. This specific repair does not require any previous knowledge about computers and can be completed by a beginner using only a single Phillips #1 screwdriver and a small plastic prying tool.
When performing this repair, ensure you are in a static free environment so as not to provide an electrical shock to the computer and possibly further damage the device.
Strumenti
-
-
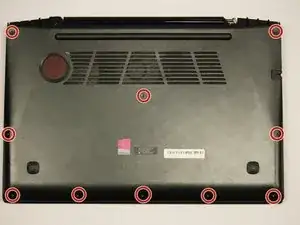
Use a Phillips #1 screwdriver to unscrew and remove the ten 6 mm screws on the back of the laptop.
-
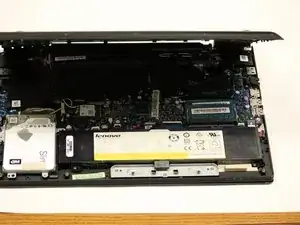
Grab and pull off the back.
-
-
-
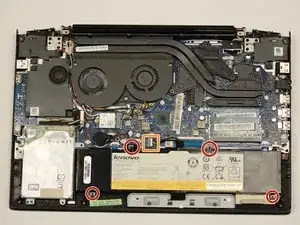
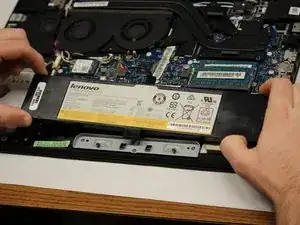
Use a Phillips #1 screwdriver to unscrew and remove the four 6 mm screws that secure the battery.
-
Grab the battery cable and gently pull it free from the cable connector.
-
Remove the battery.
-
-
-
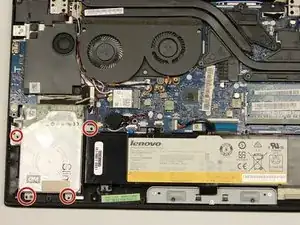
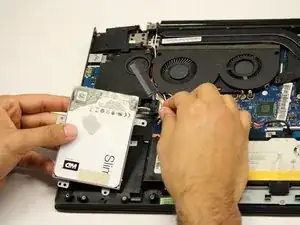
Use a Phillips #1 screwdriver to unscrew and remove the four 6 mm screws that secure the hard drive.
-
Grab the marked cable attached to the hard drive, and gently pull to unplug.
-
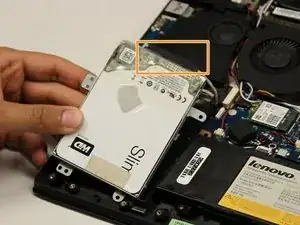
Remove the hard drive from the laptop.
-
-
-
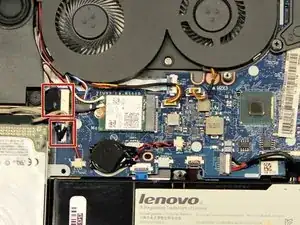
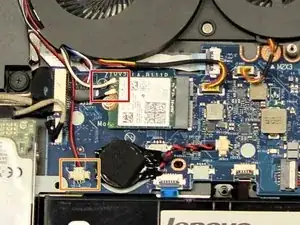
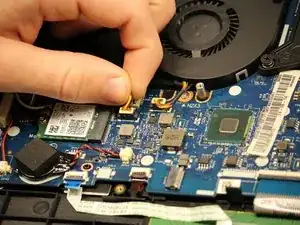
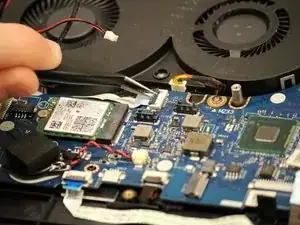
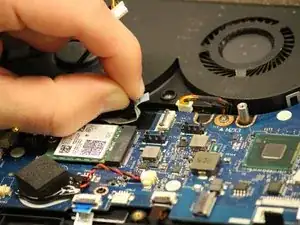
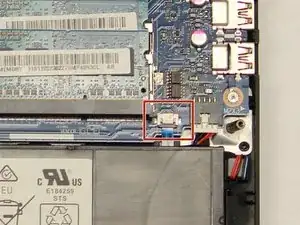
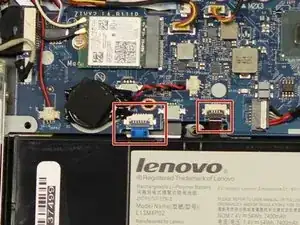
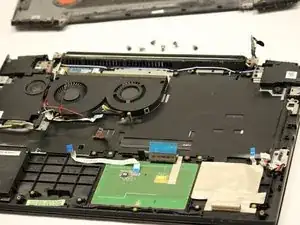
Grab the top set of marked cables and pull up to remove them.
-
Grab the lower marked cable and pull it out from their plug.
-
-
-
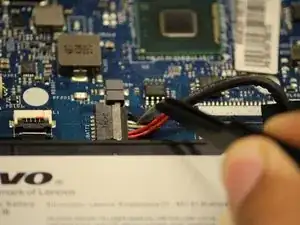
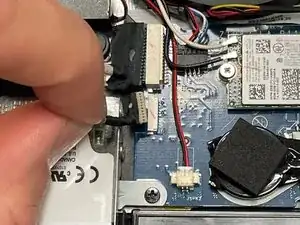
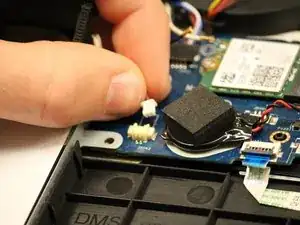
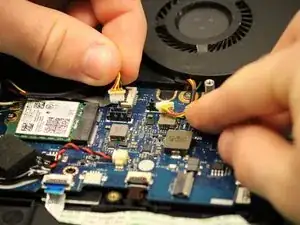
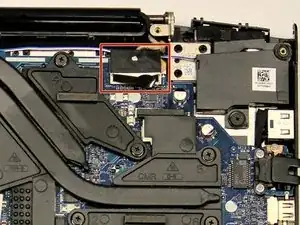
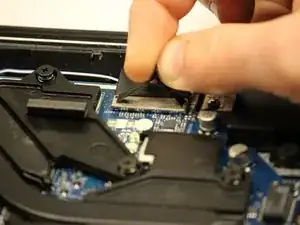
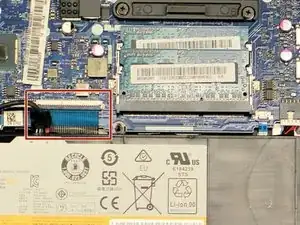
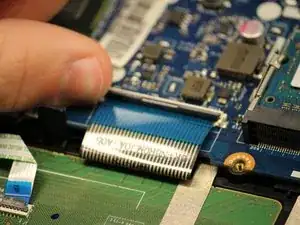
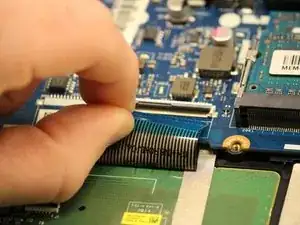
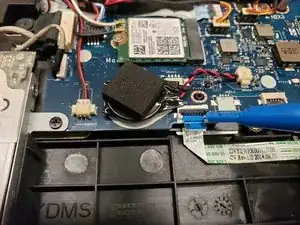
Lift the black tab on top of the marked cable.
-
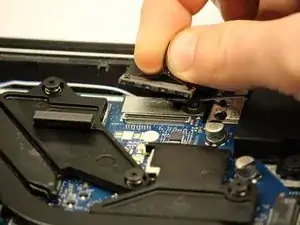
Grab the colored tab on the cable and pull to remove the cable.
-
-
-
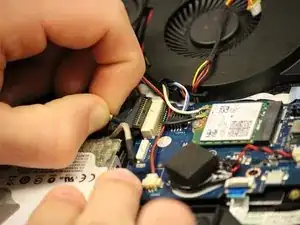
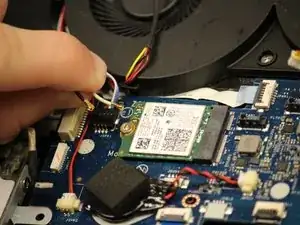
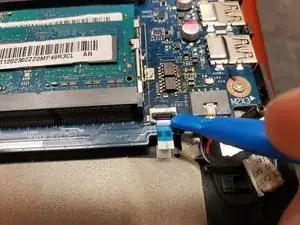
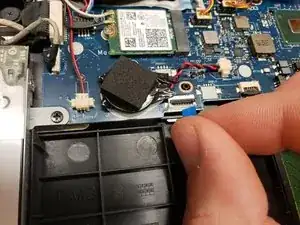
Lift the black tab on top of the marked cable.
-
Grab the colored tab on the cable and pull to remove the cable.
-
-
-
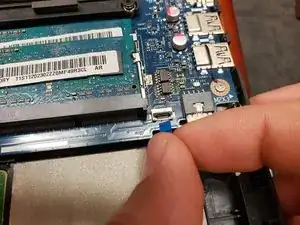
Lift the black tab on top of the marked cable.
-
Grab the colored tab on the cable and pull to remove the cable.
-
-
-
Lift the black tab on top of the marked cables.
-
Grab the colored tab on the cables and pull to remove the cables.
-
-
-
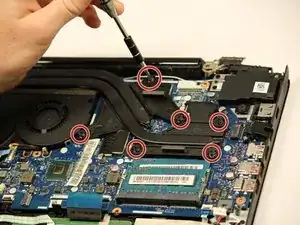
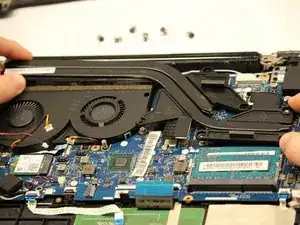
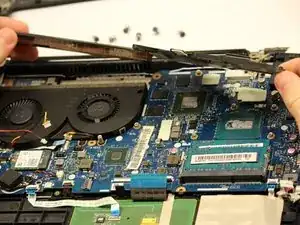
Use a Phillips #1 screwdriver to unscrew and remove the six 7 mm screws from the heat sink.
-
Grab and lift the heatsink off the motherboard.
-
-
-
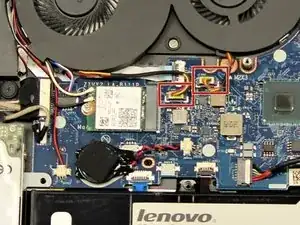
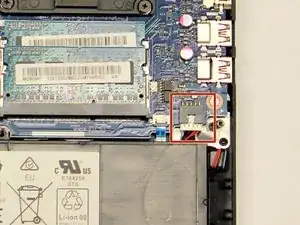
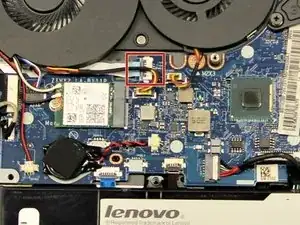
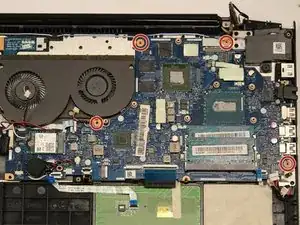
Use a Phillips #1 screwdriver to unscrew and remove the four 6 mm screws marked with red circles on the motherboard.
-
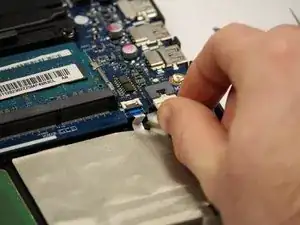
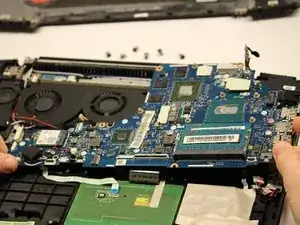
Grab and lift the motherboard up and out from the laptop.
-
To reassemble your device, follow these instructions in reverse order.
Un commento
Attempting this tomorrow soldiers, wish me luck o7