Introduzione
-
-
If the power button lits up only if the USB cable is plugged in. You probably have a loosened power cable inside the left earcup.
-
-
-
Before you start disassembling try all the guides on the official website to make sure your problem is not software-based.
-
-
-
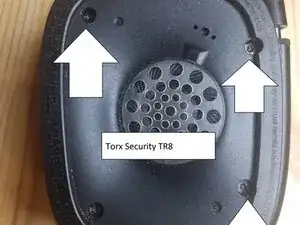
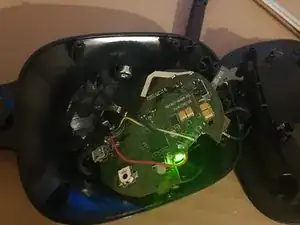
Take out the left earcup padding. Turn the right side of the earcup counterclockwise and unplug the battery.
-
-
-
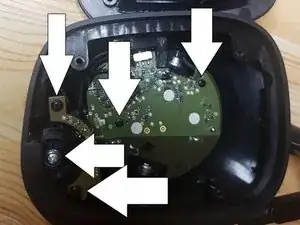
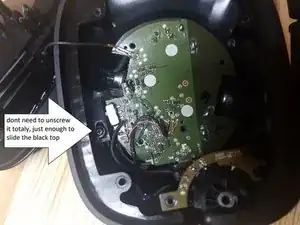
Carefully move aside the speaker. There are very thin wires connected to it and the printed circuit.
-
Unscrew the 5 screws marked on the picture with Philips 0 bit.
-
-
-
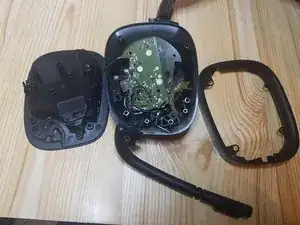
Take out the middle frame piece.
-
You will need to push the speaker through the frame and take out the mic off the frame.
-
-
-
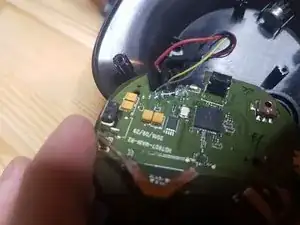
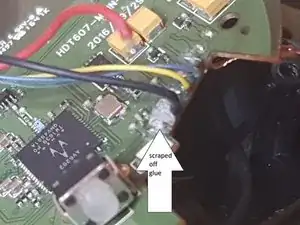
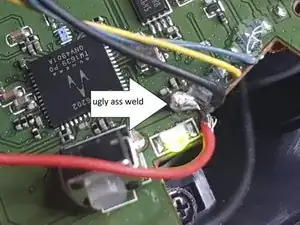
It looks like the cables are not soldered to the printed circuit. Just glued to it.
-
Scrap off the glue. I used a scalpel.
-
-
-
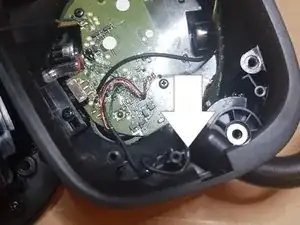
You can plug back the battery and hold the cable in its original place.
-
Switch the power button and the power light should turn on.
-
The light will turn on after 2 seconds. You will need to keep the cable in place the whole time.
-
-
-
Now you have two options. You can glue the cable back in and risk it will get loosen again. Or solder it.
-
The weld on the picture was so crappy that the cable get off when I was assembling it back. And have to redo it.
-
-
-
When I was assembling the headphones I noticed that the mic cable get partially naked. It happened because every time you move the mic leg the cable has contact with the insides of the earcup.
-
I recommend putting electrical tape over it or don't move the mic leg at all. Just use the mute button on the back of the left earcup.
-
To reassemble your device, follow these instructions in reverse order.
8 commenti
Hi, its possible to disassembly the mic to change the cable? Mine its cut in the middle and I need to replace
Can you please link a picture of the problem? It will be easier for me to assess the problem.
Kobda -
I have just taken apart the headphone because I have a similar problem, but I could not access the cable inside the microphone 'arm' without doing something that I thought might break it... Judging from the build quality inside I also think that it would be a pain in the a** to replace and fix it.
Miguel -
yep, my mic cable also broke, didnt even try to fix it and rather bought external mic.
Kobda -
Amazing guide, I was able to fix my headset to work with batteries again. Can't believe Logitech decided to glue the cables...
It's hard to tell, but in the pictures above, it appears that the wires may be soldered to the board and then additionally secured with hot glue.
My USB receiver stopped working suddenly and since it doesn't support wired connection, it's now useless. Spare parts been out of stock for at least a year and Logitech won't get back to me with a solution. Any way i could bypass the connection and make it wired or something?
the headphones should work with cable by default. I would check for any loose cable inside. Its more probable than the broken receiver.
Kobda -