Introduzione
Learn how to expand your storage in the Macbook Air 13" Late 2010 model with a Transcend JetDrive.
Ricambi
-
-
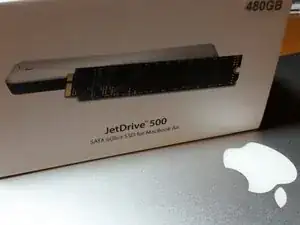
I have a Macbook Air, pretty early days. Late 2010. Got the JetDrive 500 in an attempt to increase drive space.
-
Coincidentally, I have no conflict of interest with the company Transcend. I'm just a customer.
-
Demographic / Skill level - I'm a software developer who primarily uses a windows machine.
-
-
-
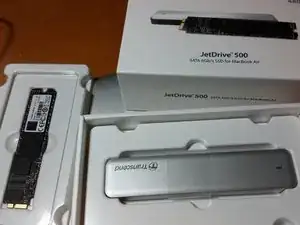
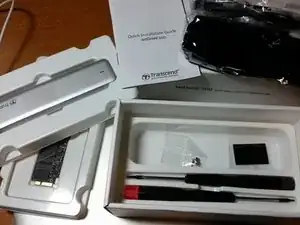
Comes with the tools that you need. Neat, I like it! Even if you are a home repair kind of guy, you are unlikely to have a magnetically charged screwdriver that can take out tiny Apple screws.
-
Also, packaging is nice. No clamshells. Stacks in a box with an eye toward efficiency.
-
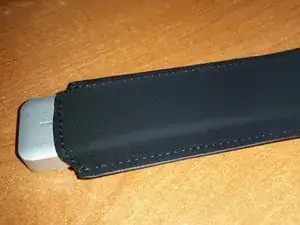
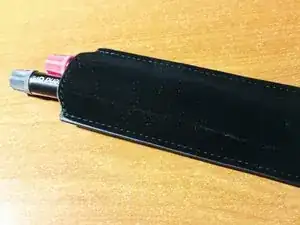
Nice quality case which you could use to store the external drive case they provide.
-
-
-
Terse instructions--but I've built 100's of computers over the years, so I think I'll just go for it.
-
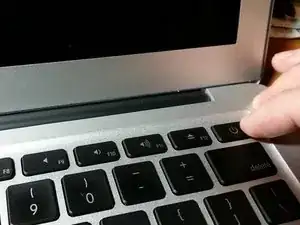
Later, I will also take a photo of my finger in this most awkward "Option key" position. For the sole purpose of lighting and camera angle. Bring it on Kubrick.
-
-
-
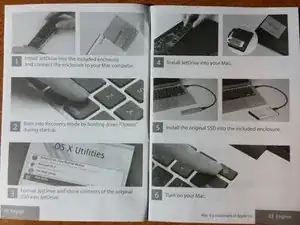
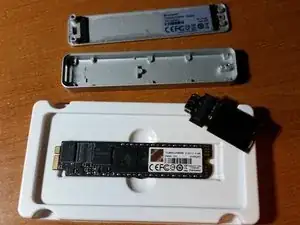
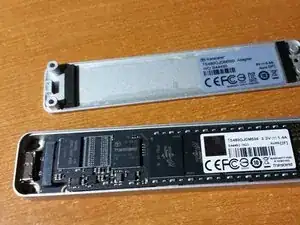
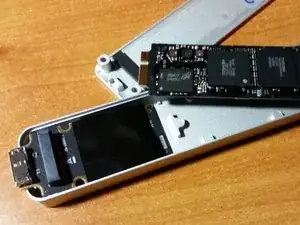
Take the new storage and put it in the external enclosure.
-
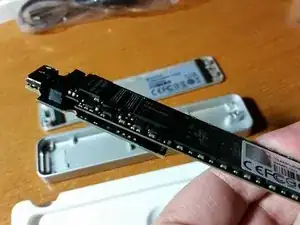
When inserting cards like this, hold one side of the connector with two fingers supporting it and gently wiggle the card into place with the other hand. Think, micro-wiggles.
-
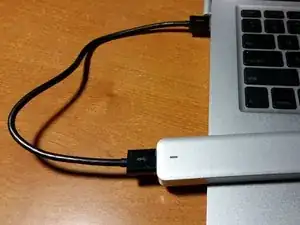
Put the monstrosity of science you just assembled into the case, connector first. Make sure it seats comfortably and that you can plug the usb cable in.
-
-
-
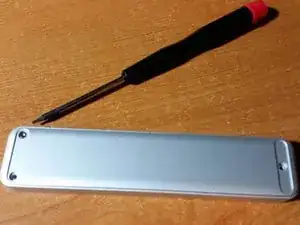
Button it up.
-
Only use one screw. This is the storage that we're going to put in the Macbook Air in a couple hours after we clone our internal drive to it.
-
-
-
Awkward option finger photo, in full effect.
-
Hold the "Option" button down the entire time that the system is restarting and you will get to the boot options screen.
-
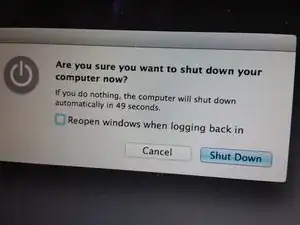
Being someone more familiar with windows, here is the point where I start worrying about the ramifications of low level operations but, like, whatever, right?
-
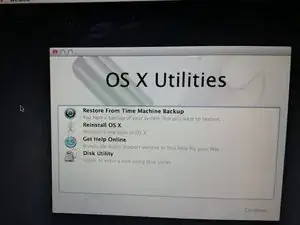
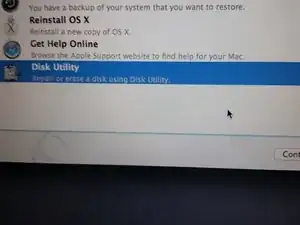
I chose the "Recovery" drive. With the amount of information provided, I figured it was pretty much a crap shoot. Two sentences of text would have probably made it crystal clear. I'm glad I made "The Right Choice (c) 2014."
-
-
-
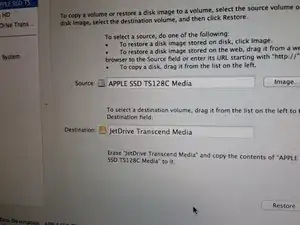
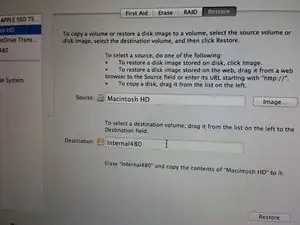
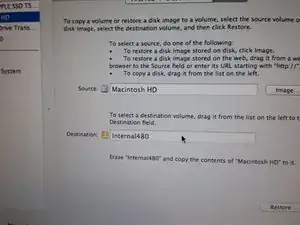
So, now we're going to clone this drive. We enter a weird UX. Must click to fill in the source but have to drag to add the destination.
-
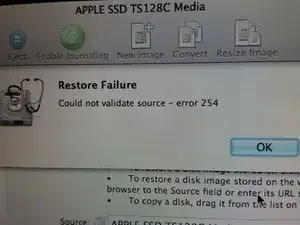
Anyway, click the hardware old and drag the hardware new with great hope but in the interest of foreshadowing, I will let you know now that this will fail miserably.
-
-
-
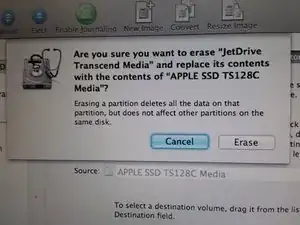
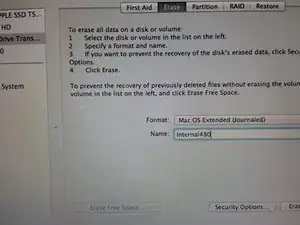
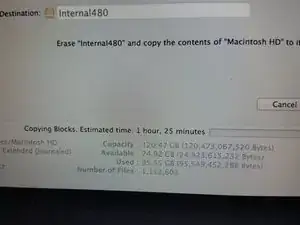
Let's erase it. (google translate: "format")
-
And then, let's try and clone it. This time though, we're going to choose what I believe is called a volume, rather than a device. The device being the stick of ram we just installed and a volume as the collection of files and metadata stored on it.
-
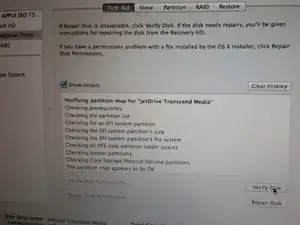
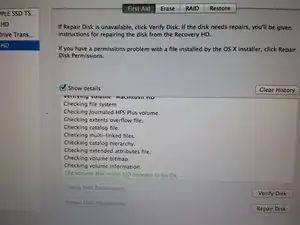
Chkdsk never hurt anyone. In Mac parlance, "Verify disk" under "First Aid"
-
-
-
We have successfully reached the point where we can clone our volume.
-
It's going to take awhile. This is the perfect time to do something else for at least two hours. I decided to go to sleep. YMMV.
-
After the cloning process finished. I verified the disk and it reported that things were super-duper, you betcha.
-
-
-
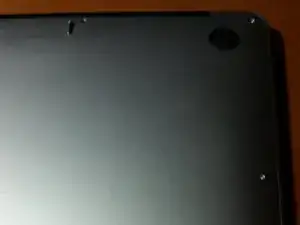
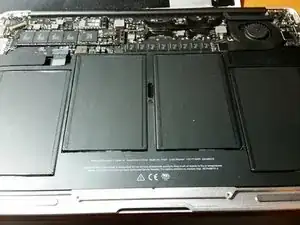
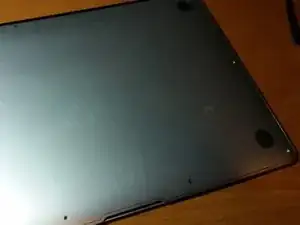
There are two long screws holding the back cover. Retain in your brain which ones they are.
-
-
-
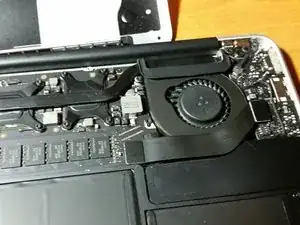
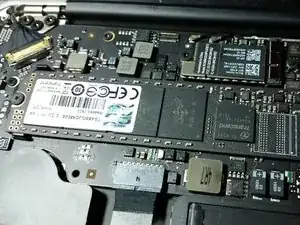
A look at the internals. We are concerned with that orderly looking circuit board...held by a set screw.
-
-
-
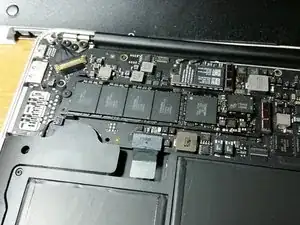
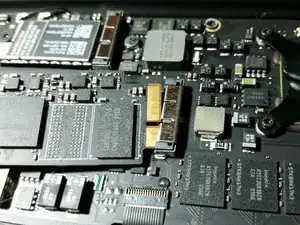
Put in your monocle and make sure you are respecting the gap when you introduce the new memory module.
-
Replace the black set screw.
-
-
-
Gently re-introduce the rear plate. Add a screw to each location. It is recommended to fasten each screw a bit at a time, so that each screw can best contribute to the case's tensor integrity.
-
-
-
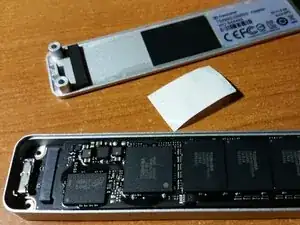
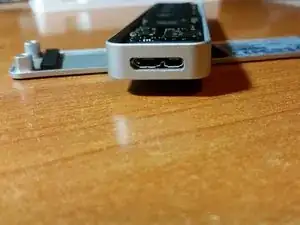
Let's put the old drive in this neat new case!
-
The purpose was unclear for the black rubber piece with an adhesive backing. I attached it to the top of drive case. It seems to hold the memory stick snug in the case.
-
-
-
I guess you could use the case to hold on to the screwdriver set. You know, for the apocalypse.
-
-
-
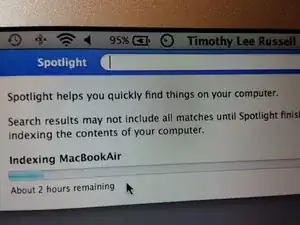
For whatever reason, making a clone seems to wipe out the index so it's going to churn on Spotlight for awhile.
-
-
-
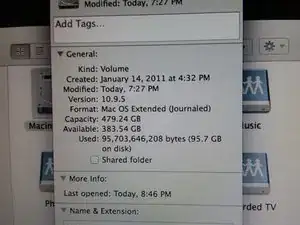
At the end though, you're likely to have a bit more disk space. 383 GB, in my case.
-
Good luck!
-
-
-
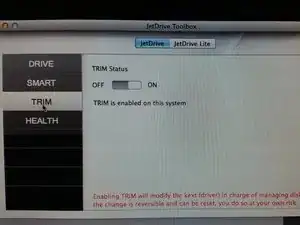
Download the JetDrive Toolbox from Transcend's website.
-
Install it and make sure you turn TRIM on. This will make your drive harder, better, faster, stronger.
-