Introduzione

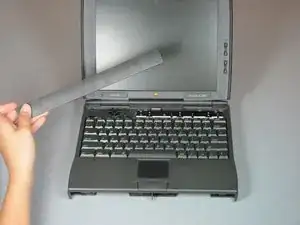
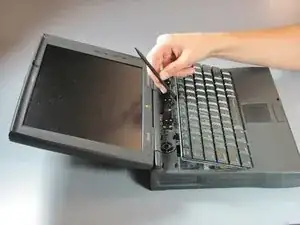
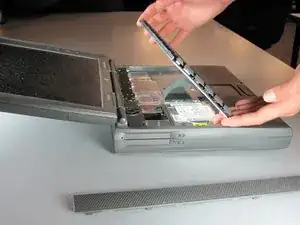
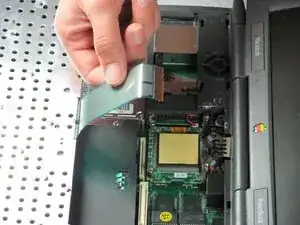
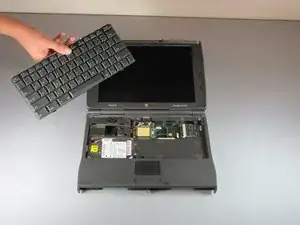
The keyboard has 3 main parts, including the speaker cover, the heat sink, and the keyboard itself. You have to remove these in order to remove the keyboard.

  1. XVAjiLMmxRXuHSmW
    • Turn the device upside down and then locate the battery latch near the front of the device.

  2. dLUXPTVOAU4pYtVU
    • Slide the latch to the left to release the battery.

  3. 3LuoltEuugDvNDSF
    • Continue holding the latch then gently pull the battery out of the device.

    • Place the battery in a safe location.

  4. hRA3HSjpbRUWlpWN
    • Locate the CD-ROM Drive latch.

  5. BlGGHxEdruloOLIV
    • Slide the latch to the right to release the CD ROM drive.

  6. 3OaZpuklxpUX4rJ1
    • Continue holding the latch then gently pull the CD-ROM Drive out of the device.

    • Place the CD ROM drive in a safe location.

  7. YFIrtSXImJAwNkmj
    • Locate the speaker cover.

  8. nNcsR2lJCMVrGvt3
    • Press firmly on each end of the speaker cover and slide it to the left.

    I found it was easy to get a spudger over the left edge and lift it up a bit, then push the bar to the left, It pops right off after that.

    Jimmy James -

  9. x3QgobWR63reVXVT
    • Gently lift the speaker cover to remove it.

  10. uosT2HIInk23dG33
    • Lift the keyboard up from the back using a spudger(wedge side).

  11. IAgnbYMCFNIB24Po
    • Gently lift the keyboard until only the ribbon cable remains attached.

  12. 5oCdjmXGO2hKbjJd
    • Tilt the keyboard away from the screen.

  13. e6I4FsEKSJMAtjKa
    • Locate the six screws that secure the heatsink.

    This is not necessary to remove the HDD. Go directly to step 20.

    Kenneth DeVries -

    That isn't the HDD!

    Dix Dox -

  14. LHEYU4obieJPAYp3
    • Remove the six screws from the heatsink using the Philips #1 screwdriver.

  15. yw4JrxuPW1SkTVtQ
    • Lift the heatsink from the side closest to the laptop screen.

  16. f6bZEM6RUY3fHtbG
    • Remove the heatsink.

  17. GVUYJc4vowI4kT2j
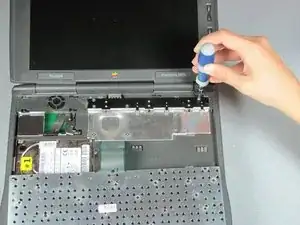
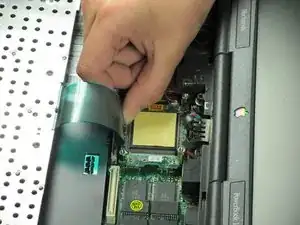
    • Gently pull up on the beige ribbon lock until it moves a short distance on both sides to separate the ribbon cable from the connector.

  18. URASOaRtCqmEcdCU
    • Detach the ribbon cable.

  19. wBfC1SBksvdDshMV
    • Remove the keyboard.

Conclusione

To reassemble your device, follow these instructions in reverse order.

Sean Bent

Membro da: 01/04/11

41 Reputazione

0 commenti